Reassigning a Work Order from the List View

From the list view, you can easily reassign a work order to another provider and quickly add a Provider Assignment when a provider is not assigned to that location/trade. You can also reassign work orders in bulk

To reassign a work order to a provider in a different trade, see Reassigning a Work Order from the Detail View.

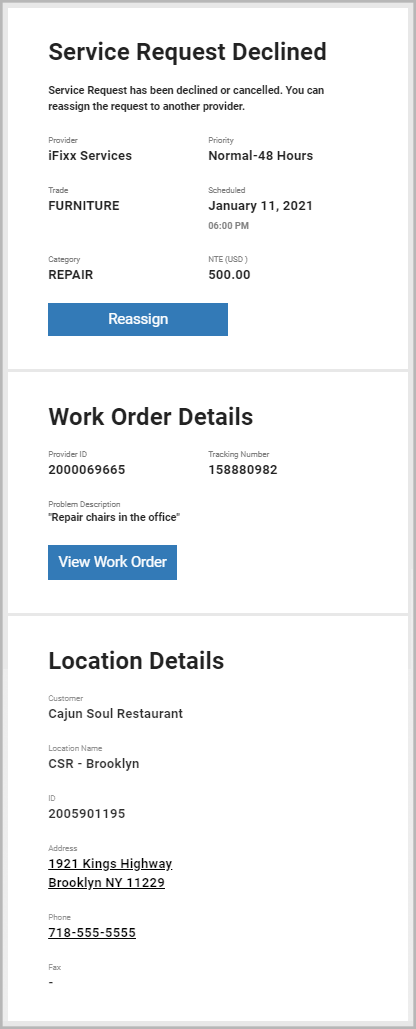
You can reassign a work order from an email notification about a declined service request. Click Reassign in the email to navigate to the Work Orders List where you can dispatch the service request to another provider. Read below for detailed instructions on how to do this.

 Click here to learn more about the email notification.

In the email about a declined work order, you can see the key details of the service request and the location it was created for. Clicking either Reassign or View Work Order takes you to the Work Orders List.

For trades with auto-reassignment rules configured, when a provider declines a work order, and the next ranked provider to whom the request was reassigned also rejects it, you are only notified of the second rejection.

Email notification about a declined work order

Reassigning a Work Order to Another Provider from the List View

In cases where the assigned service provider cannot make the estimated time of arrival (ETA), or when the provider does not service the trade, permissioned users may reassign a work order to another service provider.

Important

Only work orders in Open or In Progress/Dispatch Confirmed statuses can be reassigned to another provider from this view, as it is assumed that work has already begun. To reassign work orders where work has already begun, you must edit the work order and change the status. See Reassigning a Work Order from the Detail View for more information.
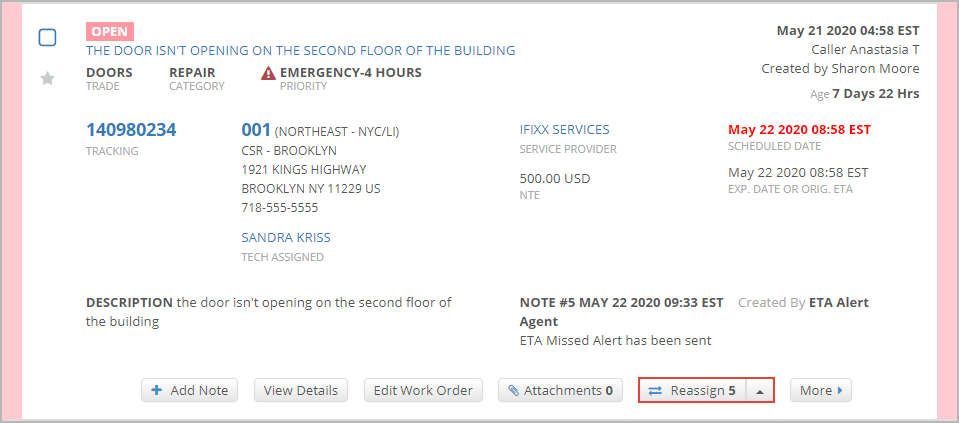
Button for reassigning a WO to another provider from the WOs list

⦿ How to Reassign a Work Order from the List View
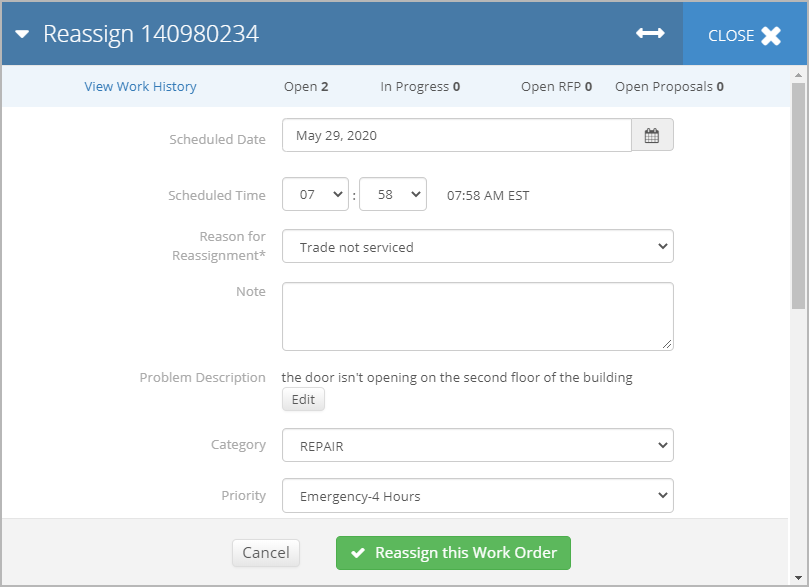
  1. Locate the desired work order from the list, and then click Reassign #. The Reassign modal appears.

  2. (Optional) Modify the scheduled date and time.

  3. Select the appropriate Reason for Reassignment.

    You can now customize your reassignment reasons that suit your business needs. Speak to your ServiceChannel Representative.

    Please do be aware that once you retire a reassignment reason, it will show up in the history of a work order, but it will no longer be a selectable option.

  4. (Optional) Enter a Note describing the reassignment reason.

  5. (Optional) Modify the Problem Description.

     Expand this section to view how to edit the problem description

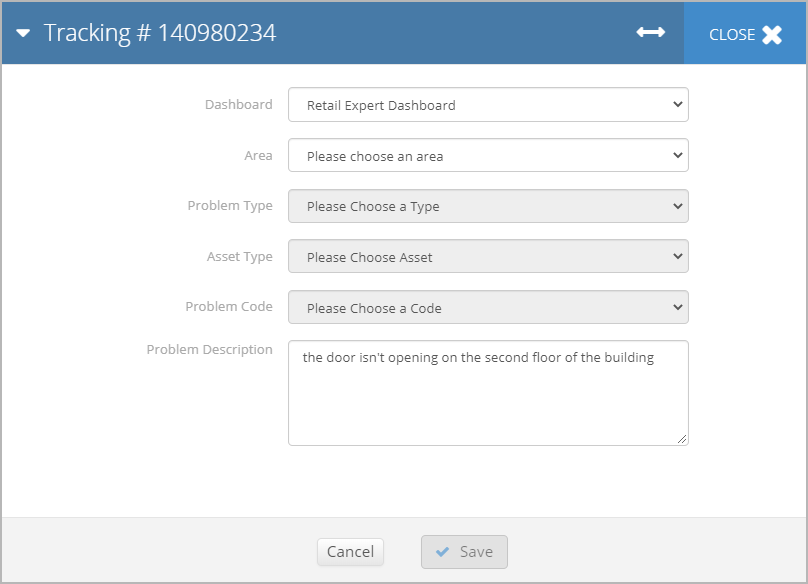
    1. Click the Edit button next to Problem Description. The overlay for updating the problem description opens.
    Overlay for updating the WO problem description2. Select the Dashboard, Area, Problem Type, Asset Type, and Problem Code as desired.
    3. Update the Problem Description, and click Save.

  6. (Optional) Update the CategoryPriority, Trade, NTE, or Purchase Order Number.

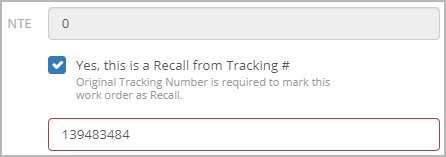
  7. (For Recall Work Orders) Check Yes, This is a Recall from Tracking #, and enter the tracking number in the box that appears.
    Marking a WO as a recall in the overlay for editing the WO

  8. (For Accounting, Optional) Update the GL Code.

  9. Select the New Provider. The email of the selected provider appears in the Request will be sent to and Send a copy to fields.

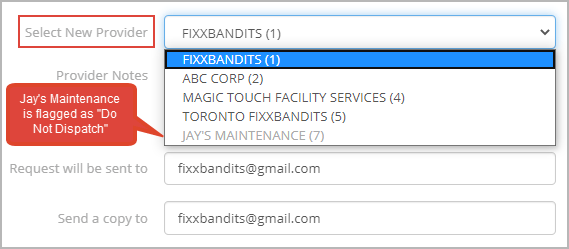
    Providers that are grayed out in the Select New Provider drop-down list cannot be selected. These providers are flagged as “Do Not Dispatch” in Compliance Manager and cannot be assigned new work orders until they prove to be compliant. Learn more about Managing “Do Not Dispatch” Providers.

    Do Not Dispatch providers on list of providers in the overlay for reassigning a WO

  10. (Optional) Enter the desired email(s) in the Request will be sent to and Send a copy to fields.

    Use ; or , to separate multiple email addresses.

  11. Click Reassign this Work Order. A confirmation message appears at the top of the screen, noting that the work order was reassigned to the new provider. A note gets added to the work order with the reassignment details.

Once you’ve reassigned a work order, the new service provider receives a service request email, and the original service provider gets a cancellation email.

Viewing a Provider's Open Work Order History

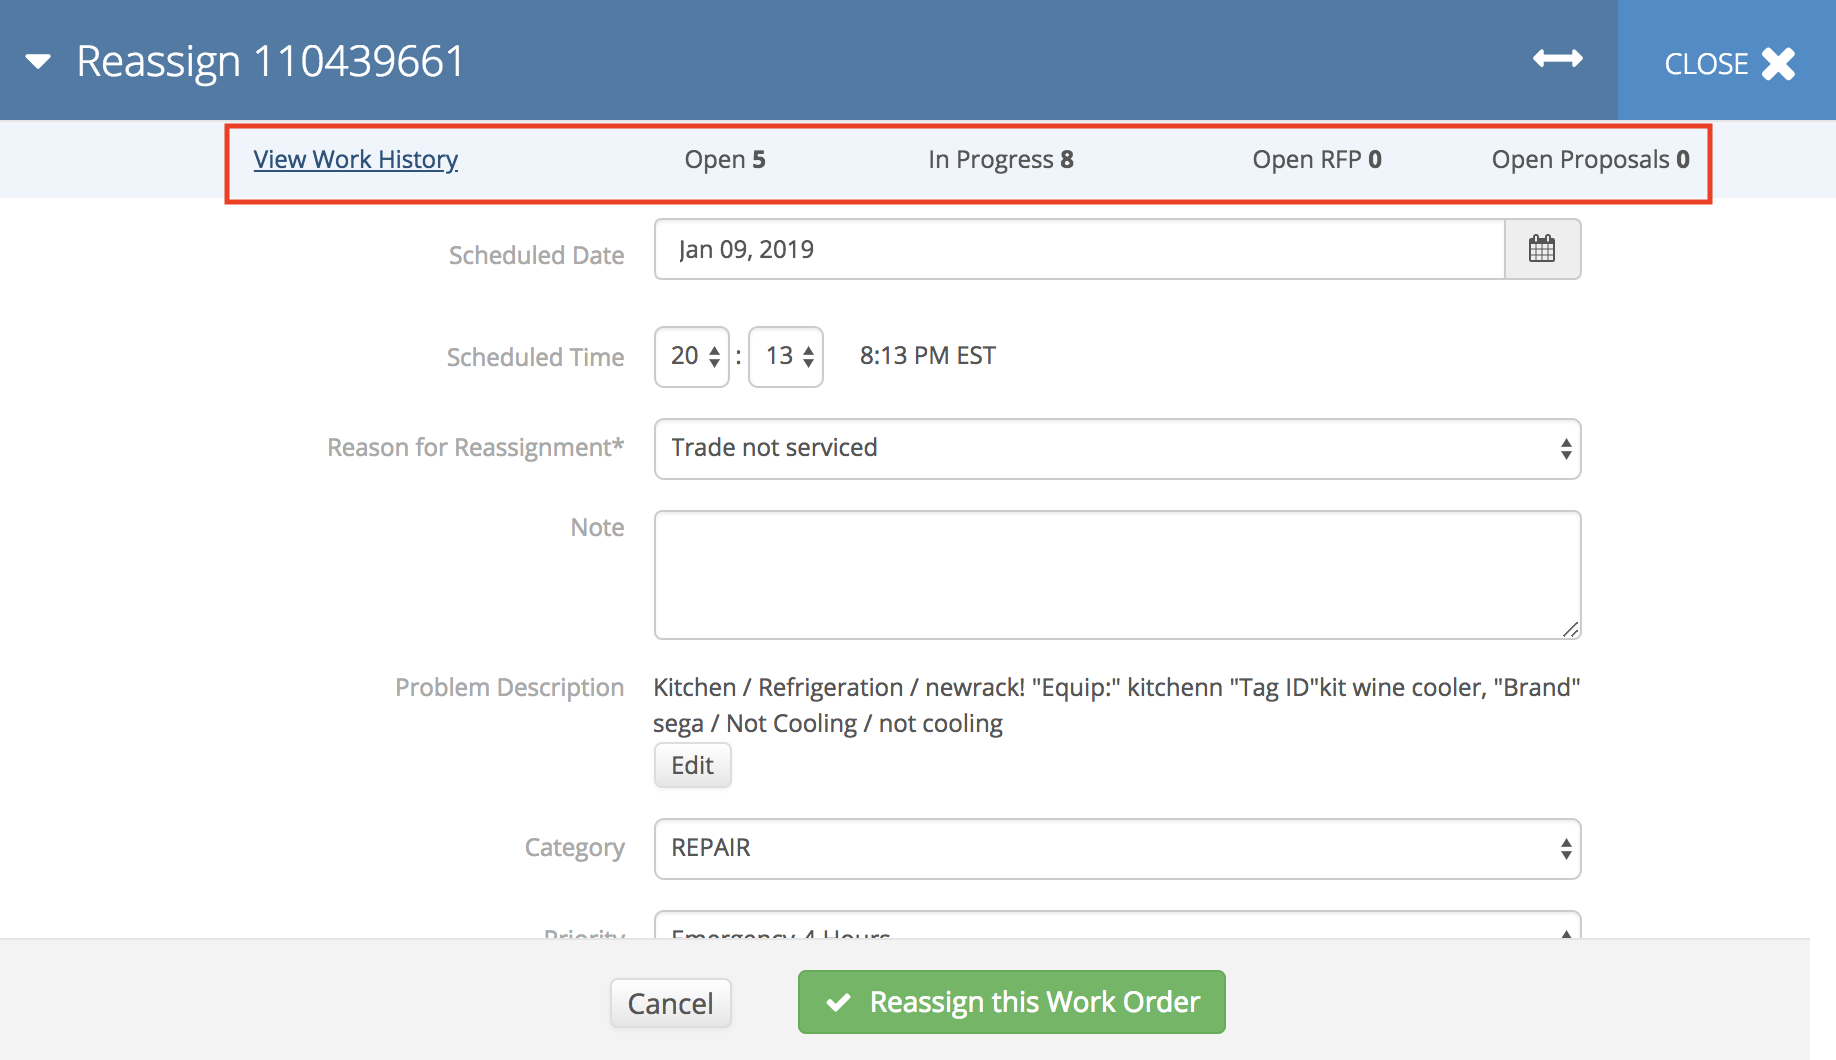
The Reassign modal displays a summary of the work history of the originally-assigned service provider for the location, including the number of work orders in the Open and In Progress statuses, as well as the number of work orders with open RFPs or Proposals.

Clicking the View Work History link opens a list of work orders assigned to that provider for the same trade/location. This helps identify the volume of work a provider has for that trade/location. It also helps yo see whether there are open work orders for the same problem and whether the problem is recurring; you can determine whether a piece of equipment needs to be replaced from this view.

Reassign window

Rapid Provider Assignment from the List View

In cases where you want to reassign to a specific provider but that provider is not assigned to that specific Trade/Location, you can quickly assign the provider to that Trade/Location from the work order list view. This is beneficial so you can quickly add a provider to reassign without going to the Locations and Provider Assignments module to add the provider to the list.

Going forward, work orders assigned to this Trade/Location will have this assigned provider included in the list of Provider Assignments.

You can also rank providers, manage provider categories, and retire providers. See Managing Provider Assignments for a Location for more information.

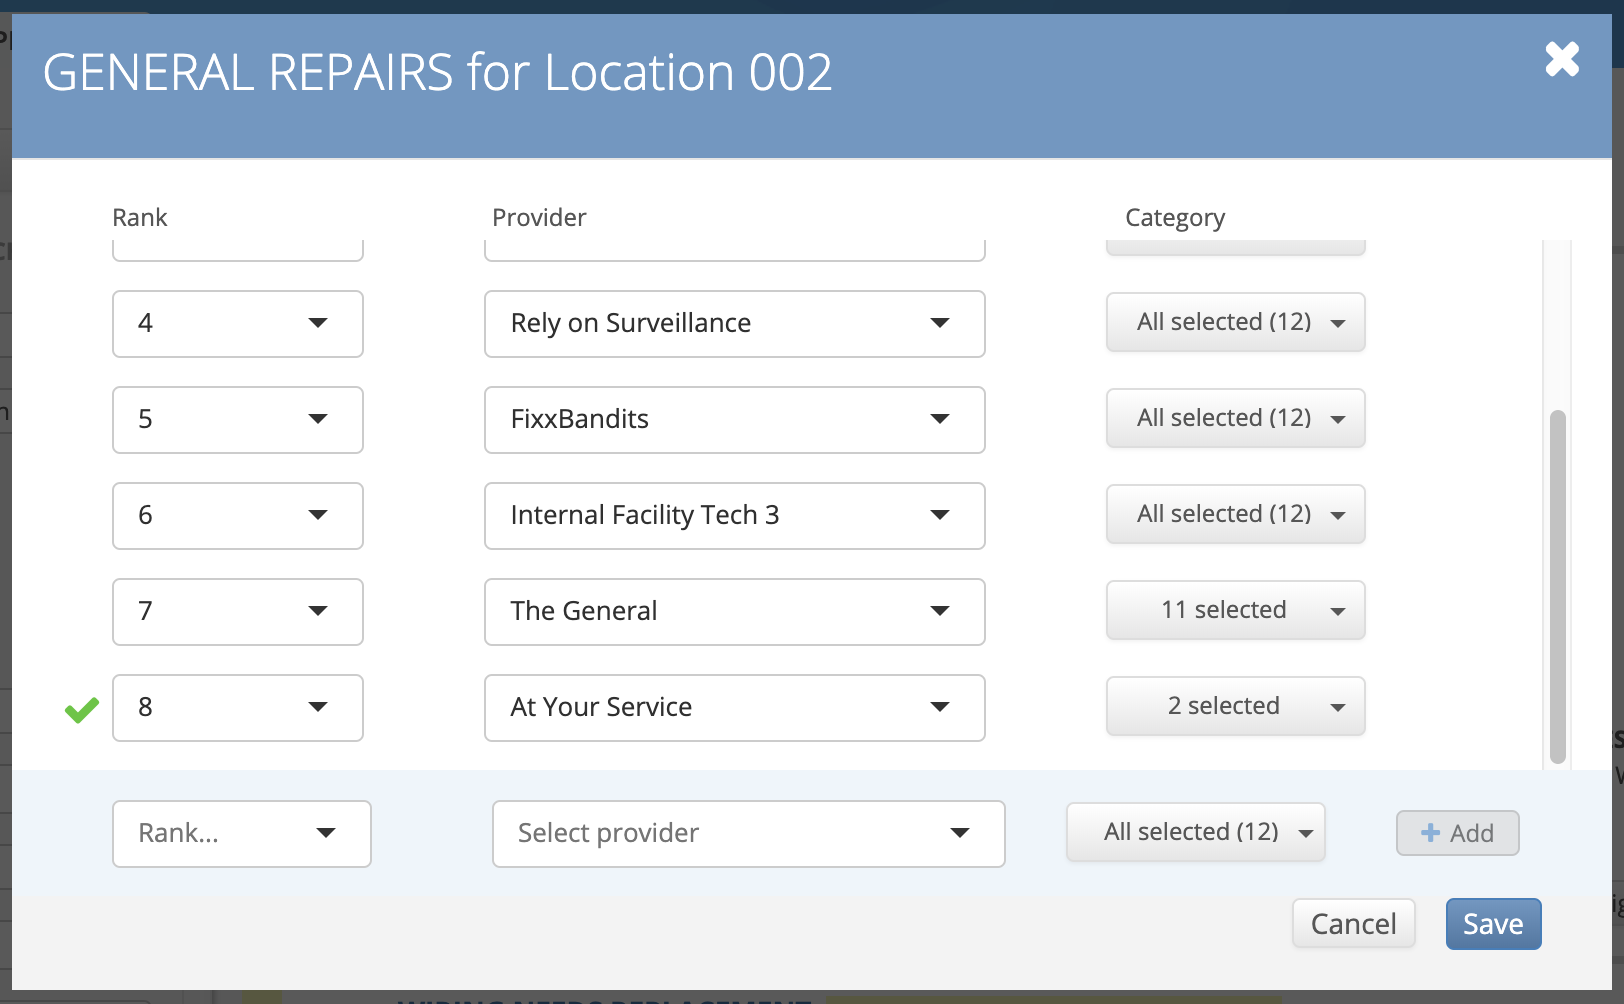
⦿ How to Assign a Provider to the Trade/Location in List View
  1. Locate the desired work order from the list, and then click the arrow next to the Reassign # button.

  2. Click Assign Provider. The Trade for Location # modal appears.

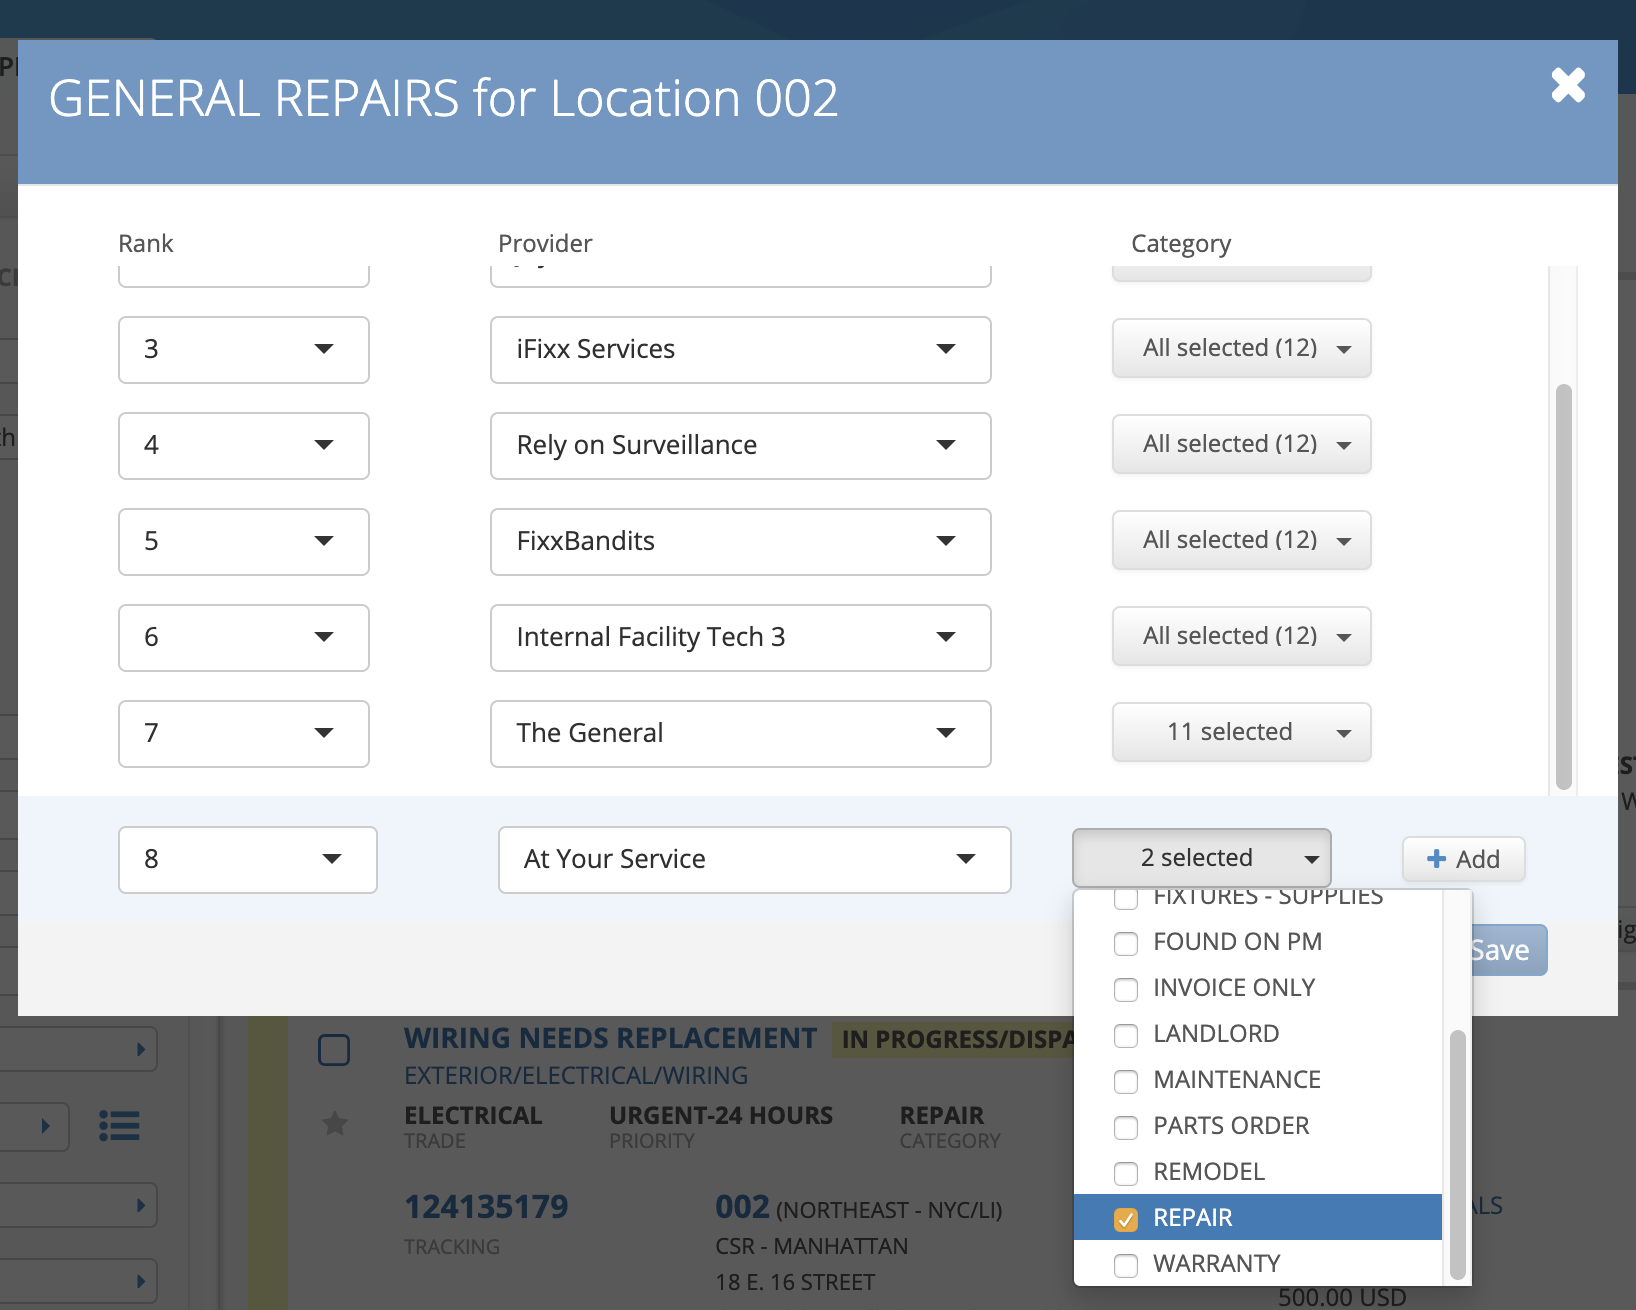
  3. Select a Rank and Provider.

    In the drop-down list with providers, some companies may appear grayed out. It means that these providers are flagged as “Do Not Dispatch” by your company in Compliance Manager, and thus they cannot be assigned new trades. Read more about Managing “Do Not Dispatch” Providers.

  4. (Optional) Click All Selected (#) to select specific work order categories to which the provider should be assigned.

    The ability to assign providers to a combination of trades and categories depends on your company account settings. Reach out to your ServiceChannel representative if you want to use this feature.


  5. Click +Add

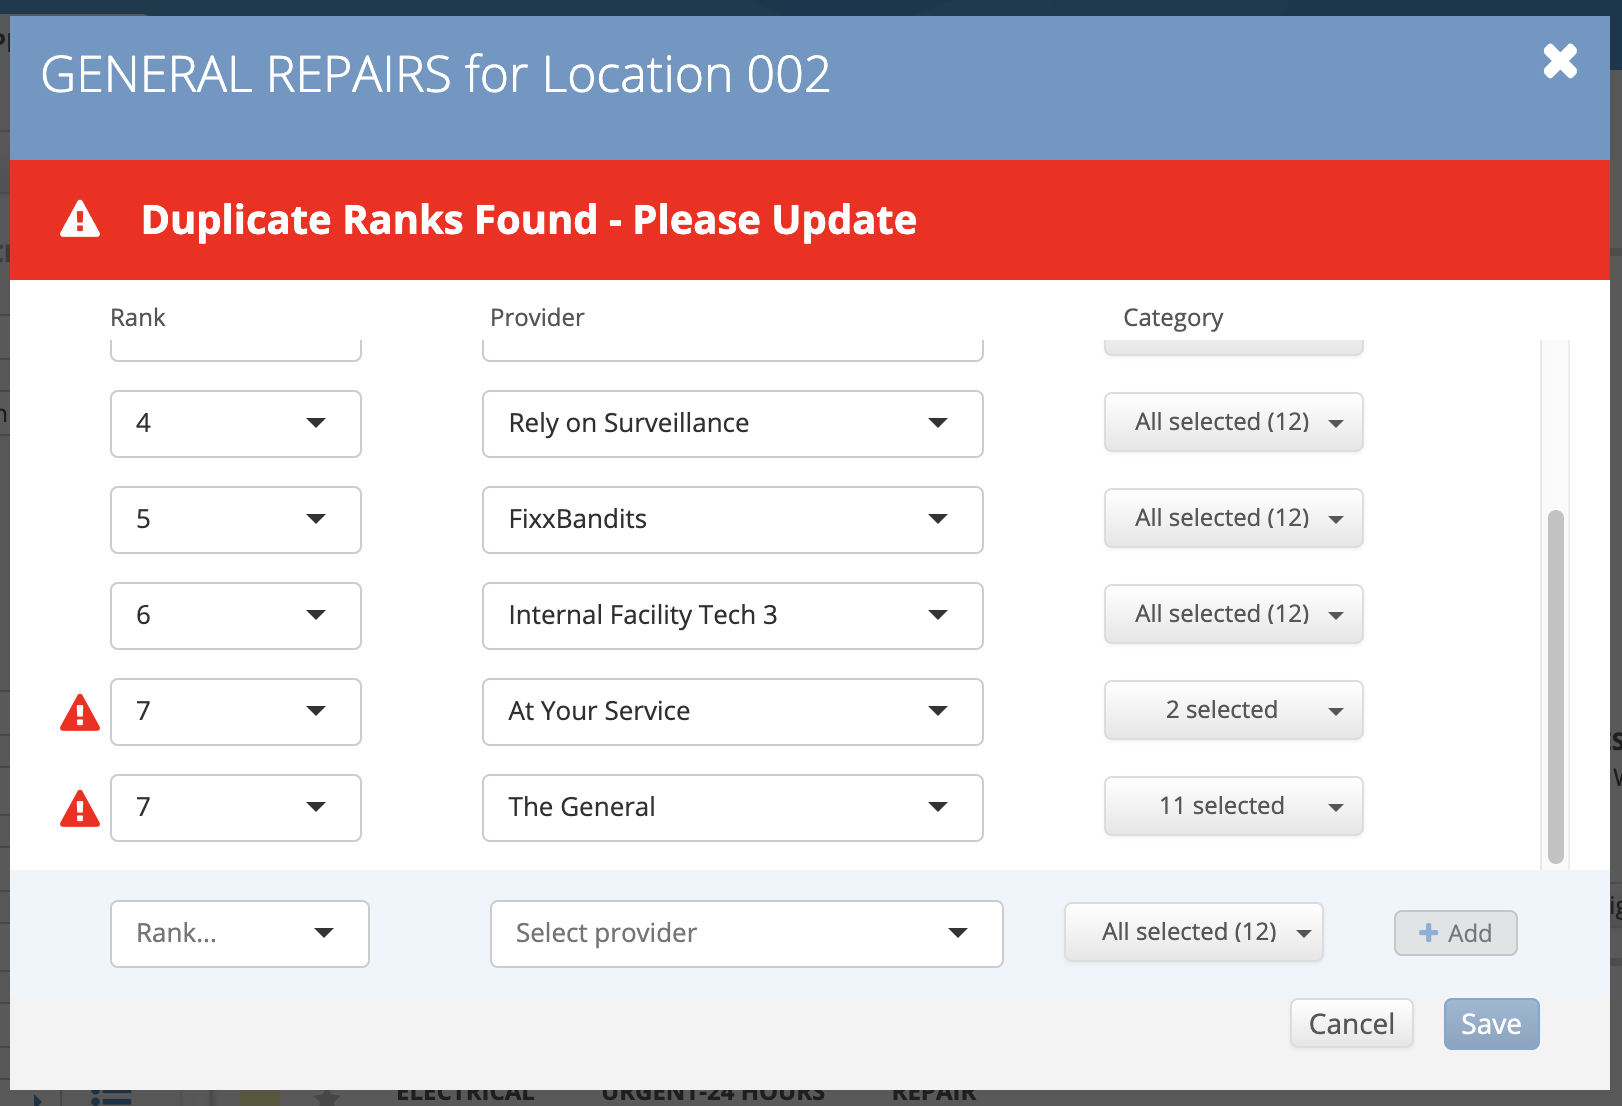
    Should you inadvertently assign providers to the same rank — either through the Provider Assignment template or in the interface — you will see an error message prompting you to resolve it.

  6. When you see a checkmark and no errors, click Save.

  7. On the Reason description page, enter a note describing why the provider assignments were changed.

  8. Click OK. A confirmation message appears at the top of the screen noting that the provider assignment was adjusted.


Automatic Reassign

It is also possible to set a work order to automatically reassign to the next ranked provider when the original provider reschedules the work order too many times. See Automatically Reassigning Work Orders after Maximum Reschedules for more information.