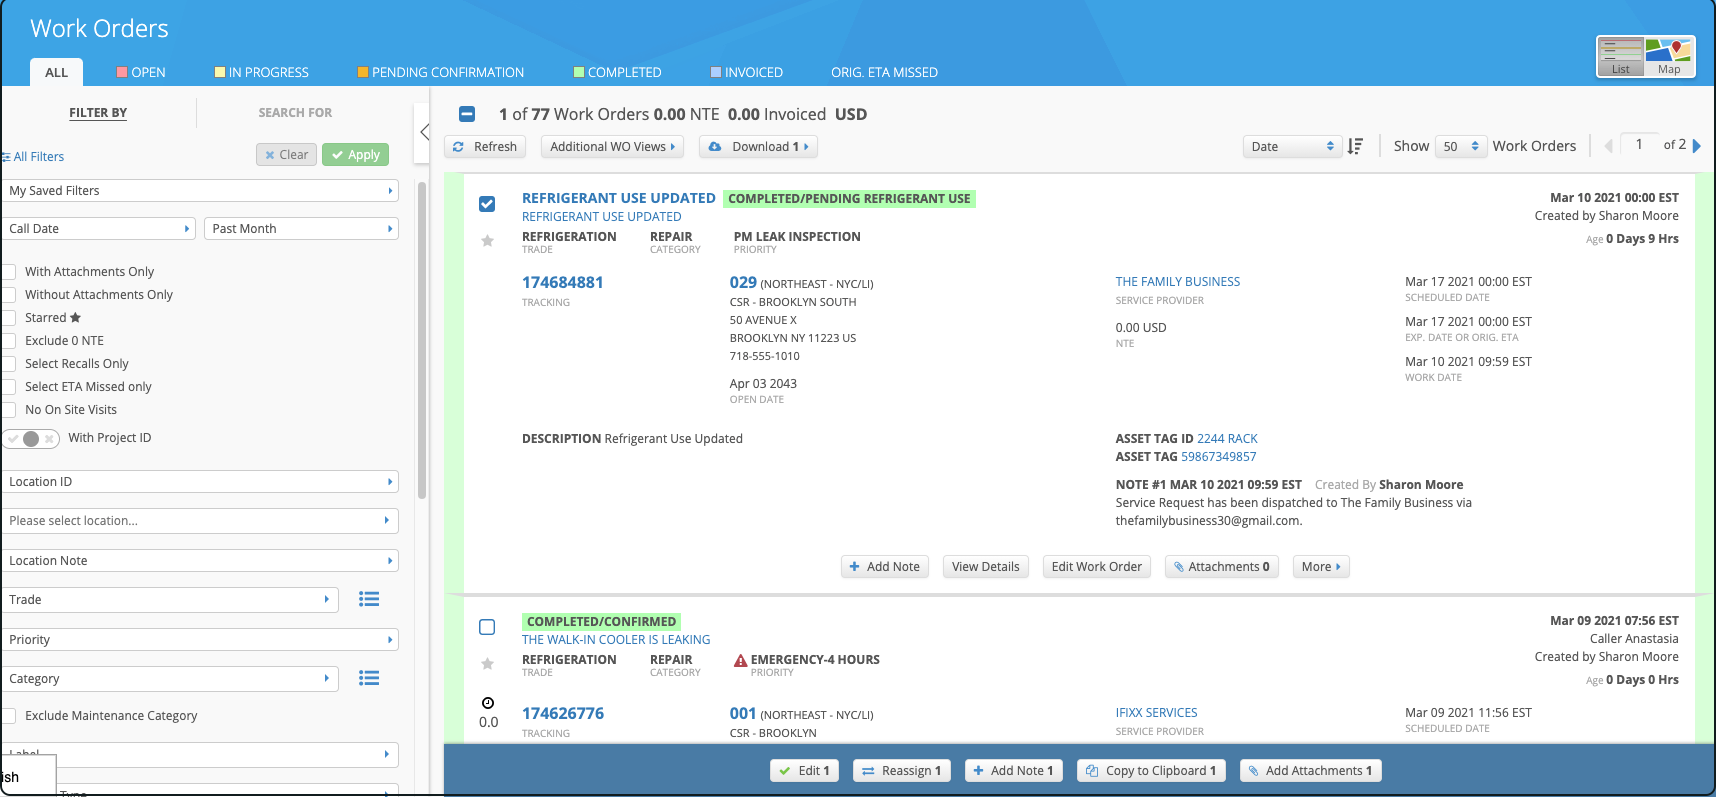
In Service Automation you can take action on multiple work orders at a time — also called batch actions or bulk actions. You can perform the following actions in batch:
- editing work orders in batch for any work order that has not been invoiced
- adding notes to work orders in batch
- adding attachments to work orders in batch and adding multiple attachments to a work order
- copying one or many work orders to paste in HTML format to an email or another document
You can also reassign work orders in bulk.
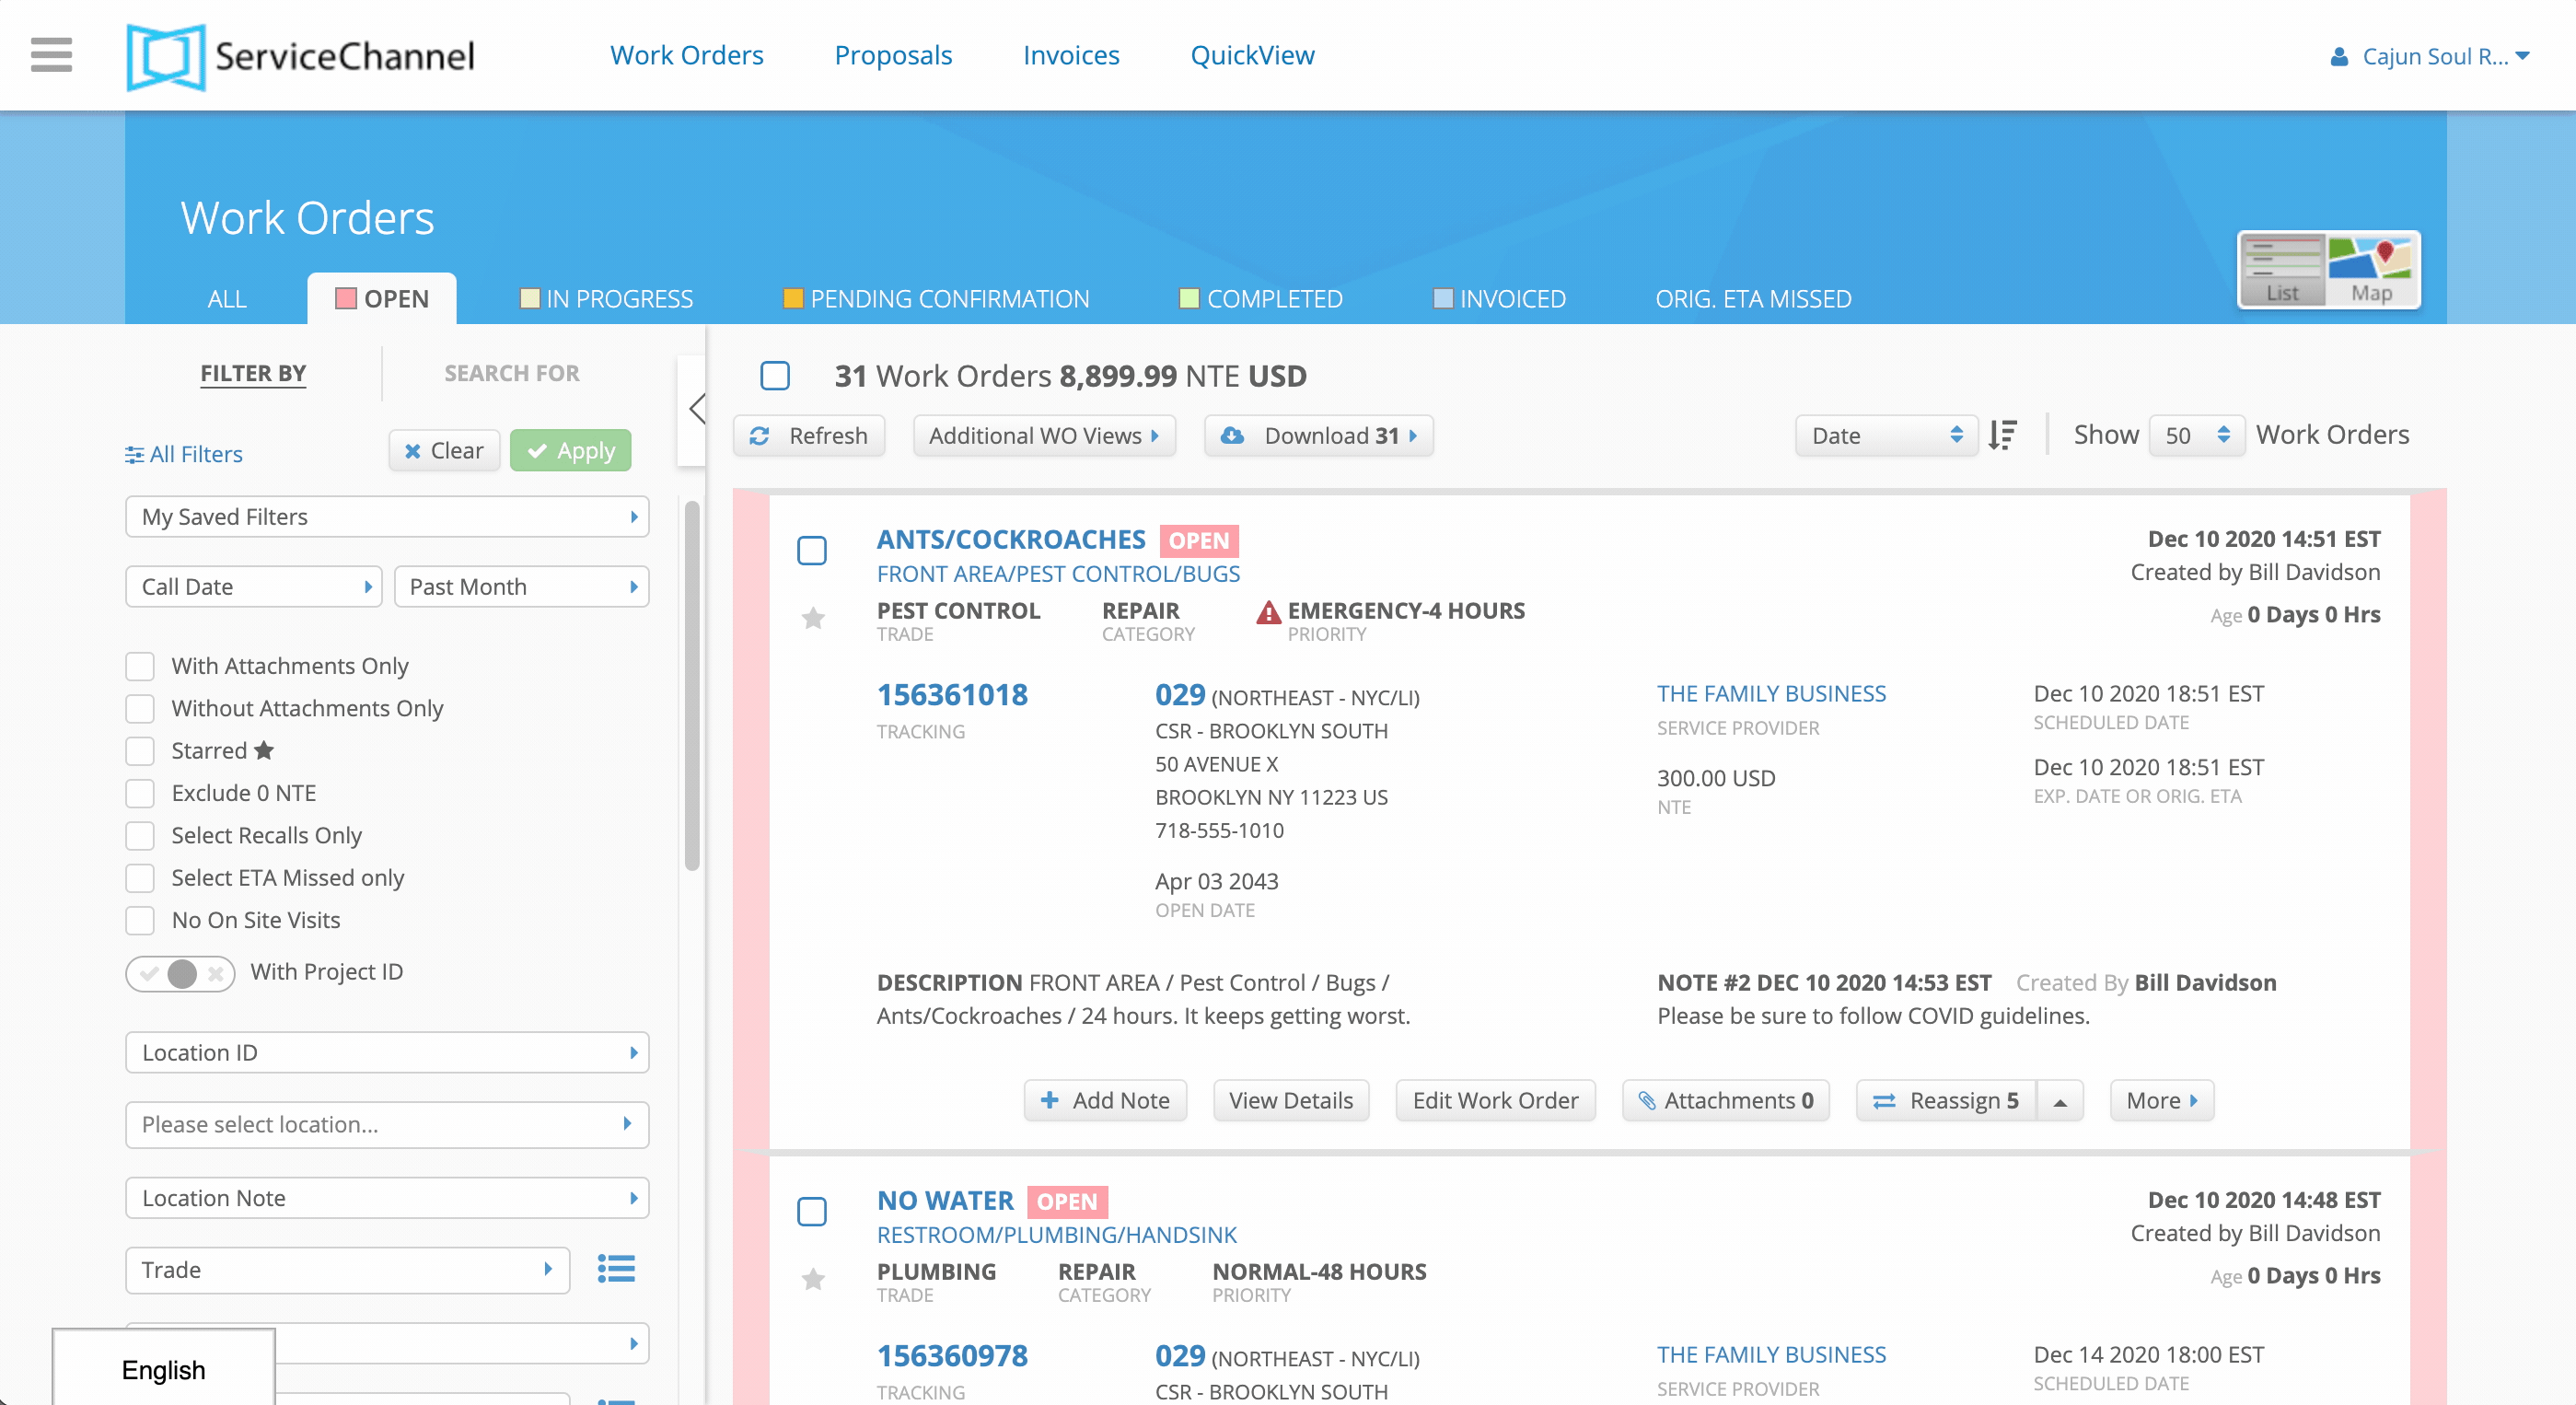
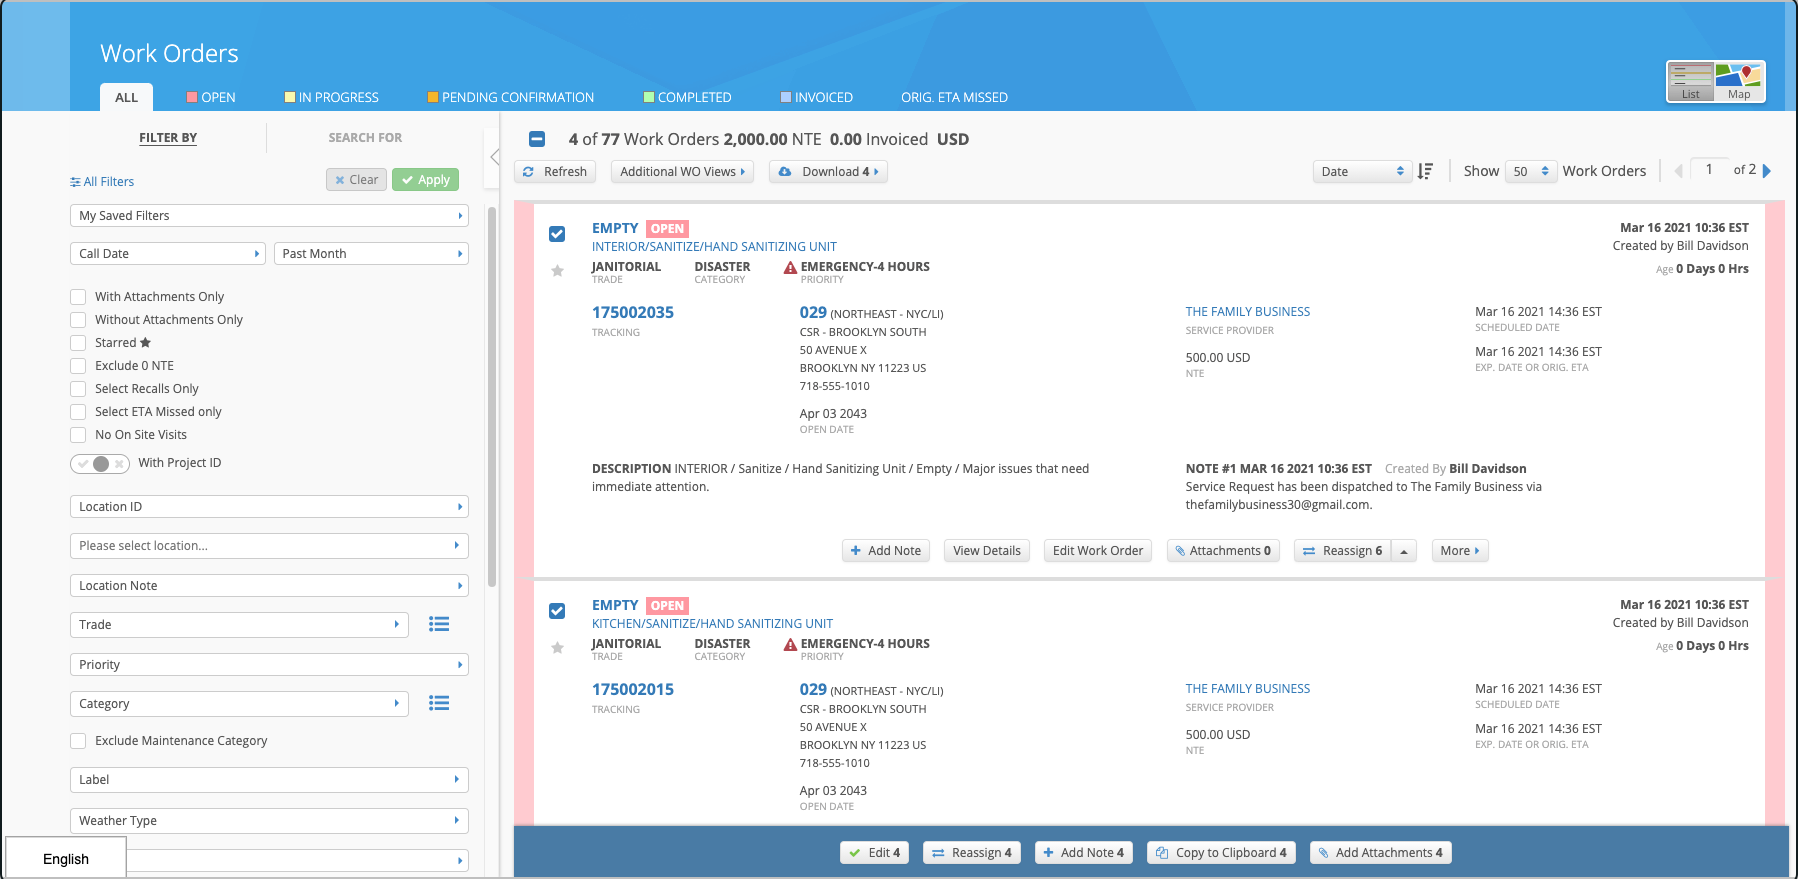
The batch actions bar appears on the bottom of the screen.
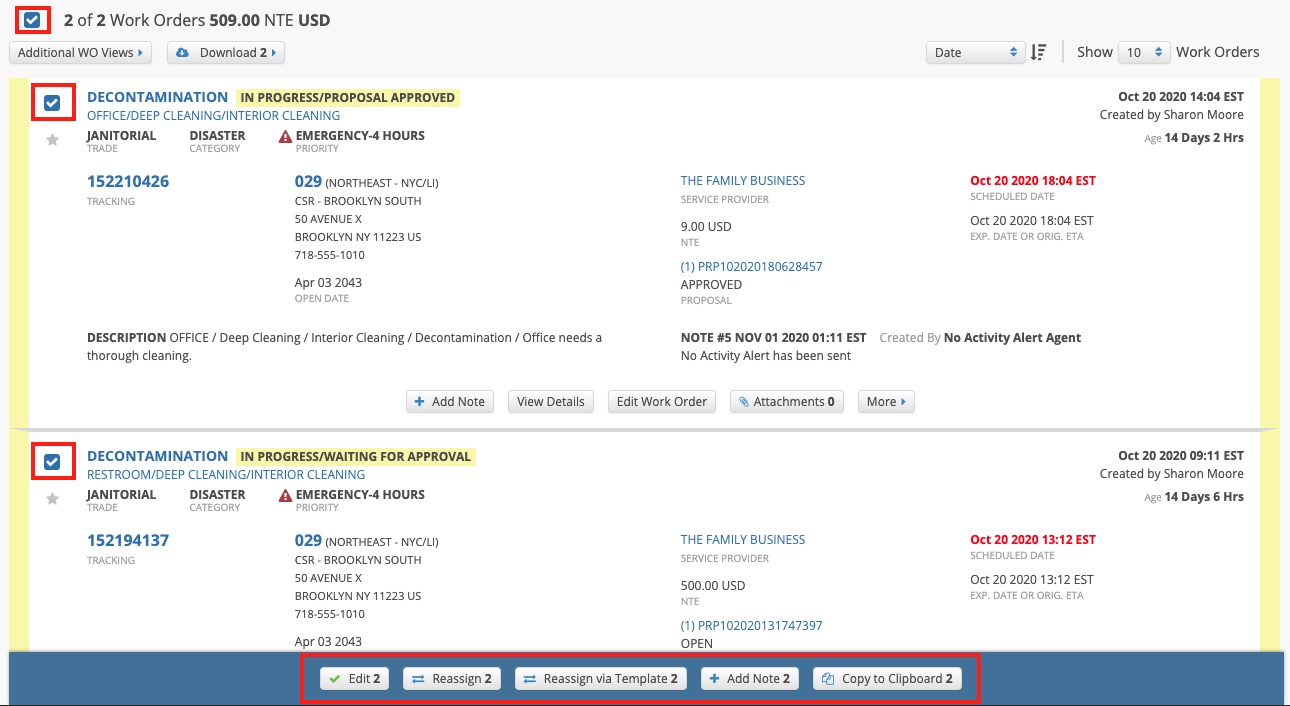
Note that each button lists a number, which represents the total number of work orders selected for that feature.

Editing Work Orders in Batch
Sometimes you may need to edit multiple work orders at a time, for example, when you want to reschedule work orders scheduled for a specific day due to other events at the location; manage auto-invoicing for maintenance work orders; update the category or NTEs on similar scopes of work, or add a Purchase Order number for issues fixed by the same provider.
You may process up to 100 work orders in a batch.
You may change the following information on multiple work orders:
- Purchase Order number
- Assignee
- Priority
- Status
- Add a Work Order Note
- Scheduled Date/Time
- Notify Providers of WO edit/cancellation
- Weather Type
- Label
- Category
- GL Code
- Currency
- NTE Amount
- Subtotal and Tax
- Auto-Complete
- Auto-Invoice
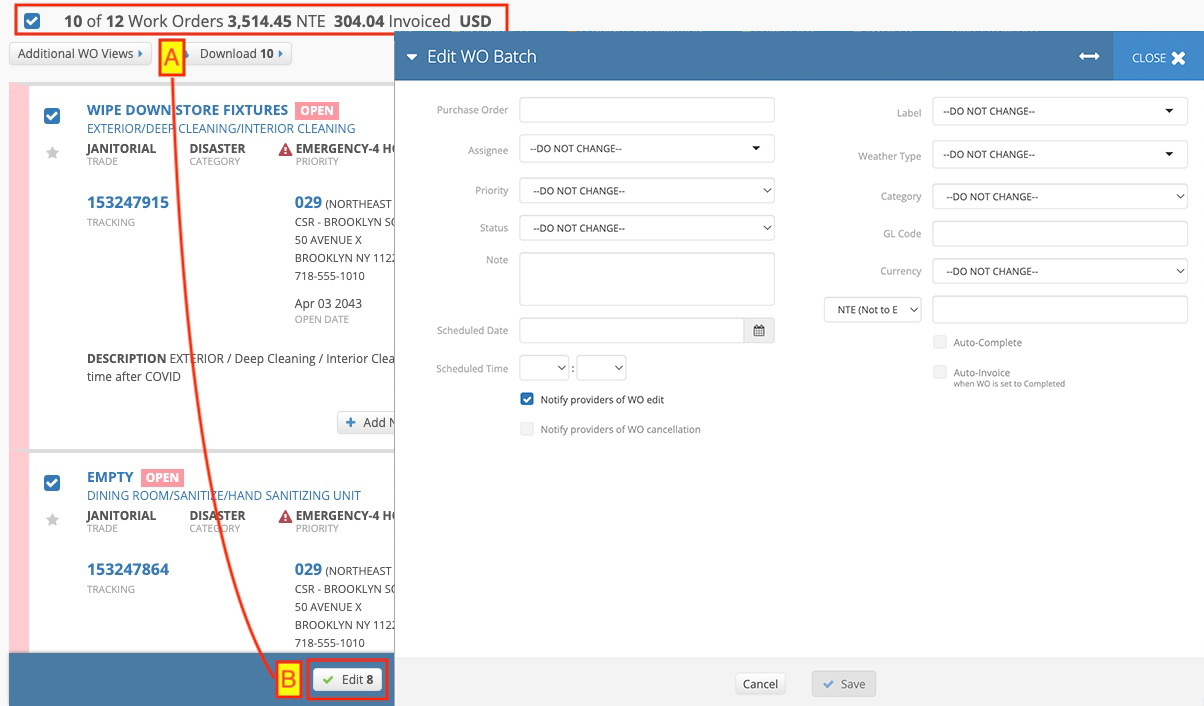
Only work orders that have not been invoiced can be edited.
In the illustration below, notice that the total number of work orders (A) is 10, but the number of work orders to edit (B) is 8. This indicates that there are 2 work orders that are already invoiced. Those work orders cannot be edited.
Provider Notification of Batch-Edited Work Orders
By default, the service provider assigned to each work order is notified of the changes made via email. While you are compiling your work orders, be mindful of whether the assigned service providers need to be notified of your changes.
You can turn on and off the functionality to notify providers. Therefore, you may want to batch edit work orders that do not require provider notification, and then batch edit those that do require notification.
- After locating and selecting the desired work orders, click the Edit # button in the batch actions bar at the bottom of the page. TheEdit WO Batchpopup appears.
- Modify the desired work order details.
(Optional) Check the Notify providers box to email the changes to the service provider assigned to each work order.
This step is recommended when changing key details such as the Priority, Scheduled Date/Time or NTE.
(Optional) Check the Notify Providers of WO Cancellation box to email changes to the service provider assigned to each work order.
To use this feature, set the work order status to Complete/Cancelled — the Notify Providers checkbox is selected by default.
Click Save. The edit summary appears, detailing the changes.
When the Notify Providers checkbox is selected, you will also see the "Notification Sent" confirmation under the Action Taken column as well as the service providers' emails to which the notifications were sent.
- Click Close to return to the list view.
Adding Notes to Work Orders in Batch
Similar to editing, you can add notes to work orders in bulk. This is helpful when you want to notify providers en masse about a store closing for renovations, or update related work orders of particular details. Again, by default, all providers will be notified unless you specify otherwise.
Unlike the Edit feature, you can Add Notes to work orders regardless of the work order status.
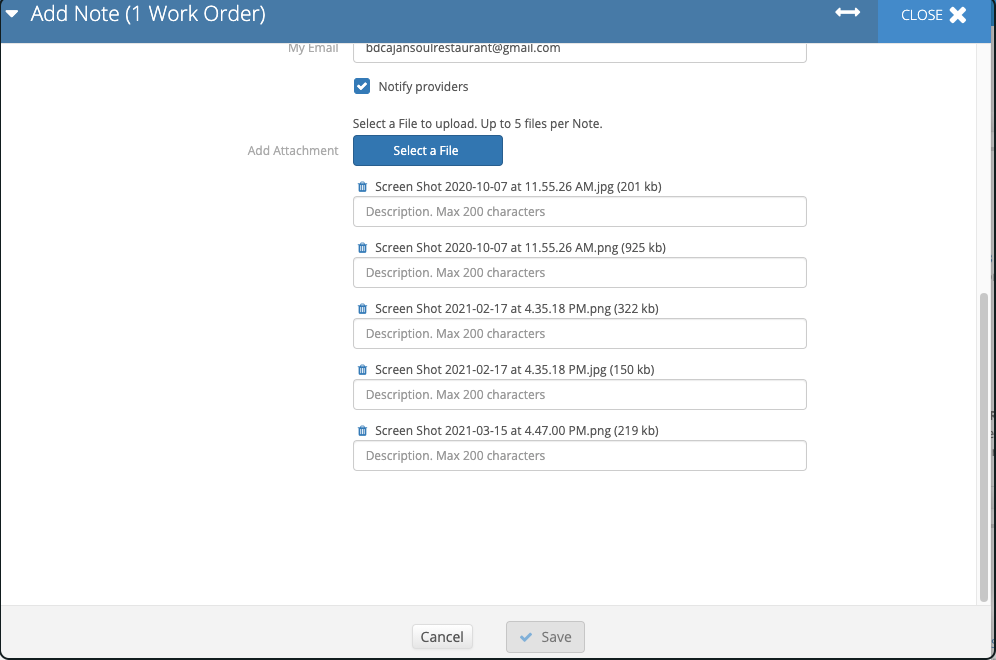
- After locating and selecting the desired work orders, click Add Note # in the batch actions bar at the bottom of the page. The Add Note (# Work Orders) pop-up window appears.
- Enter the note text.
- (Optional) Select the Action Required checkbox if you want to alert the recipients to take further action on the work order. Note that in this case you also need to specify the recipient of the work order note.
- (Optional) Pick the addressees you want to notify of the change, or specify the required email address in the Enter Email Address(es) text field.
- (Optional) Select the Send a Copy to Myself checkbox if you also want to get a notification email with the new work order note.
- (Optional) Clear the Notify providers checkbox if you don’t want to email the changes to the service provider assigned to each work order.
Click Save. The operation summary appears with the details of the changes.
When the Notify Providers checkbox remains selected, you also see the “Notification Sent” confirmation under the Action Taken column as well as the service providers' emails to which the notifications were sent.
- Click Close to return to the list view.
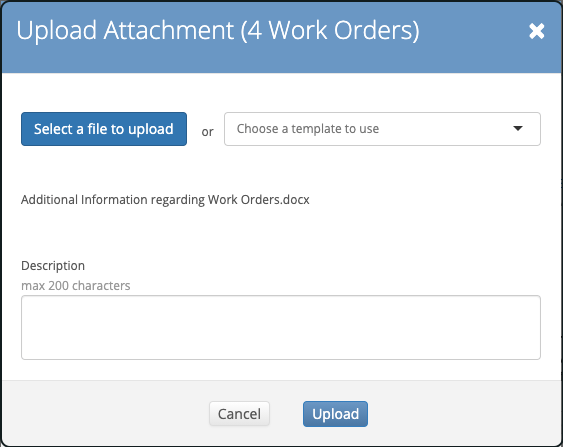
Adding Attachments to Work Orders in Batch
In situations where you have to attach additional photos and/or documents to help with the completion of work orders, you can add
- one attachment to multiple individual work orders, or
- up to 5 attachments to a single work order.
Those who have access to the work order can view all attachment(s) added to the work order.
- On the Work Order List View, use the filters and search features to locate the desired work orders.
- Select the checkbox(es) next to each desired work order, or
- Select the checkbox at the top of the Work Orders List to select all work orders.
- The Batch Action Bar appears, click the Add Attachments button to open the attachment modal.
- Add the attachment by clicking the Select a file to upload button then click the Upload button to submit and the file to the selected work orders.
- The attachment displays on the work order list view and a systems note is created.
The following file types are not accepted: ade, adp, bat, chm, cmd, com, cpl, exe, hta, ins, isp, jse, lib, mde, msc, msp, mst, pif, scr, sct shb, sys, vb, vxd, wsc,wsf, and wsh.
- On the Work Order List View, use the filters and search features to locate the desired work orders.
- Select the checkbox next to the desired work order
The Batch Action Bar appears, click the Add Note button to open the add note modal.
You can also click the Add Note button on the work order
Create a note in the Note Textbox.
Add up to 5 attachments by clicking the Select a File button then click the Save button to submit the files onto the work order.
The attachments are now visible from the work order list view.
The following file types are not accepted: ade, adp, bat, chm, cmd, com, cpl, exe, hta, ins, isp, jse, lib, mde, msc, msp, mst, pif, scr, sct shb, sys, vb, vxd, wsc,wsf, and wsh.