Creating a Service Request from the Map View
- Lamont Eddins
- Natalia Larina (Unlicensed)
Once you select a location or multiple locations, you may create a service request. Users permissioned with either a Dashboard or the Place Service Request permission are able to create service requests through this method.
Creating a Service Request for a Single Location
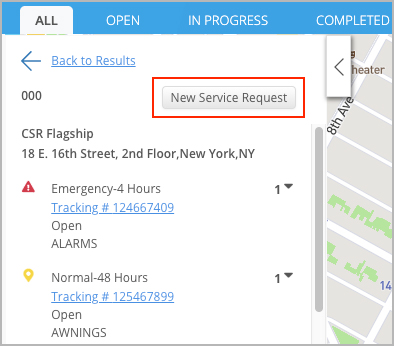
When selecting one location from the map view to create a service request, it is only for that location. When doing so, the process is through the classic service request module.
Creating a Service Request for Multiple Locations
You can create a service request for multiple locations at once. Selecting multiple locations to create a single work order allows for a similar issue affecting multiple locations to receive the same service without having to go into separate locations to submit a service request from the dashboard.
For example, when locations across the Northeast section of the United States are dealing with a snowstorm, you can create a service request for locations that are impacted by the storm to have snow removed.
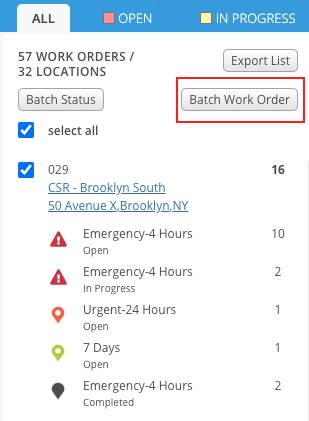
- From the Map View filter, Select and Drill Down into the desired location.
In the filter, click the Batch Work Order button to open the Batch Work Order Modal.
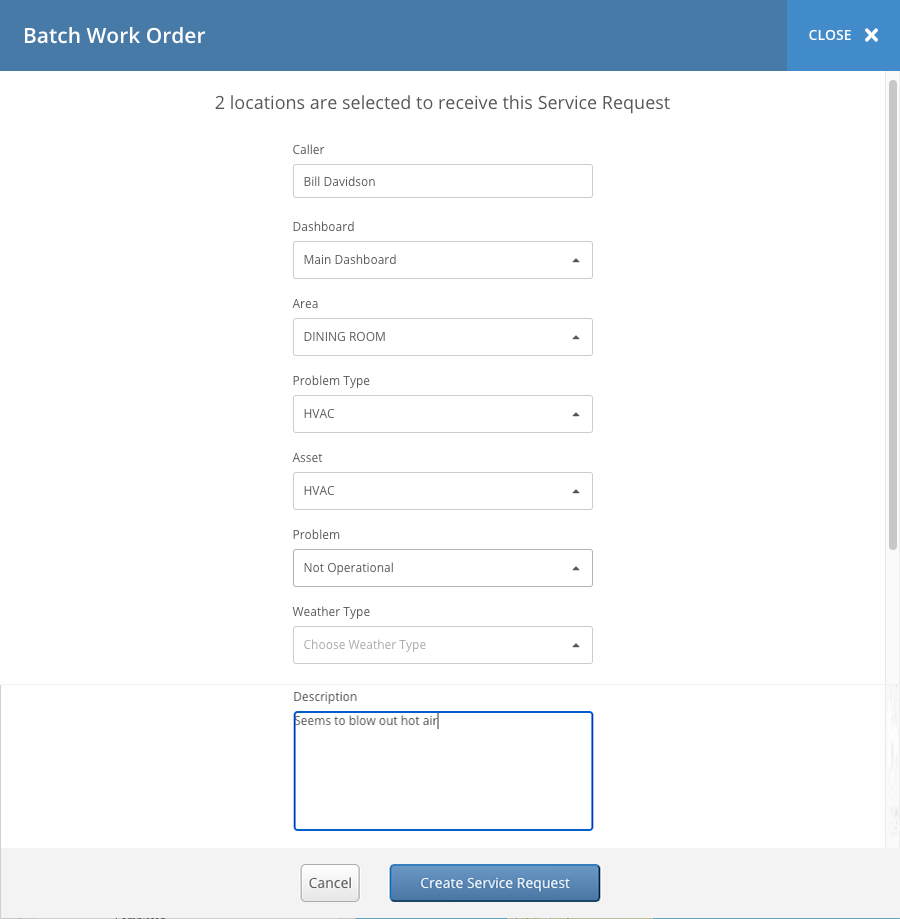
You must fill out each section before moving onto the next section within the modal.
- Enter a name in the Caller Textbox for the work order.
- Use the Drop-down arrow to choose a dashboard for the work order.
- Select the Area, Problem Type, Asset, and Problem for the work order.
- (Optional) Choose a Weather Type for work orders related to a weather event.
- Add a Description detailing the scope of work.
- Click the Create Service Request button to submit the service request to those locations. You will receive confirmation the request has been submitted.
Checking Work Order Batch Status
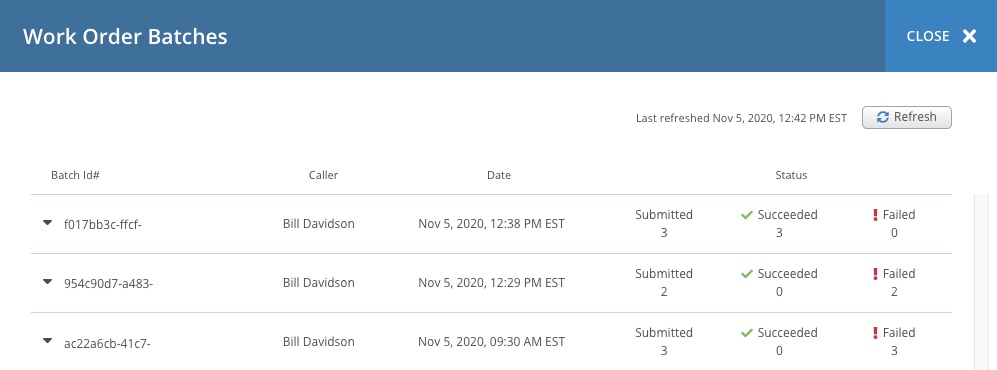
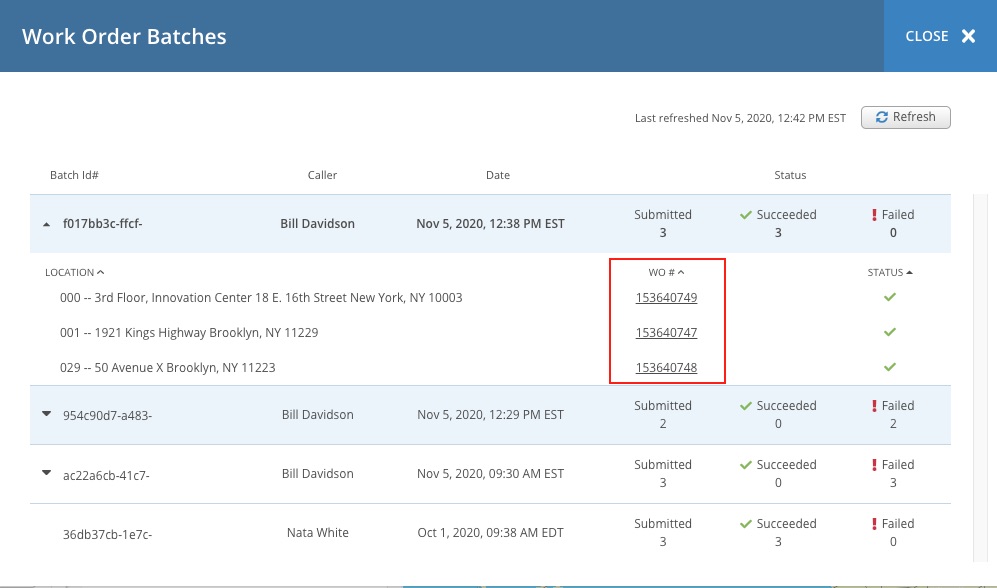
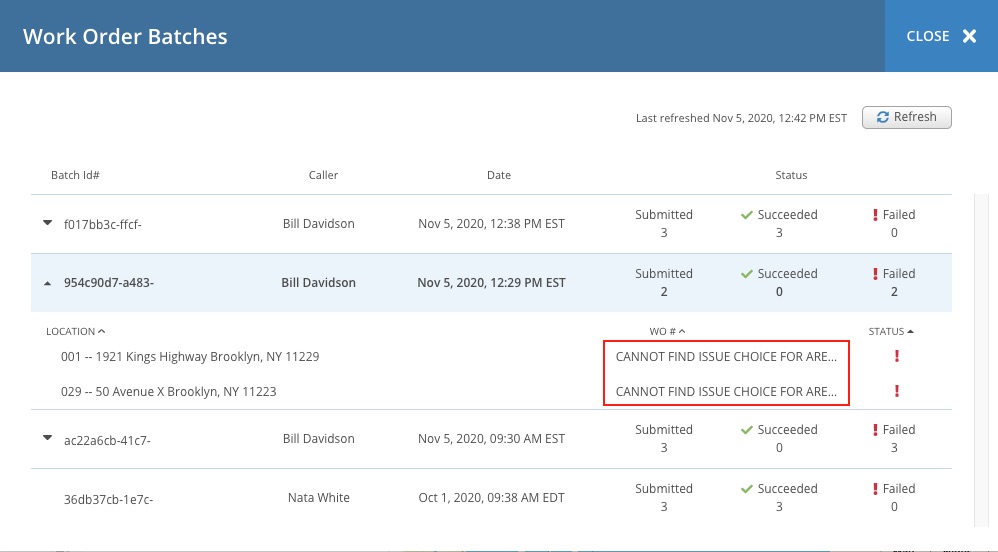
Once a Batch Work Order is submitted, you can check the status to view the results. The information on the Batch Status shows the amount of work orders submitted and whether it succeeded or failed. An amount is shown under the succeeded and failed column. Successful work orders are added onto the dashboard for the selected location and the work order list view. Any work order within the succeeded batch receives a WO#. When a work order fails, a statement on why it failed is provided.
You can also view the Batch Id#, Caller, and Date & Time submitted. Using the Refresh button located on the upper right corner allows you to update the status in real-time which includes the last refreshed information.
- From the Map List filter, click the Batch Status button to open the Work Order Batches modal.
- Click inside a specific Row to view the details of the Work Order Batch Status.
- For succeeded work orders, click the WO# link to view the work order details.
- For failed work orders, you can view the reason why it failed.
- For succeeded work orders, click the WO# link to view the work order details.
Viewing Weather Type on Work Order Reports
After a weather type is selected during creation and appears on a work order, you can download the Work Order Regular and All Calls reports from the list view. The reports include a weather type column and the weather selection appears for any work order that is selected. The weather type column appears on the 3 short versions of the Work Order Regular Reports and the All Calls (Long Format) Report.