.jpg?version=1&modificationDate=1611085107571&cacheVersion=1&api=v2&width=300&height=141)
Using Keyword Search to Create Work Orders
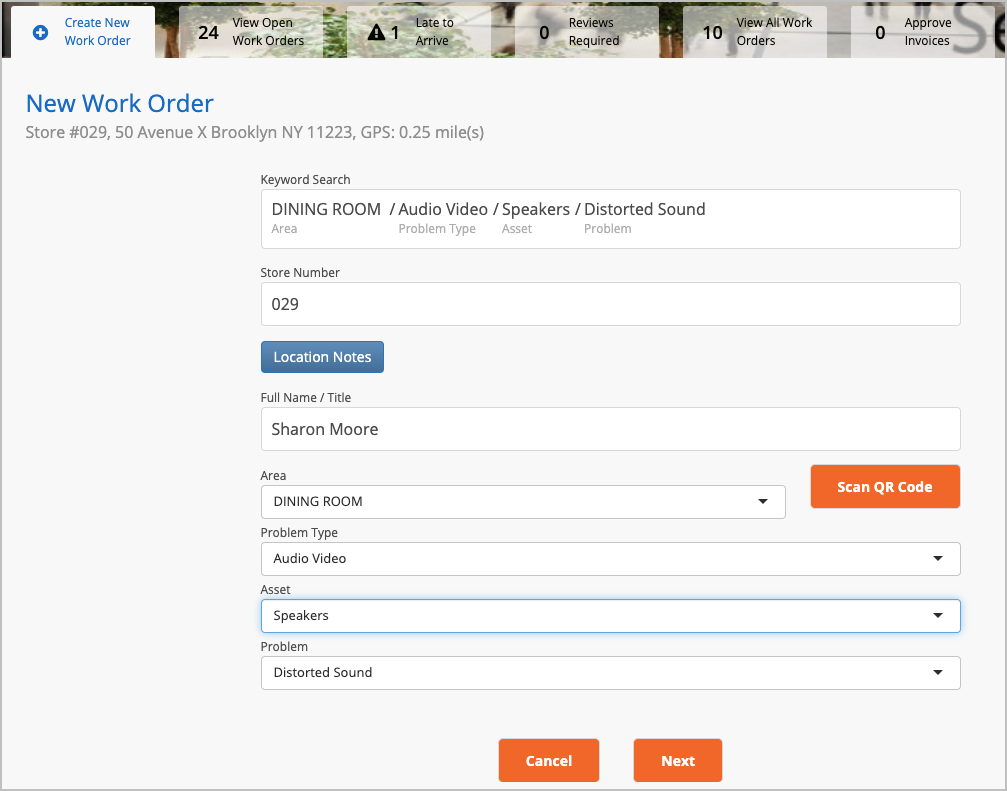
Keyword search is a feature that provides dashboard users with an additional method for entering service request data. With the feature enabled, dashboard users will be able to enter a keyword that correlates with a word/term that appears in the Issue List. Users would then be presented with a list of possible service request options to select from. The selection chosen will populate the service request screen.
In the example below, the keyword Generator returned several possible service requests. The user selects Exterior > Lighting > Emergency Lighting > Emergency/Exit Lights Out, which then populates the service request form. Users still have the option of manually changing the Area, Problem Type, Asset and/or Problem.
.png?version=2&modificationDate=1606948495207&cacheVersion=1&api=v2&width=750&height=258)
Note: The options that are available are the same options that are available when manually entering service request data.
Reporting Problems on Assets
If you choose a problem that has an asset associated with the Issue Type, there will be a list for you to select from. If the asset is not listed, choose “Asset Not Listed”.

Creating an Asset Transfer Work Order
From the dashboard, an Asset Transfer work order can be created and submitted. A request can be created and submitted for a particular asset to be moved from one location to another. This can be done when the Issue List includes you can lines when an asset or equipment needs to be transferring. A different approach would be to create a new issue list strictly for Asset Transfers.
Wording on Issue List for Asset Transfer Work Order
When developing lines on the Issue List for asset transfer, it is critical to have the following words in specific columns.
| Unique Word | Issue List Column |
|---|---|
| Transfer Code | Problem Group |
| Transfer | Problem Code |
For instance, the issue list can have a line that represents an asset transfer creation on the dashboard:
Area: Front Area
Problem Group: Transfer Code
Equipment (asset): Ceiling Fan
Problem Code: Transfer
- Use the drop-down arrows to select the following:
- Area
- Problem Type
- Equipment
- Problem Code

- Click the Next button to continue
- Select the asset to transfer by clicking the radio button

- Click the Next button to continue
- Use the drop-down arrow to select the transfer reason

- Click the Next button to continue
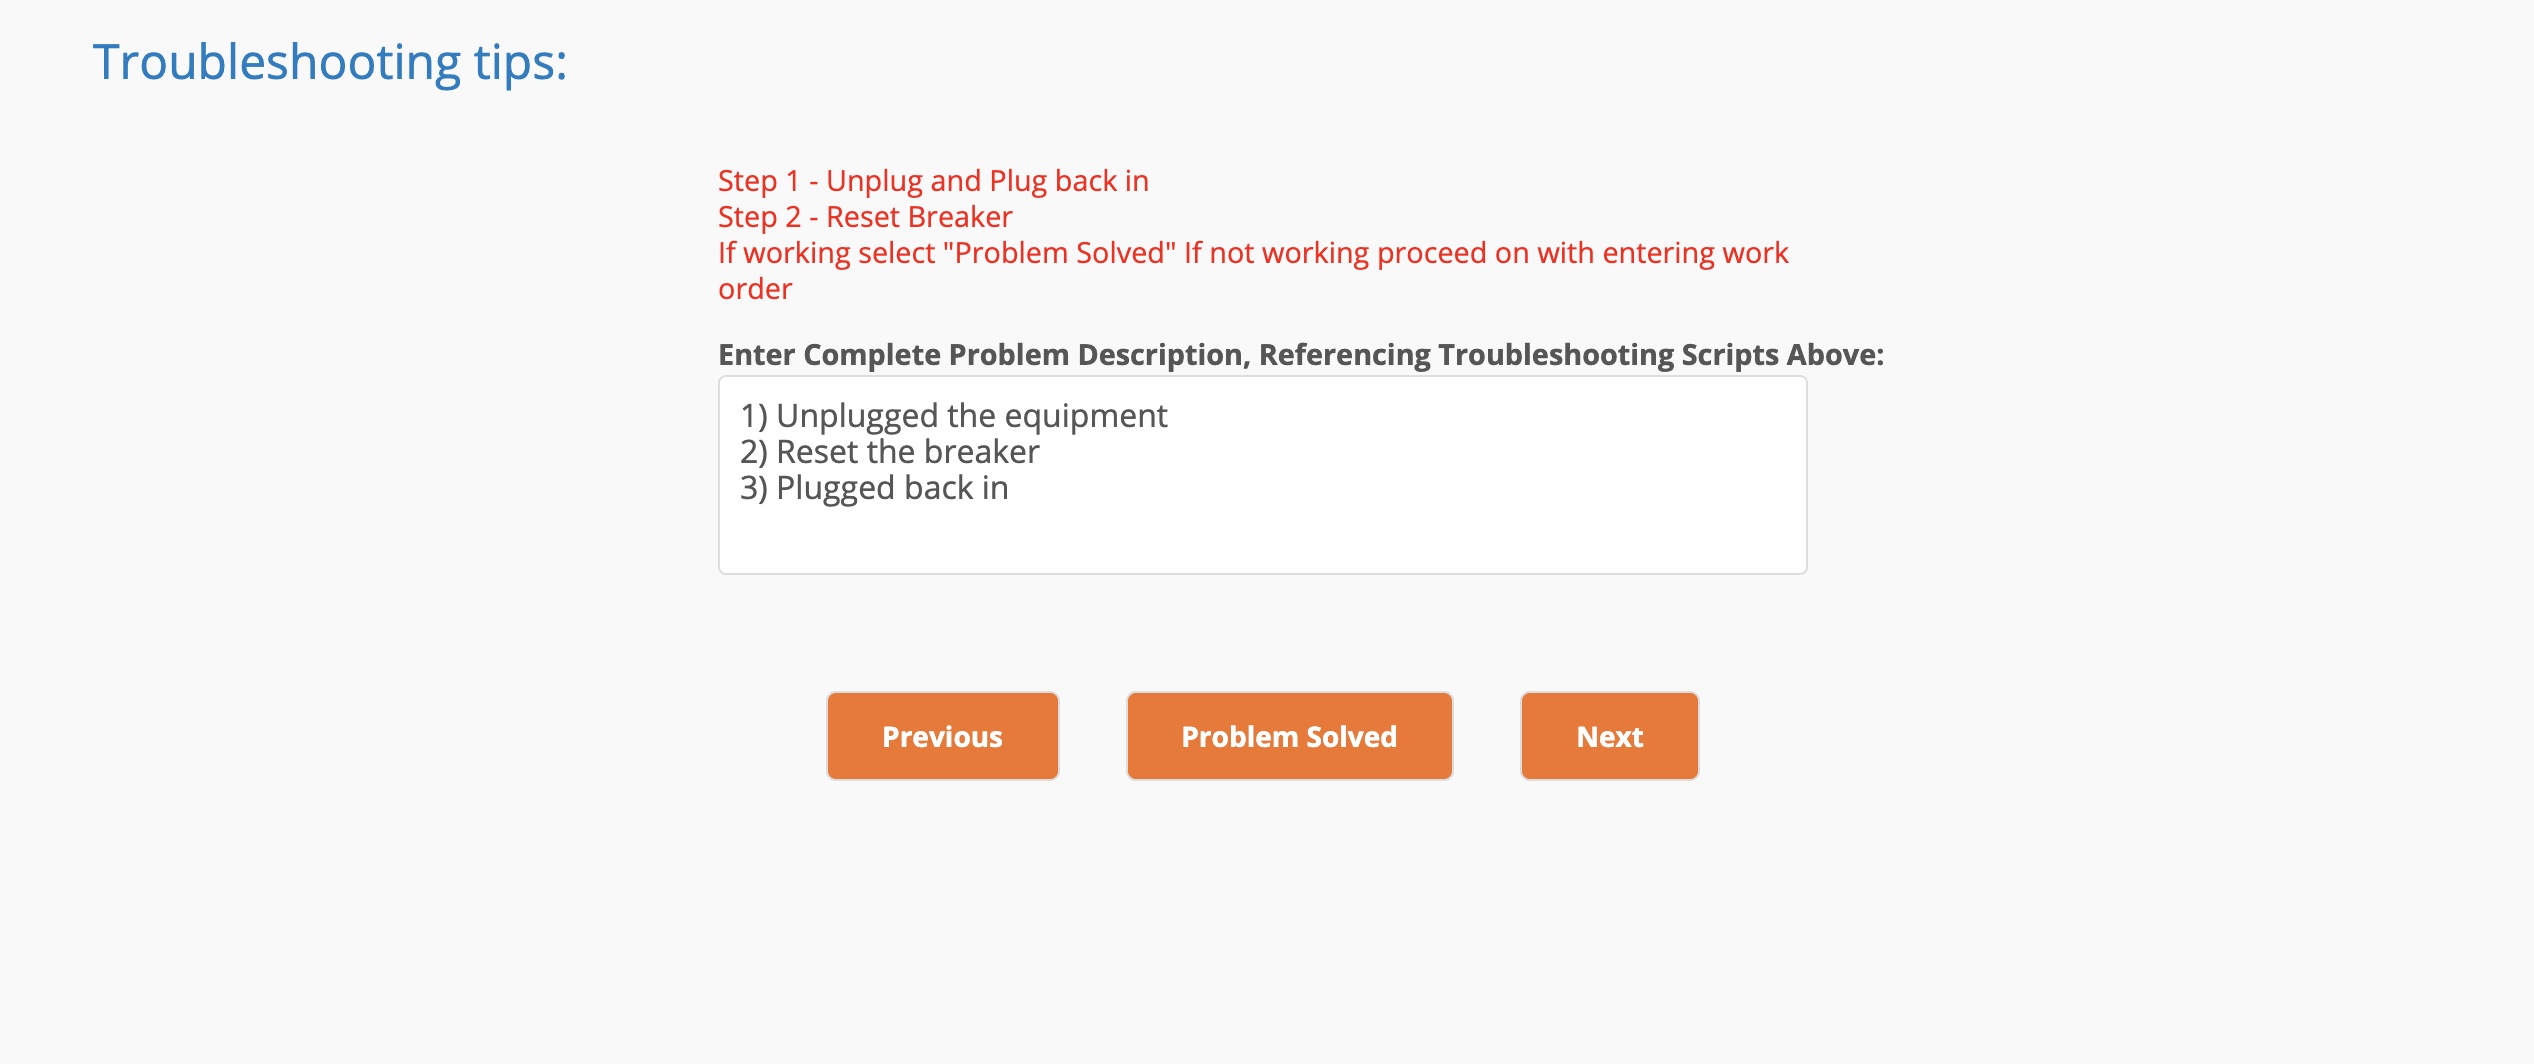
- Complete the troubleshooting tips section
- Click the Next button to continue
- Finalize work order details
- Submit work order for creation
Please contact your ServiceChannel representative to enable this feature.