Adding and Viewing Work Order Notes from the List View
Through Work Order Notes your facilities team and assigned providers can communicate about the selected work order, to keep conversations compact and related to the issue at hand.
Keep in mind that work order notes are visible to all who have access to that work order, including service providers.
Adding a Work Order Note
While adding a note, you can also use any of the following:
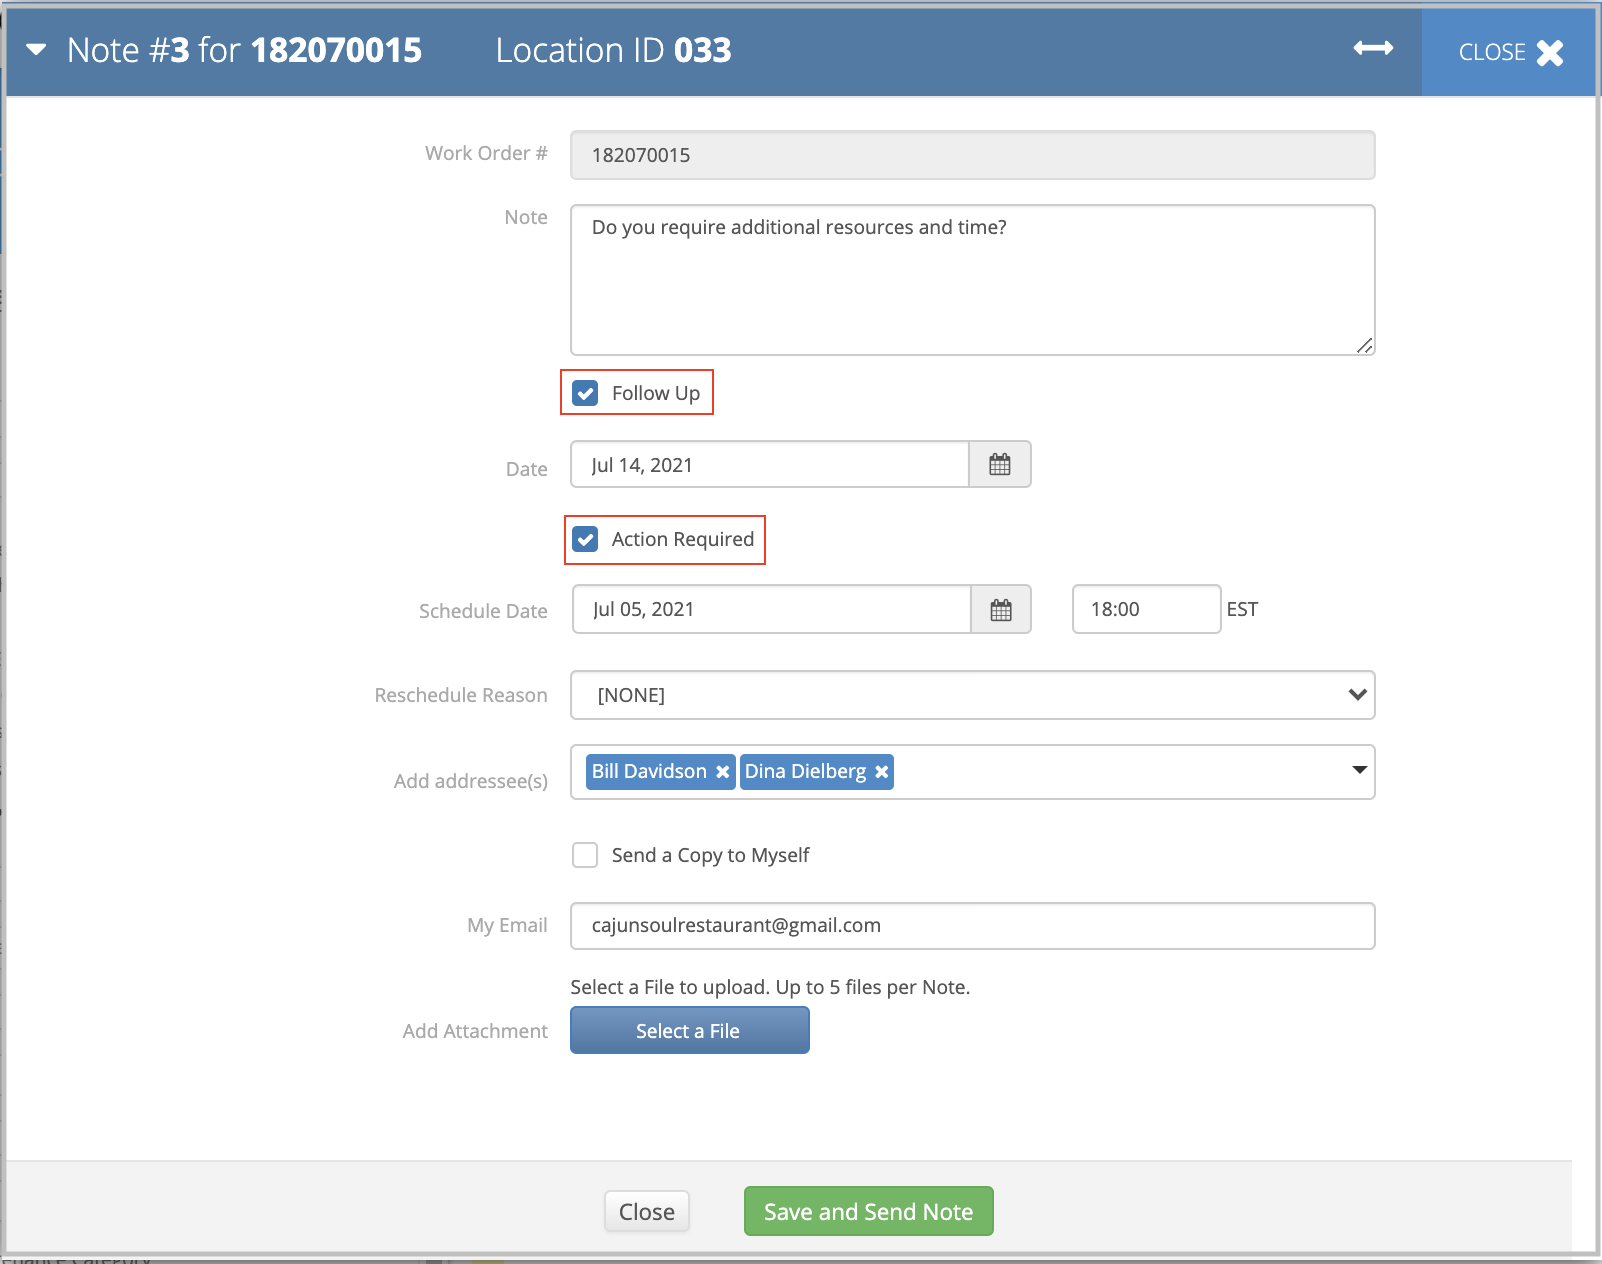
Follow Up flag: Use the flag if you need to revisit a work order at a later time, for example, to ensure the provider clocked in or updated the work order by the specified date. The follow-up date appears on the note once the latter is created.
Another note is added to the service request when the follow-up date rolls around. The note informs that a notification email was sent to the recipient reminding them that this work order was flagged for a follow-up.
Action Required flag: Select this flag to prompt the recipient of the WO note to take further action on a work order and help yourself track notes that need action to be taken. You can track all work orders with action required notes from the ALP and by filtering in the List View.
Add Attachment button: Click to add attachments such as floor plans, images, and invoices.
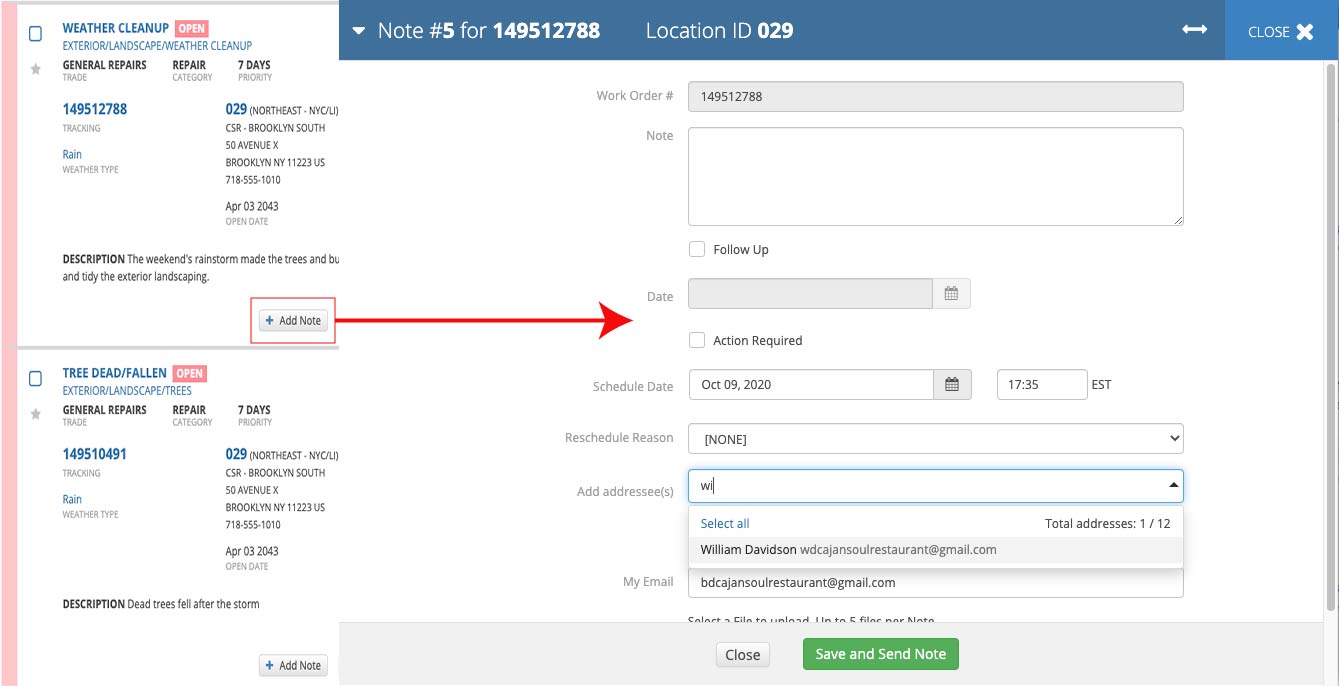
Locate the desired work order, and then Add Note. The Note <#> for <WO #> modal opens.
- Note: If there is one, the work order number appears in the textbox. Otherwise, the tracking number appears in the work order textbox.
Enter your note in the Note text box.
(Optional) Check the Follow Up box, and include the Date by when the recipient should respond.
(Optional) Check the Action Required box.
Inside the Add Addressee(s) box, type or select the name(s) of the people you wish to copy to the note.
(Optional) Check the Send a Copy to Myself box.
Your email, as listed under User Permissions, lists here automatically, Should this box be empty, enter your email in the My Email textbox.
(Optional) Add an attachment:
Click Select a File.
Browse to the location of the desired file, and click Choose. The selected file appears in the Notes window.
Enter a brief description of the attachment.
(Optional) Repeat steps 8a - 8c to add up to 5 files.
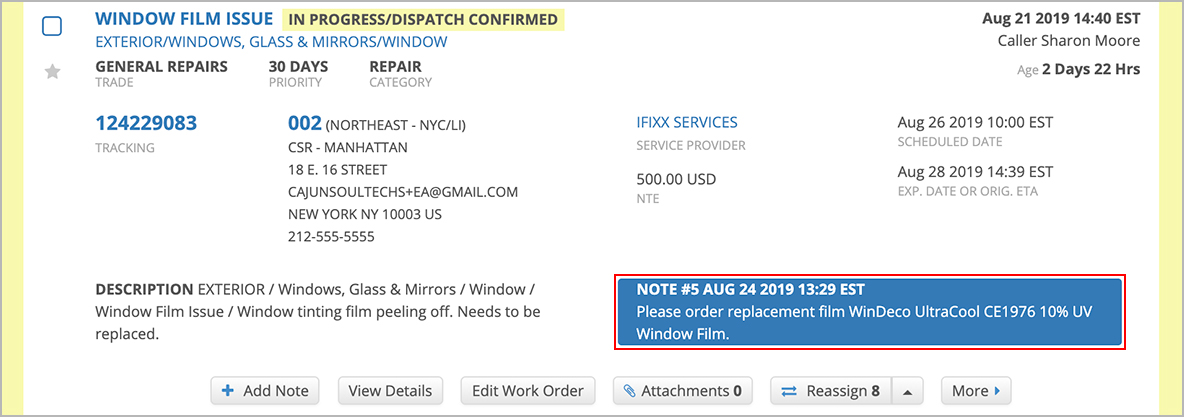
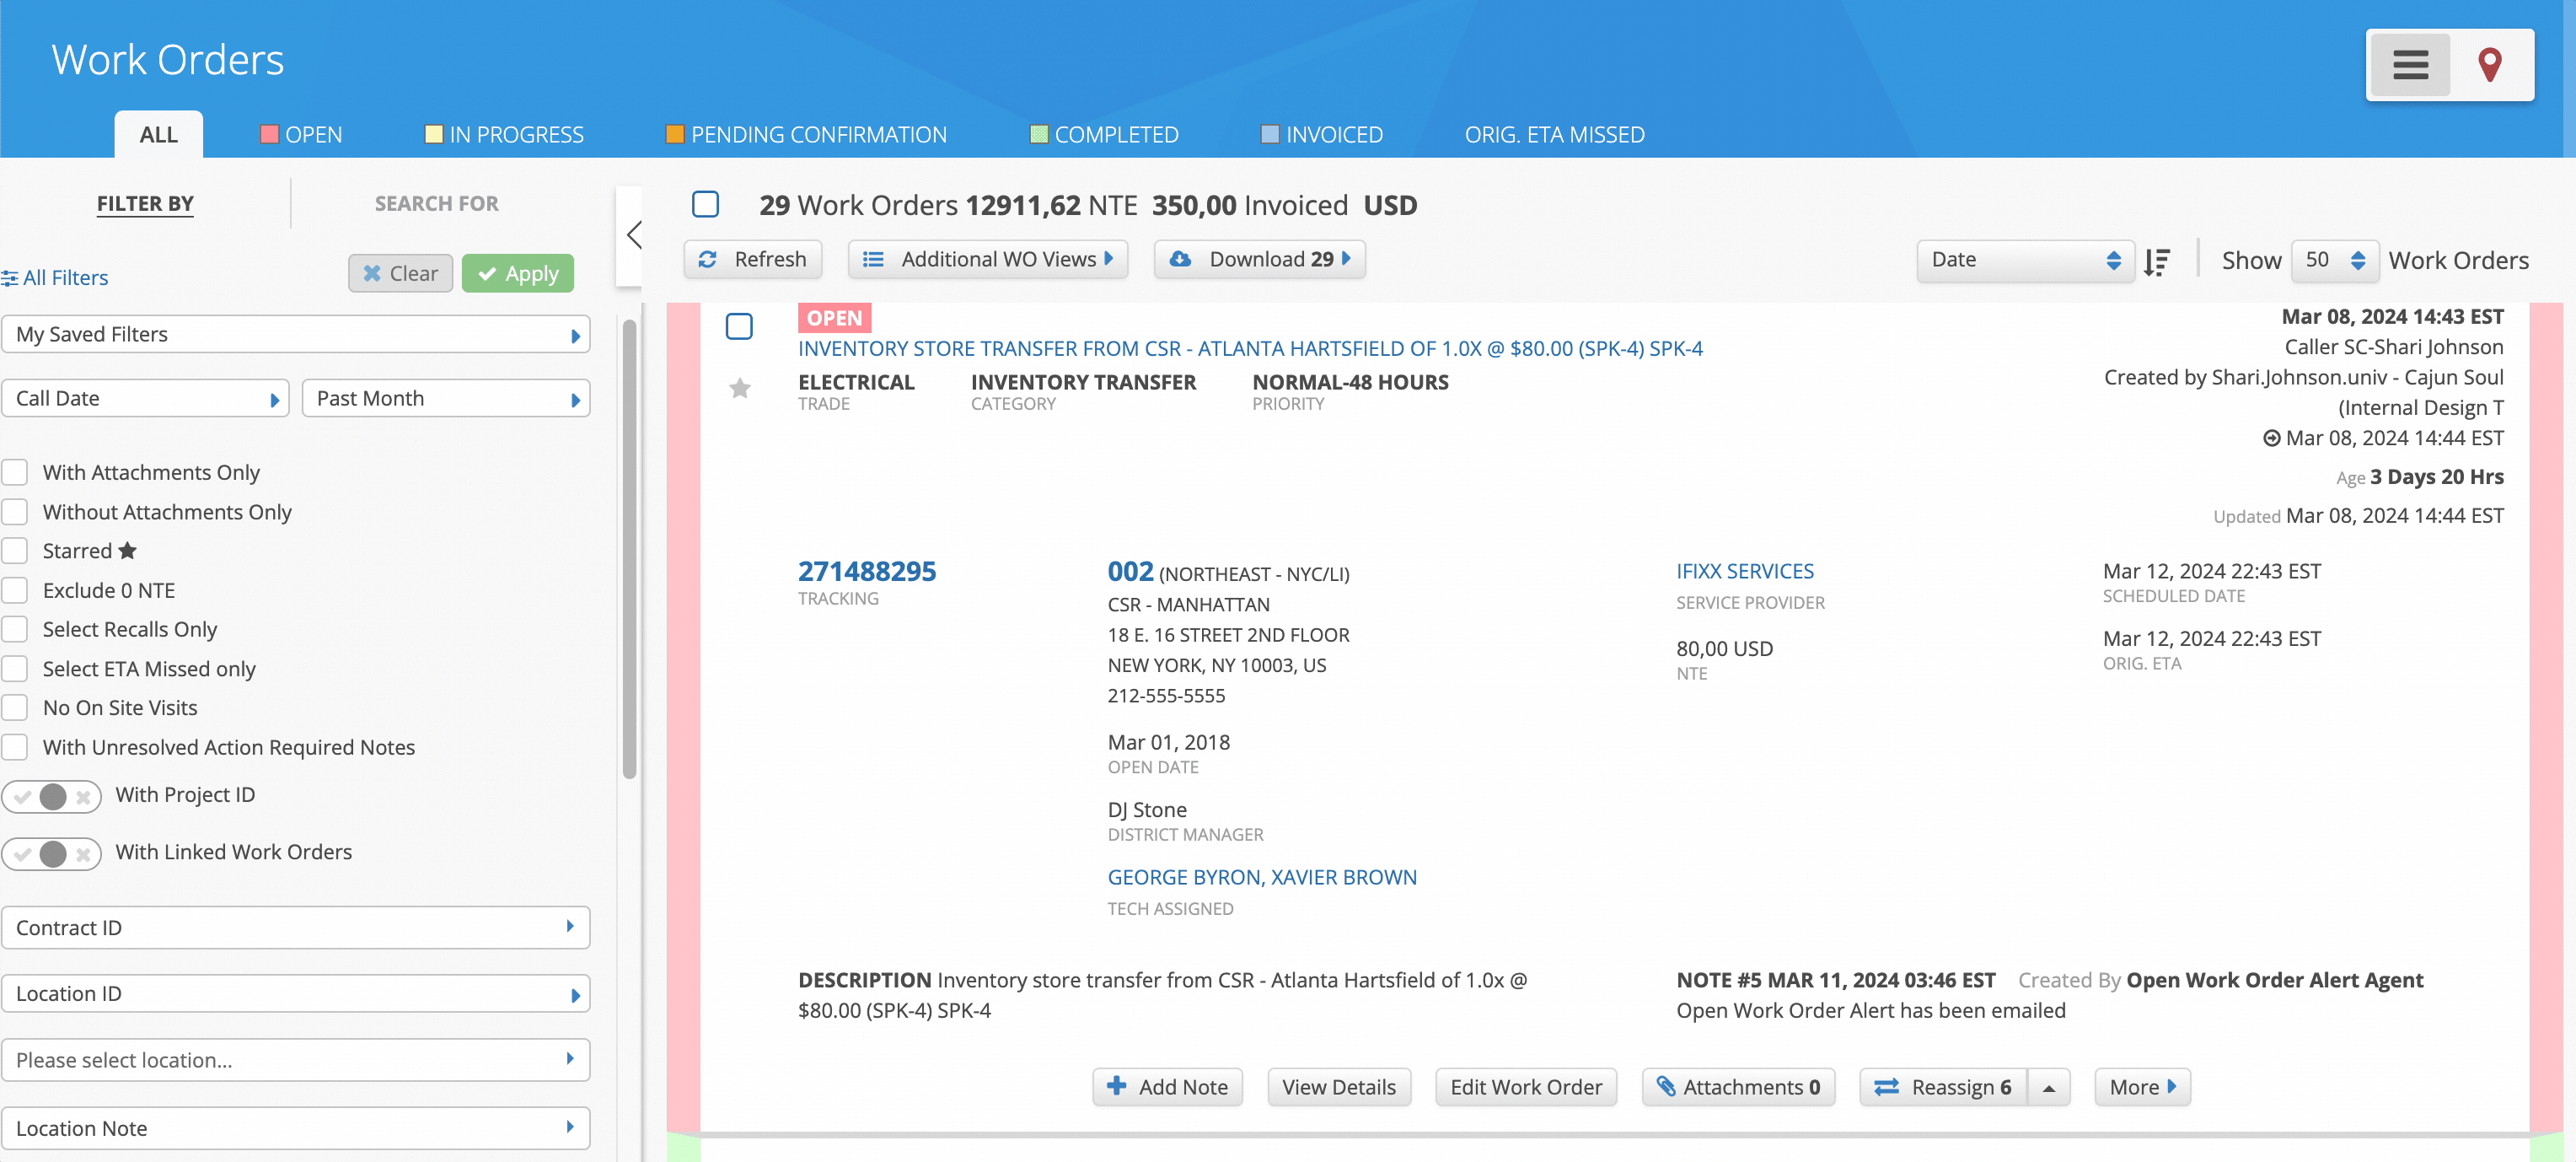
Click Save and Send Note. The note lists on the Work Order. Any selected recipients are sent email notifications.
You may also add a note to multiple work orders. See Editing Multiple Work Orders in Batch for more information.
When you receive an email notification about a note added to a work order, you can add a new note from the email. In the email, you can see the last and the last but one added note (if any).
- Click Create New Note in the email. You are prompted to log in to Service Automation if you are not logged in.

- You land on the Work Orders List where you can add a new note to the service request.
---OR---
- Reply to the email, and type your note in the reply.
Send the email.
Ensure the original message is included in the reply.
The client gets an email notification about a new note added to the work order.
You may also add a Note to a work order through email by emailing your desired note to <tracking#>@wonote.servicechannel.net. For example, to add a note to a work order with tracking number 84226813, you need to send the note with the tracking number of the work order in the email subject to the following email address: 84226813@wonote.servicechannel.net.
Viewing Work Order Notes
On the work order, simply click on the last note to view all Work Order Notes in a modal. Filter by clicking on each tab to view: All, System Created, or User Created.
Action Required and Action Resolved
You can also view and resolve any notes that show Action Required.
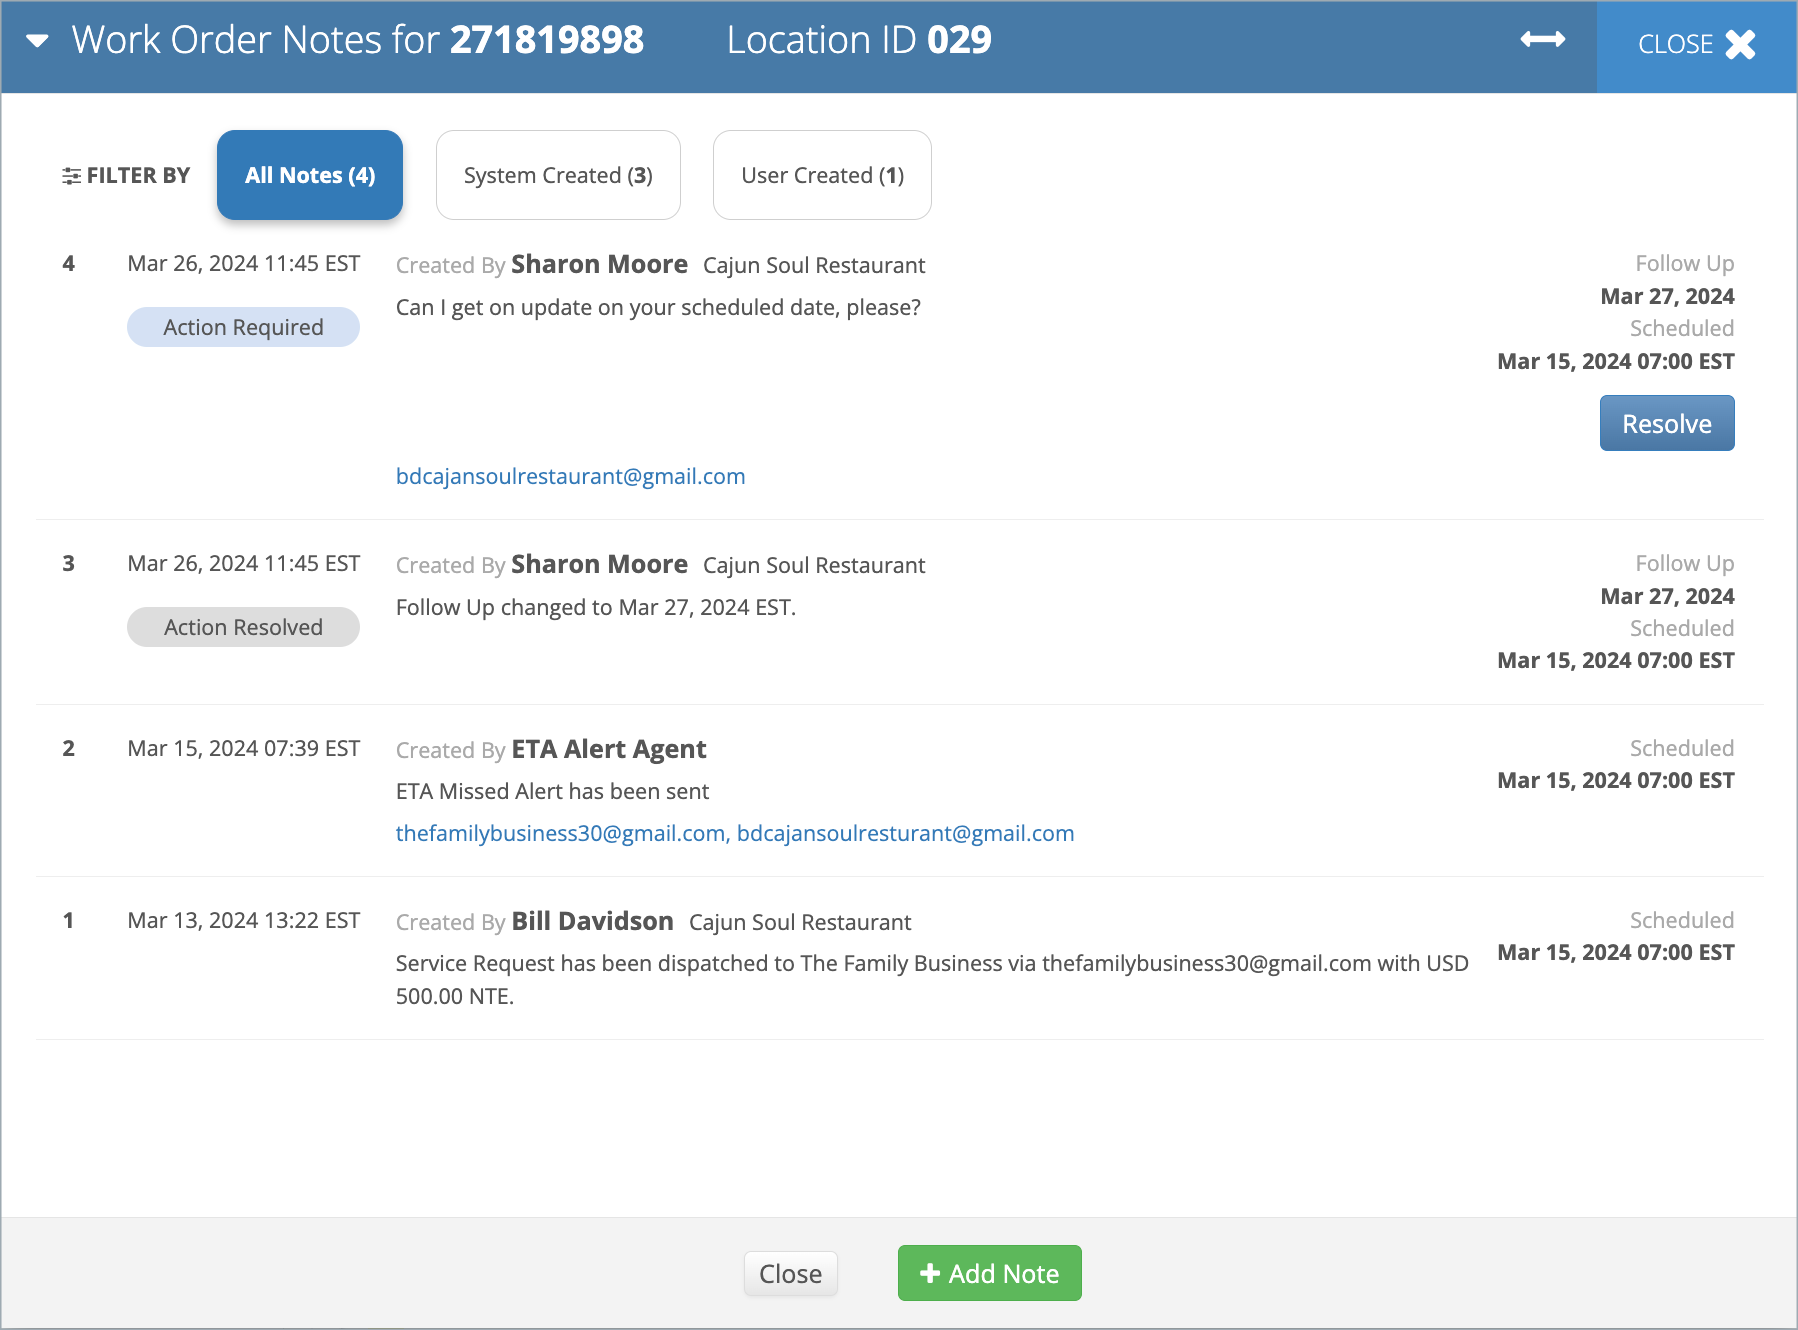
Notes that require action will have the Action Required bubble on the left of the note and a Resolve button on the right. If you have resolved the issue, you can press the Resolve button here or in the Notes tab under the Work Order Details View.
Notes that have been resolved will have the Action Resolved bubble on the left of the note.
Analytics
You can now drill into Action Resolved/Required data in Explore.