Viewing Work Order Activity
- Uma Srinivasan (Unlicensed)
- Caroline Antoun
- Natalia Larina (Unlicensed)
The bottom section of the work order window displays all of the work order activity in the following tabs:
- Attachments & Notes
- Status History
- Check In/Out
- Checklists
- Asset Details
- Invoice & Materials/Parts
- Asset History
Please, contact your ServiceChannel representative should you need to change the decimal point (.) to decimal comma (,) on non-monetary amounts, such as:
- Hours and Duration
- Quantity Amounts
- Weight.

Attachments & Notes Tab

This tab displays the history of all activity pertaining to the work order, such as:
- System-generated notes
- Pinned Notes
- Notes including the original NTE
- Attachments added by users
- Rescheduled information
- Change of statuses
- Date, time, and the name of the user who made the change.
- Checklist attachments to work orders.
- Notes Requiring Action
The default filter selection is the All Notes tab which shows both system and user created notes. Click on the System Created tab to only view notes that were system created. Click on User Created to only view notes your users have created.
You may also add a note, add or delete attachments, resolve action required notes or reschedule the work order from this tab.
Status History
The Status History tab displays the history of all status changes made, including the updated status, the provider who is assigned, reason for reassignment, the user who updated the status, and the date and time the status was updated.

Check-In/Out
Check-in or check-out made either by service providers through the ServiceChannel Provider Mobile App, or by the facilities team through the Labor Performed section appears here. Check-in/out details available include:
The date and time of each check-in and check-out
User ID of the service provider
The Caller ID used to check in/check out
- *GPS/IVR Status shows whether the check-in was compliant or not.
Whether it was a check-in or check-out
The status indicated at the time of check-in or check-out
Work type
Number of hours spent on-site
- Signature
Total IVR /Check-in hours
* Compliance vs. Non-Compliance feature is turned on by request. Contact your ServiceChannel representative.
The information listed under Caller ID will differ, depending on the system used:
IVR check-in/out: The phone number used to dial in appears.
SC Provider check-in/out: The geolocation coordinates of the user’s mobile phone appears.
Labor Performed
Labor Performed allows you to add information for the work type performed on a work order by a service provider. Perhaps, a service provider calls or emails the location stating they did not officially check-in and/or out but did perform work on that day; updating the work order by adding a repair record in labor performed will document the visit on a work order. Another situation could be where the service provider inputs the incorrect data whether it be a date or time, adding a record in labor performed with an accurate date or time of that visit rectifies the error. Using labor performed offers the ability to add information to a record for acknowledging and documenting a service provider’s visit when IVR or mobile is not used.

When a service provider ends up not checking-in with IVR or mobile, it does not show up in Analytics.
- On the Work Order Details page of a work order, click the Check-In/Out link to access Labor Performed located under Check-In/Out Occurred.
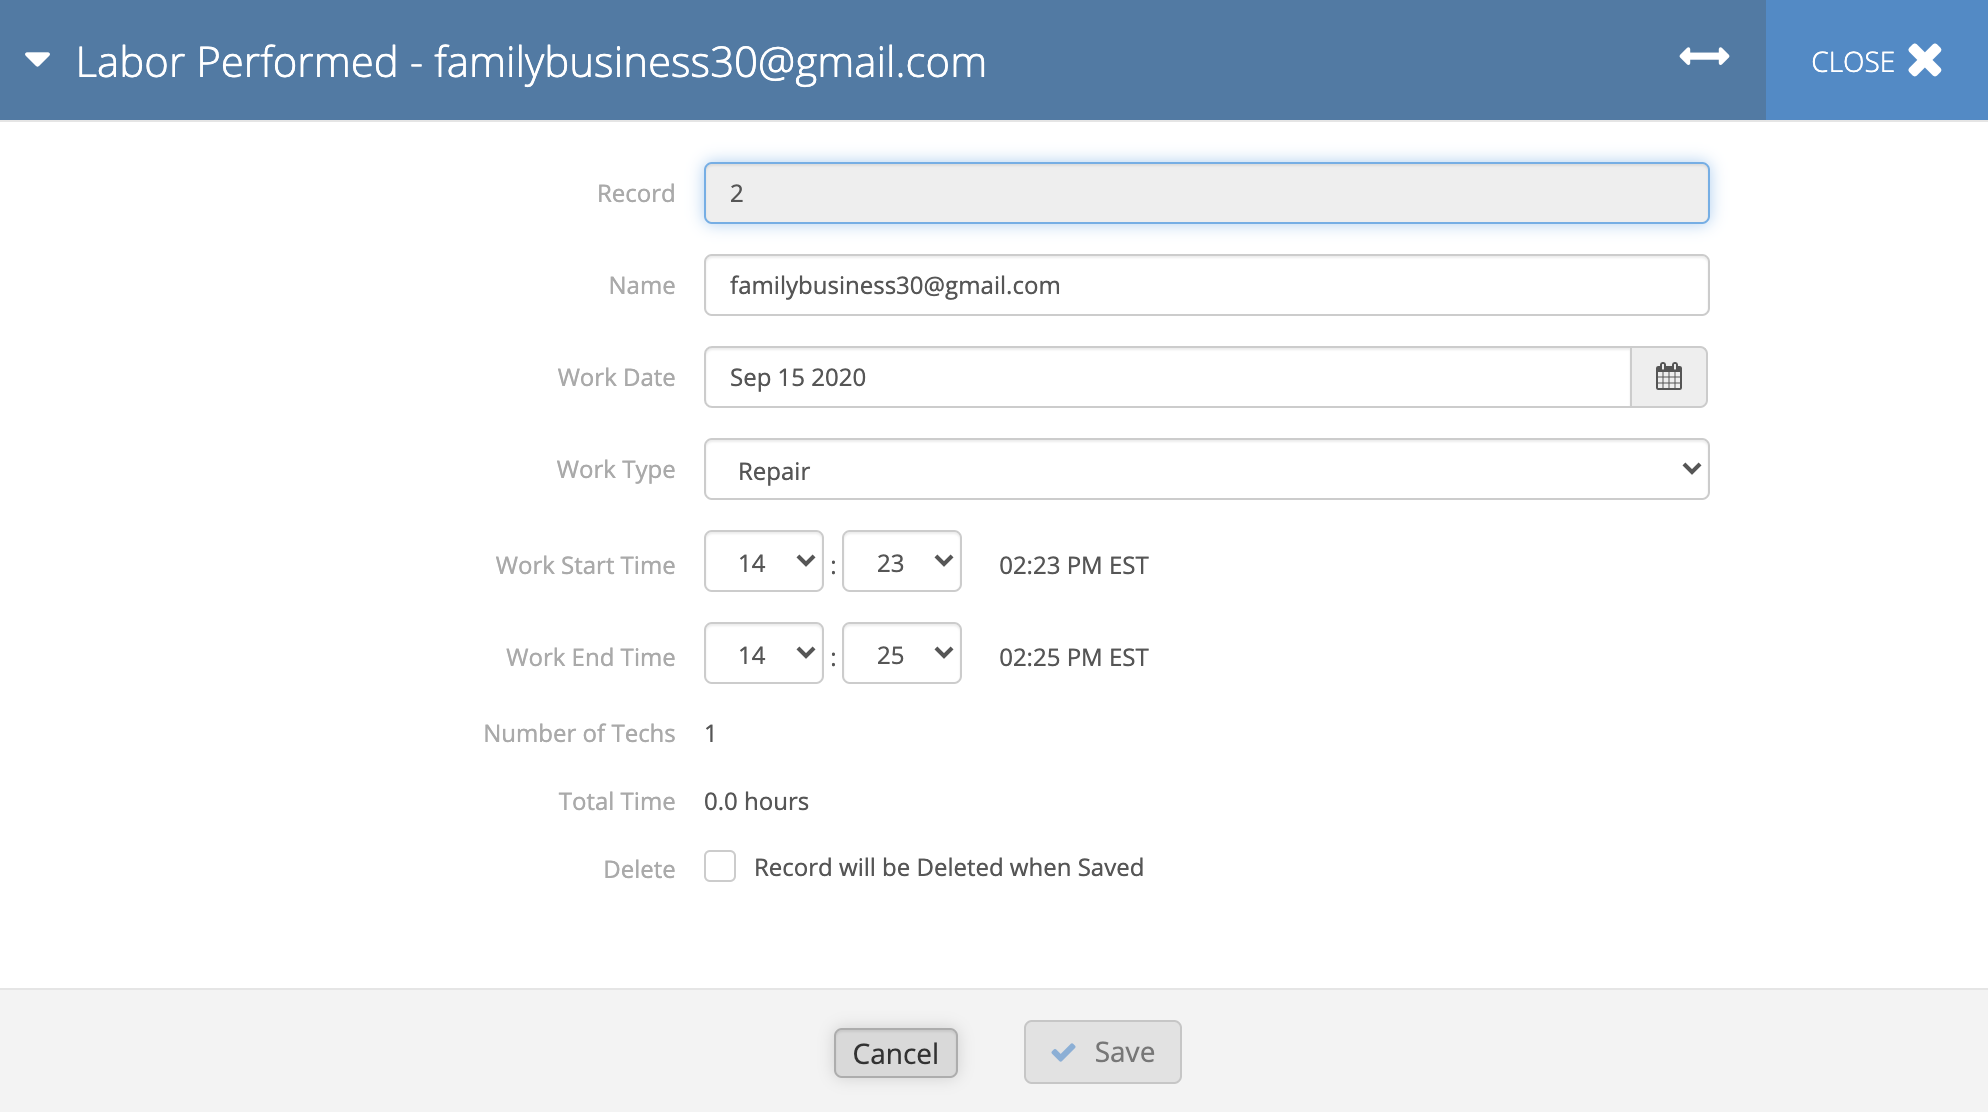
- Click the Green and White Plus button on the left side to create a new record. The Label Performed - New Record modal appears.
- Note: In the modal, the Record field and Number of Techs field are uneditable because this is a new record.
- Add the Name of the person who is creating the record.
- Provide a Work Date for services performed.
- Use the Drop-Down Arrow to select a Work Type.
- Use the Drop-Down Arrow to select a Work Start Time and adjust the Total Time field.
- Note: Hours after 12pm are in military time.
- Use the Drop-Down Arrow to select a Work End Time and adjust the Total Time field.
- Note: Hours after 12pm are in military time.
- Click the Save button to add the record into labor performed.
Modifying a Record in Labor Performed
You can modify a record at any point during the work order lifecycle except for when a work order has been invoiced.
- Click the Green and White Pencil button on the left side of the record to enter the Labor Performed modal.
- Note: The Record field is uneditable.
- Change the Name of the person on the record.
- Edit the Work Date by using the Calendar button on the right side of the date.
- Edit the Work Type by using the Drop-Down arrow.
- Edit the Work Start Time by using the Drop-Down arrow for hours and minutes..
- Note: Hours after 12pm are in military time and Total Time automatically updates.
- Edit the Work End Time by using the Drop-Down arrow for hours and minutes.
- Note: Hours after 12pm are in military time and Total Time automatically updates.
- Click the Save button to add the record into labor performed.
- Optional: Delete the record by clicking the Check box box before clicking save.
It is possible to create or modify a record by editing a work order. See Updating Service Provider Check-In/Out Information, for more information.
Checklists
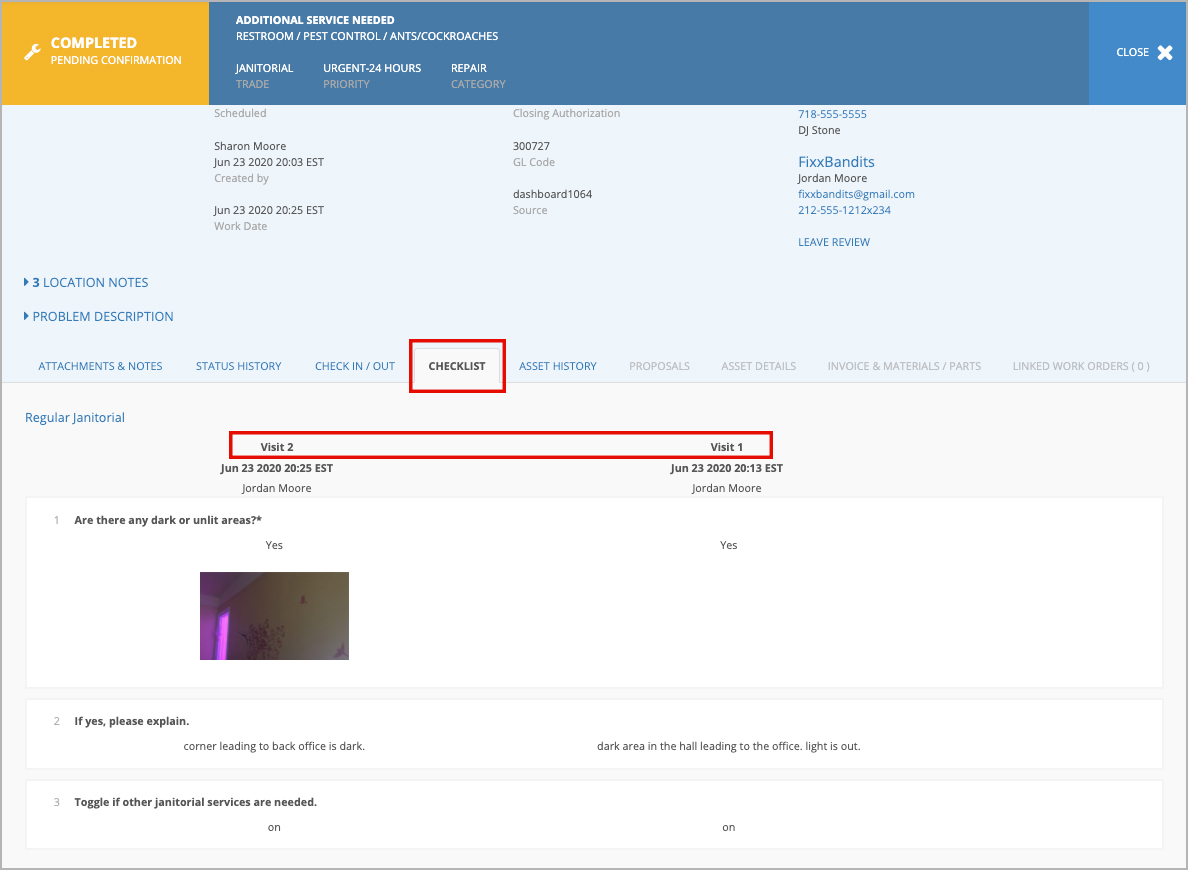
When Checklists are configured and answered by technicians, the answers appear under the Checklist tab on that work order's Details page. Each Checklist completion is marked as a Visit on the Details page. In situations where technicians have to check in and out multiple times (for example, marking the work order as Incomplete), the Checklist appears after every check out, even after the technician has already completed it.
The below illustrates a technician who has checked in and out of the same work order twice, and has completed the Checklist each time. Visit 1 did not include a photo, while Visit 2 did. In cases where multiple photos are available, you can click through a photo gallery to see them all.
At this time, there are no filters to determine which work orders have checklists associated with them. We suggest creating a Work Order Filter that matches the Trade/Category/Location combination to help hone in on possible work orders with Checklist answers.
Asset Details
When viewing a work order that has been created to repair or replace a faulty asset, you can take a look at key information on this asset from the Asset Details tab of the work order. To take a deeper dive into the asset data, you can navigate to the asset details page by clicking the asset tag ID.

Multiple Assets on Planned Maintenance Work Orders
Planned Maintenance work orders may be associated with multiple assets at a time. The Asset Details tab will list all the assets attached to the work order.
By clicking the Edit button, you will be able to add more assets to the work order or remove unwanted assets. Learn more about Adding Multiple Assets to Planned Maintenance Work Orders.
To be able to associate a Planned Maintenance work order with multiple assets, please contact your Customer Success Manager.

Click the asset tag ID to expand the section with asset details.

Information Available Under Asset Details
The first block of information is part of the Asset Intelligence feature powered by the Decision Engine solution. Check asset info tidbits captured in this block:
- Asset tag ID. Click the asset tag ID to view the asset details.
- Asset condition, for example, Good
- Warranty period in months — for assets under warranty
- Date when the asset was updated
- Initial cost, for example, 2,000.00 USD
- Asset age, for example, 2 years and 3 months. The age of an asset is calculated from its Installation Date to the current date.
- Completed work orders associated with this asset. Click View # to see Completed requests.
- In-progress work orders tied to the asset. Click View # to see In Progress requests.
- Invoices associated with the asset. Click View # to see invoices.
- Other data

To get the most out of Asset Intelligence, make sure you keep the asset information up to date in Asset Manager.
Should you want to use Asset Intelligence, contact your CSM.
The second block shows you whether the work order was created to repair or replace the broken asset. This section also shows such details as:
- Asset physical area
- Asset type
- Asset tag ID
- Brand
- Model and serial numbers
- Install date
- Warranty expiration date — for assets under warranty

Invoice and Material/Parts
In case your service provider has added an invoice, you may view it in this tab. The invoice number appears in the name of the tab. This tab has two sections: Client Rates and Materials.
Client Rates displays the details of the labor rates, travel expenses, and materials cost added through the invoice. The caller name and date as well as the provider name and the date the invoice was created also list here.
Materials Ordered lists supplies ordered through the Supply Manager platform, including the quantity, part number, description of the part, and price points.
Asset History
The Asset History tab provides information on the overall asset history and refrigerant leak history of an asset. This allows you to review information from the work order details page without viewing asset history within the manage asset section of the Assets Module. You can take action by clicking the pencil icon to manage the asset. When viewing:
Refrigerant Leak Record: It shows current information regarding leak record for the asset identified on the work order. You can review all the information by clicking anywhere on the record and clicking on the pencil icon takes you directly to the managed asset page for the asset.
Asset History: Offers insight on the actions taken on the specific asset associated with the work order.

