Adding Notes and Attachments from the Detail View
- Uma Srinivasan (Unlicensed)
- Caroline Antoun
- Maria Tarnopolskaya (Unlicensed)
From the Attachments & Notes tab, you can:
Adding Notes
When adding a note, you may also check Pin Note, Follow Up and Action Required.

- (NEW) Pin Note: Check Pin Note if you wish to pin this note to the top of the work orders notes. It will show up on the List View and Details View and in Dashboard notes for both you and your Provider, signifying this is the most import/pressing note right now for this work order.
- Follow Up: Use the flag if you or your colleagues need to revisit a work order at a later time, for example, to ensure the provider clocked in or updated the work order by the specified date.
The follow-up date appears on the note once the latter is created. Another note is added to the service request when the follow-up date rolls around. The note informs that a notification email was sent to the recipient reminding them that this work order was flagged for a follow-up.

- Action Required: Select this flag to prompt the recipient of the note to take further action on a work order and help yourself track notes that need action to be taken. You can track all work orders with action required notes from the ALP and by filtering in the List View.
When Action Required is checked, you will see Action Required in the bubble on the left of the note and a Resolve button on the right. If you have resolved the issue, you can press the Resolve button here or in the Notes tab under the Work Order Details View.
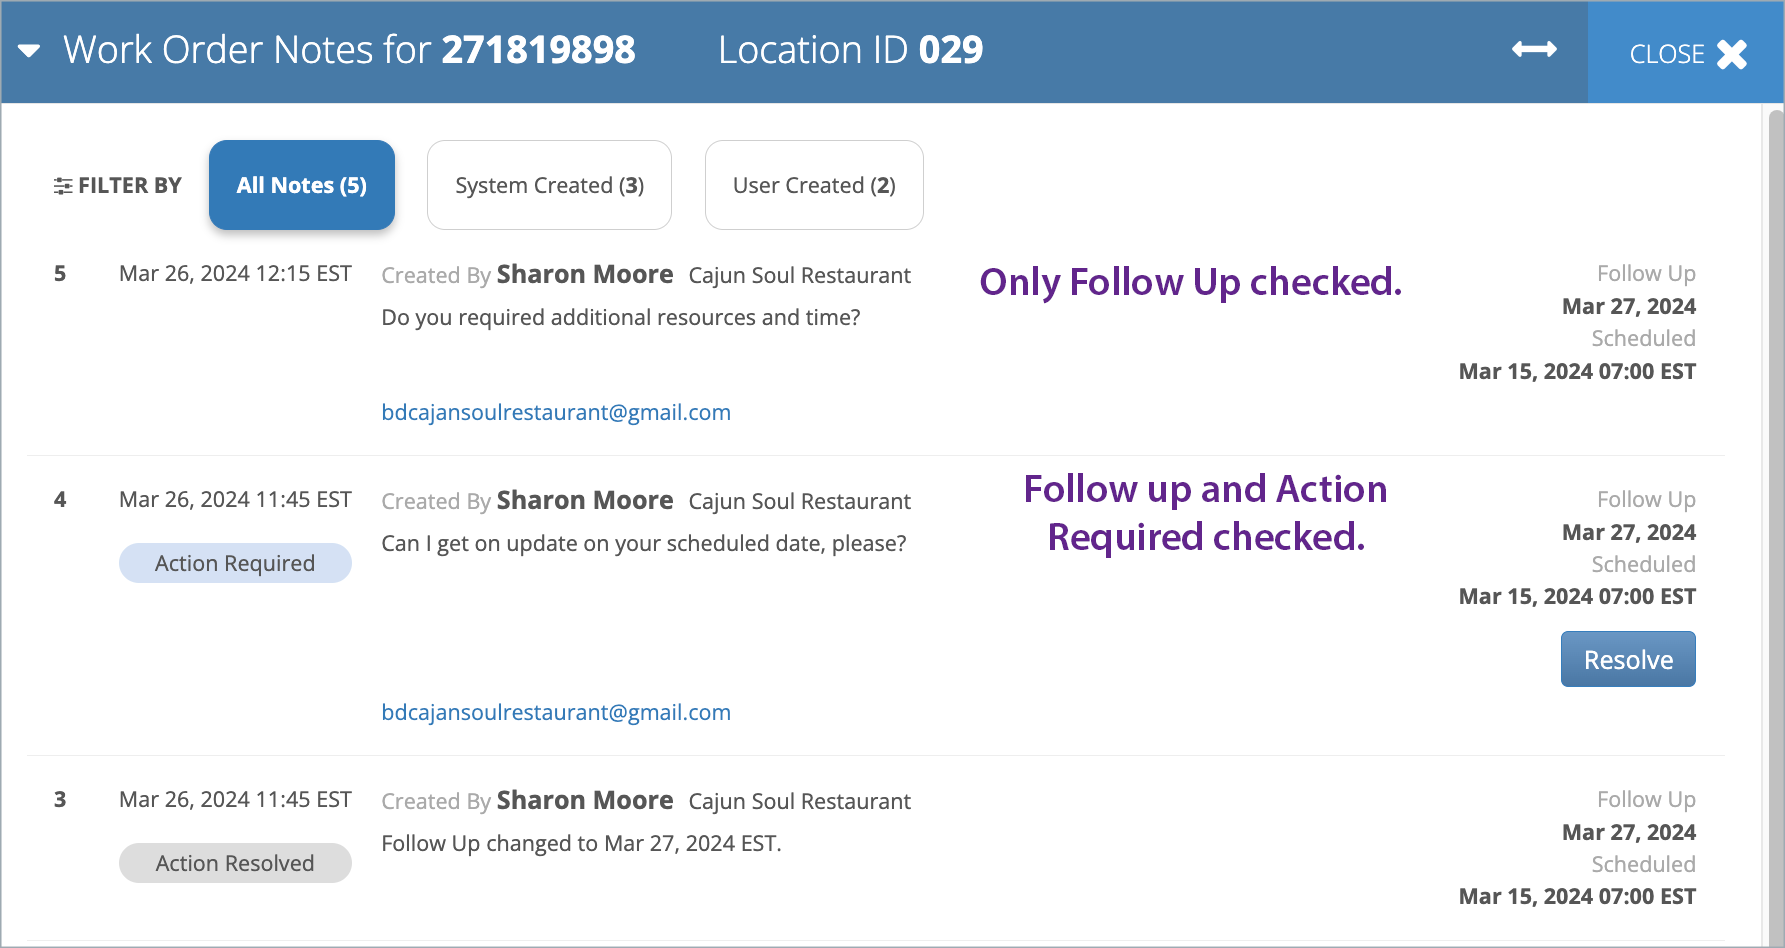
- If you check both Follow Up and Action Resolved, it will create two notes, both with the Action Required bubble and the Resolve button like in notes #3 and #4 above.
- Action Resolved: When the action has been resolved, click on the Resolve button. The Resolve button will disappear and the Action Resolved bubble will show up on the left like in note #3 above.
You may also add a note to multiple work orders. See Editing Multiple Work Orders in Batch for more information.
You may either select a recipient(s) with access to the specific location from the To Send Email Select Addressees list or enter an email address(es) in the or Enter Email Address(es) box.
In addition, you may also add an attachment related to the work order while adding a note. There is an optional feature which allows you to send notes with MS Teams.
- In the detailed view of the desired work order, under the Attachments & Notes tab, click Add Note/Update Schedule Date. The Note <#> for <WO #> window opens.
- Enter your notes in the Notes text box.
- (Optional) Check the Pin Note box to pin this note to the top of the work orders notes.
- (Optional) Check the Follow Up box, and include the Date by which the recipient should respond.
- (Optional) Check the Action Required box.
- Inside the Add Addressee(s) box, type or select the name(s) of the people you wish to copy to the note.
- (Optional) Check the Send a Copy to Myself box, and enter desired email in the My Email box.
- (Optional) Add an attachment:
- In the bottom of the Note <#> for <WO #> window, in the Add Attachment section, click Select a File.
- Browse to the location of the desired file, and click Choose. The selected file appears in the Notes window.
- Enter a brief description about the attachment.
- (Optional) Repeat steps 8a - 8c to add up to 5 files.
- Click Save and Send Note. The note details display in the Attachments & Notes tab. The selected recipients receive email notifications.
When you receive an email notification about a note added to a work order, you can add a new note from the email. In the email, you can see the last and the last but one added note (if any).
- Click Create New Note in the email. You are prompted to log in to Service Automation if you are not logged in.

- You land on the Work Orders List where you can add a new note to the service request.
---OR---
- Reply to the email, and type your note in the reply.
Send the email.
Ensure the original message is included in the reply.
The client gets an email notification about a new note added to the work order.
You may also add a Note to a work order through email by emailing your desired note to <tracking#>@wonote.servicechannel.net. For example, to add a note to a work order with tracking number 84226813, you need to send the note with the tracking number of the work order in the email subject to the following email address: 84226813@wonote.servicechannel.net.
Adding Attachments
You may add up to 5 files to a work order at a time from the Attachments & Notes tab.
You may also use the Attachments link in Work Order Reports to add files. Details of the selected work order appear, from where you can add single or multiple attachments.
You may also add an attachment to a work order through email by sending an email with the attachment to attachments@servicechannel.net with the tracking number of the work order in the email subject. Note that your email client (for example GMail, Outlook, etc.) and/or your company IT may limit the maximum file size that you can send via email.
- In the detailed view of the desired work order, under the Attachments & Notes tab, click Add Attachment in the left side. The Upload Attachment pop-up window opens.
Click Browse a file, browse to the location of the desired file, and then click Choose.
Your attachment can be up to 50MB in size.
- Enter a brief description about the attachment.
- Click Upload. The new attachment displays in the left section under the Attachments & Notes tab.
- In the detailed view of the desired work order, under the Attachments & Notes tab, click Add Note/Update Schedule Date. The Note <#> for <WO #> window opens.
- Enter your notes in the Notes text box.
- In the bottom of the Note <#> for <WO #> window, in the Add Attachment section, click Select a File.
- Browse to the location of the desired file, and click Choose. The selected file appears in the Notes window.
- Enter a brief description about the attachment.
Repeat steps 3 - 5 to add more files.
- You may add up to 5 attachments at a time.
- You can select multiple attachments at the same time by:
- On MAC
- Hold command and Shift
- Select the files you want to add
- Click Open, to add the files to the work order note
- Hold command and Shift
- On PC
- Hold CRT and Shift
- Select the files you want to add
- Click open, to add the files to the work order note
- Hold CRT and Shift
- On MAC
- Click Save and Send Note. The attachments display under the Attachments & Notes tab, and a note appears with the details of the attachments
Deleting an Attachment
In case an attachment is not required, you may also delete it from the Attachments & Notes tab. Note that attachments added through the invoice module can be deleted only by the user who added them.
In the detailed view of the work order, under the Attachments & Notes tab, click the Delete icon next to the desired attachment. The attachment is removed, and no longer displays in the list. A note displays indicating the attachment was deleted.
You can attach digital copies of the provider’s original invoice. Contact your ServiceChannel manager to mark attachments as digital invoice copies.

Attachment Templates
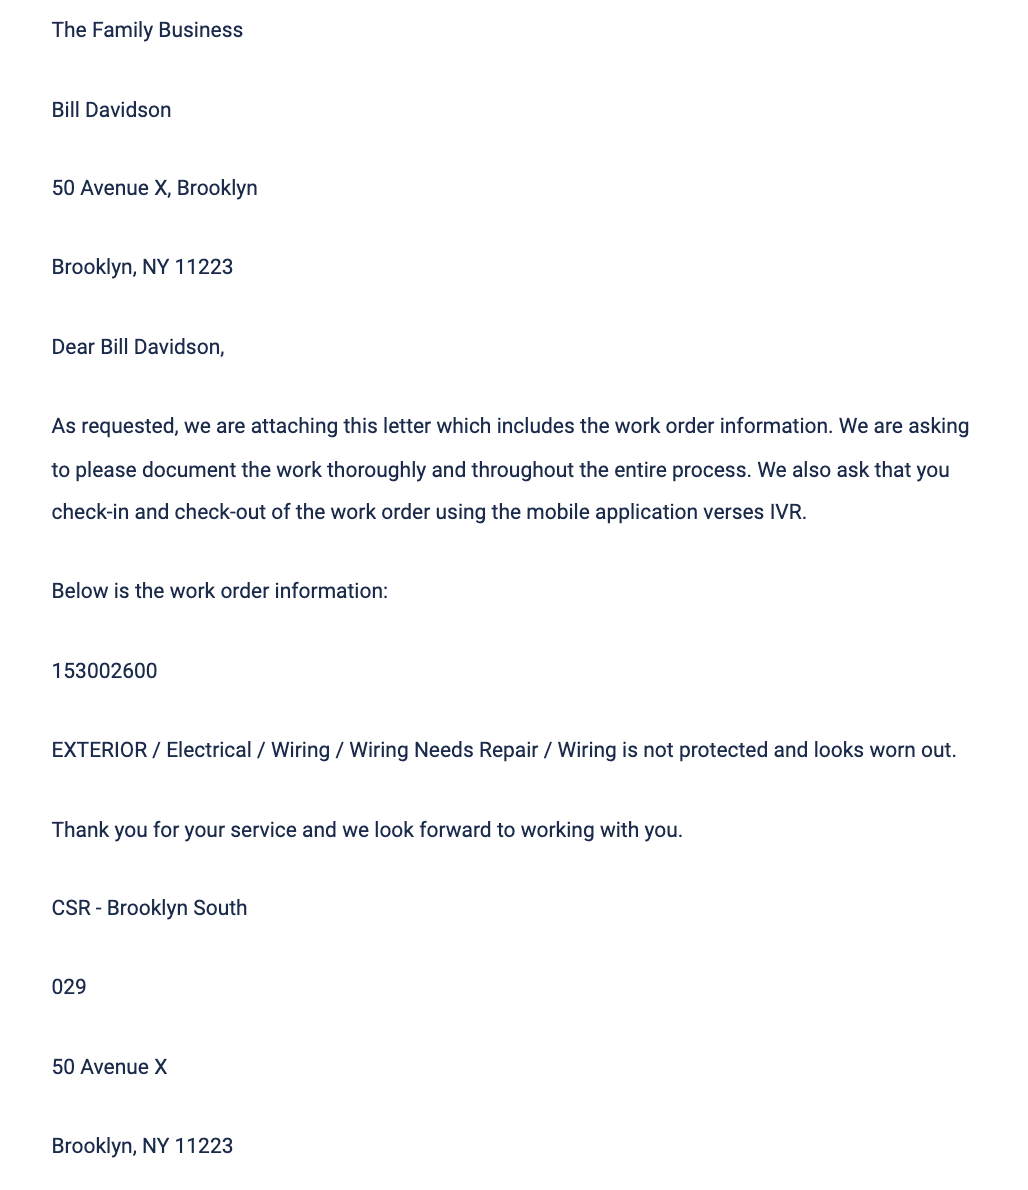
In certain situations, additional documentation is required for a work order once it’s been created, submitted, and becomes viewable in the work orders list view. Using Attachment Templates supports a work order by creating documentation with pre-designated information. For example, for one of your locations, the landlord contributes as a service provider for certain trades. It requires any repair or maintenance requests include a letter supporting any work orders. Instead of having to manually create a letter and physically mail it, an attachment template using Data Points adds information from the work order automatically. Service Automation generates the attachment template which then allows for selecting and attaching onto a work order.
Work with your Customer Support Representative to have any attachment template(s) added into Service Automation for future use.
