Checking in and out of Work Orders in ServiceChannel Provider Mobile
Checking Into a Work Order Using ServiceChannel Provider
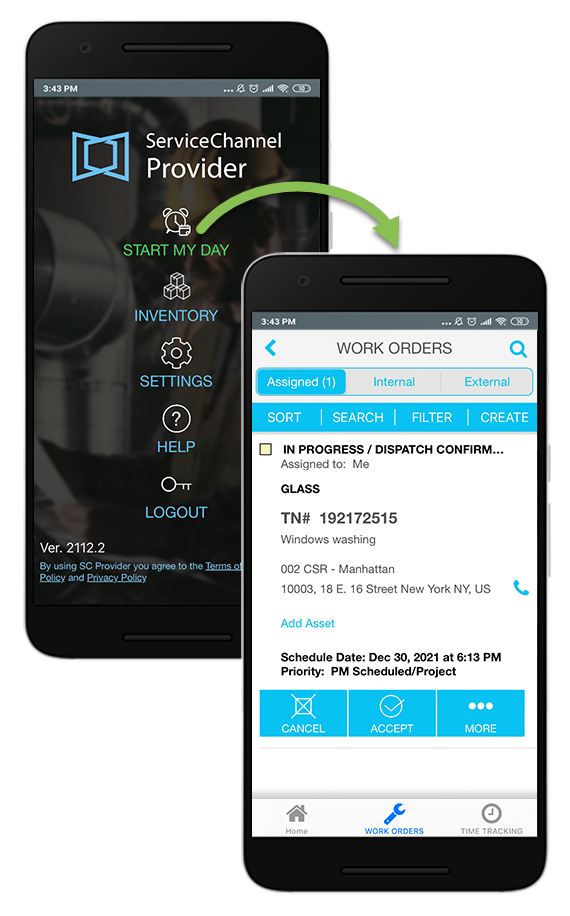
Technicians log in to ServiceChannel Provider Mobile using their email and password combination. Following login, technicians are prompted to Start Their Day.
Technicians are then taken to the work order screen where they can toggle between work orders assigned to them, all work orders assigned to the FTM internal techs group, and work orders assigned to external providers.
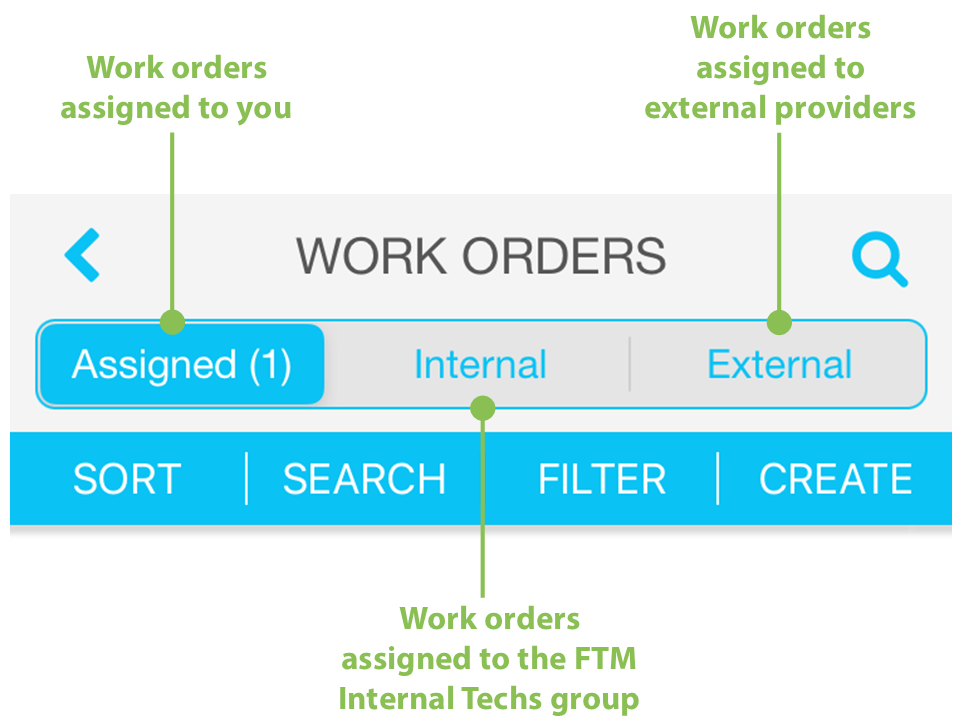
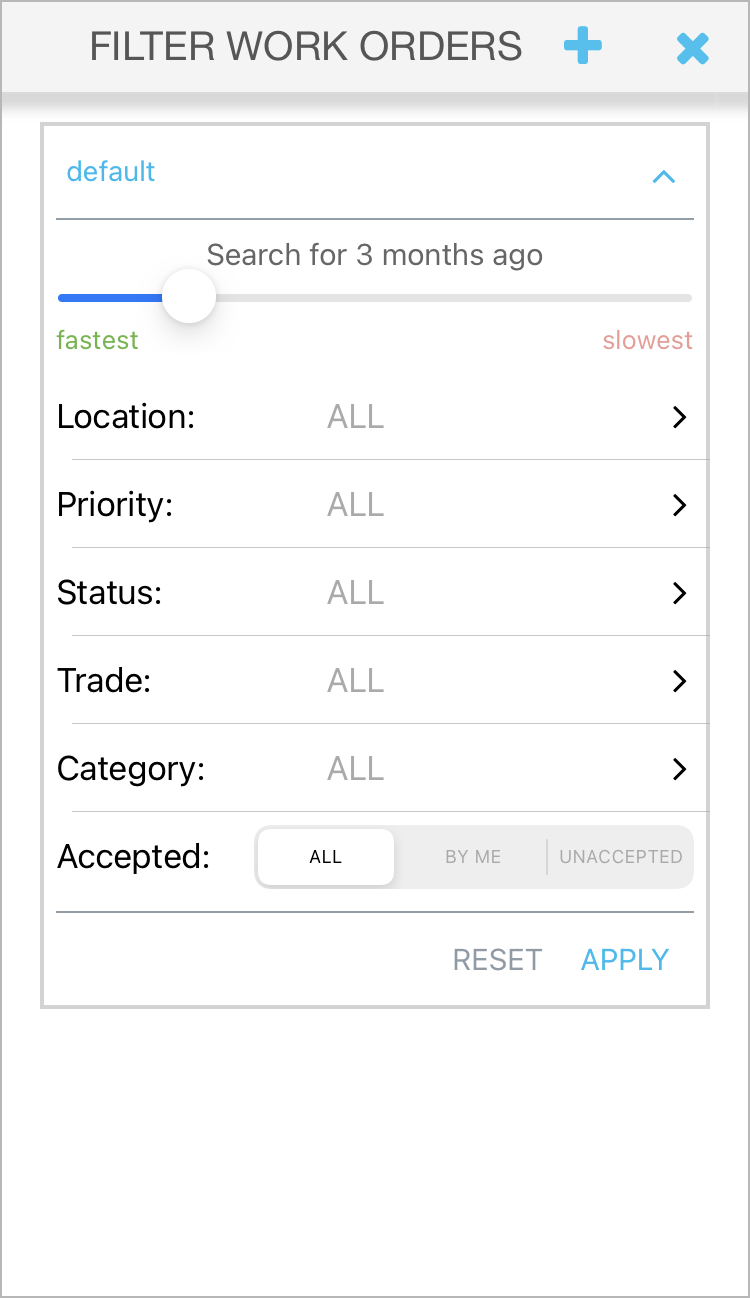
Additionally, technicians can Sort, Search for, Filter, and Create work orders, using the tools along the top of the work orders list view.

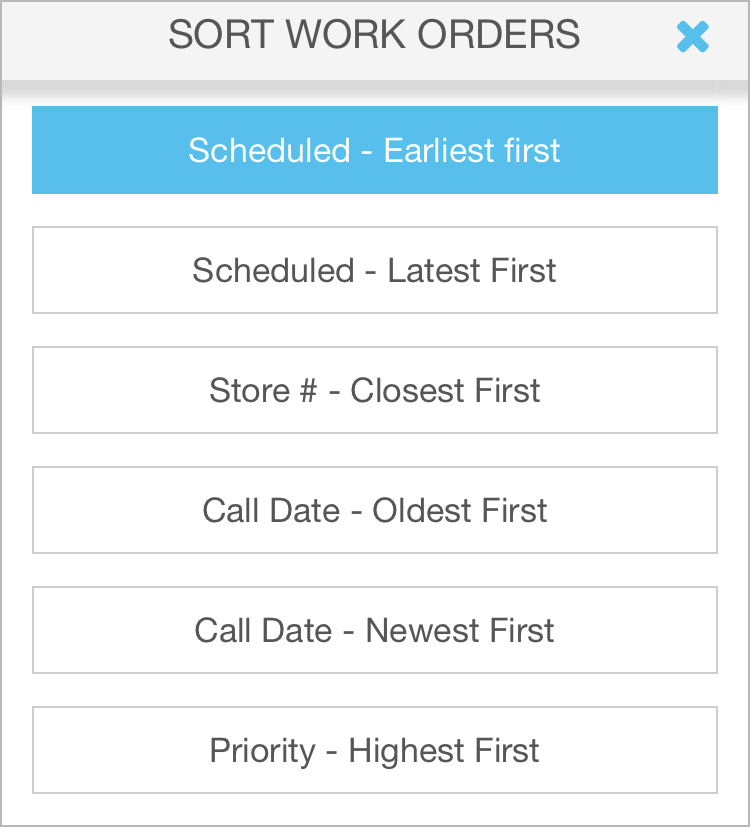

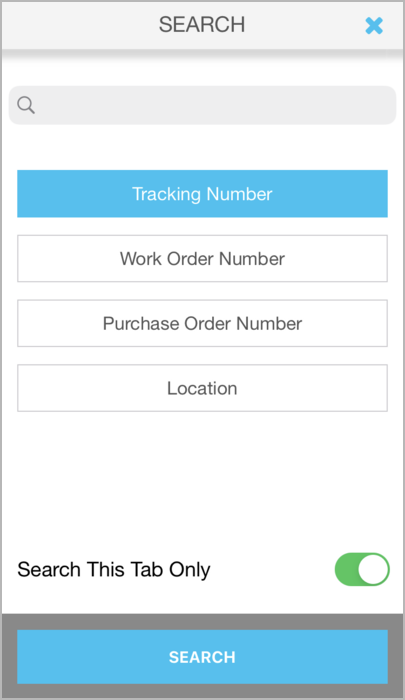

- Locate the Work Order you want to check into by:
- Scrolling through the available list
- Using the Sort tool
- Using the Search tool
- Using an existing Filter or creating a new search filter
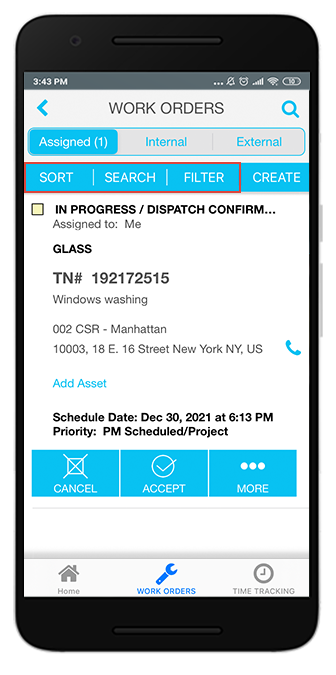
- Tap the Accept button on the desired work order.
Once you arrive onsite, tap Log Time.
Prevent Check-in Outside Radius
If you are not within the specified radius (usually within 1 mile), you might get a pop up screen preventing you from logging in until you are within the specified area.
- Select the type of activity from the list provided, then tap Done, which starts the clock for that work order.
Checking Out of a Work Order Using ServiceChannel Provider
Once you have completed work on a service request, you can check out.
- Locate the work order you are currently checked into.
- Tap Stop to stop the clock on the work order.
Choose a status from the list, and tap Done.
If you check out with the Completed status and the work order belongs to the trade where resolution and root cause codes are used, you need to pick the codes right after selecting the Completed status for the work order. If no appropriate resolution code or root cause is listed, you can select Add New Resolution Code / Add New Root Cause Code at the bottom of the screen and enter your understanding of the resolution or root cause in the text field that appears. You can specify up to three resolution codes and one root cause — either standard or custom. If you add an erroneous code, you can edit it in Provider Automation at a later time.
Click here to see how to add resolution and root cause codes.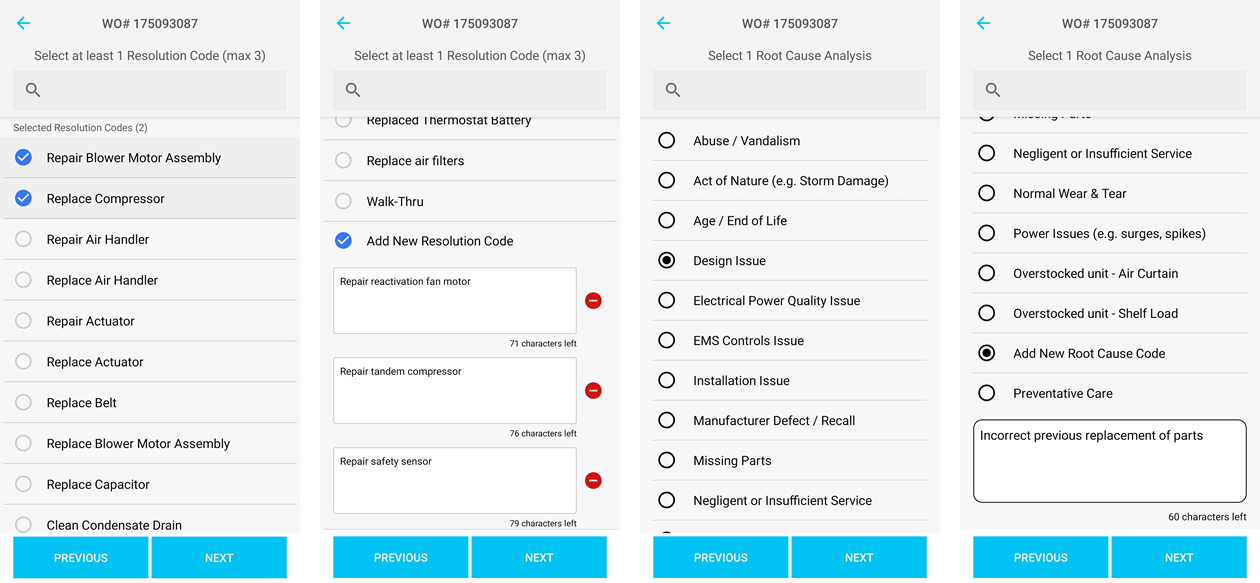
- Add a description of the work done in the Work Summary field, then tap Submit.
Adding Required Electronic Signatures for Work Orders
Clients can require electronic signatures during the check-out process of a work order. This means as part of the completion process, you must add the signature of a work order. If a signature can’t be added, a reason must be given as to why you are not able.
Starting and Stopping the Repair Clock Work Order Using ServiceChannel Provider
There may be times when a technician will need to stop the work order clock before they have completed the work required. This could be due to a more pressing repair needed or the need to travel for a part. In either case, a technician can stop the clock on a work order, then resume working on that work order at a later time.
- Find the work order you are logged into.
- Tap Stop to stop the clock on the work order.
- Select Incomplete or Stop Repair as the status. This will allow the technician to resume work on the work order.
-
Page:
-
Page:
-
Page:
-
Page:
-
Page:
-
Page:
-
Page:
-
Page:
