Setting Up a Planned Maintenance (PM) Service
Setting Up a Planned Maintenance (PM) Service
The Planned Maintenance module allows flexibility in how you want contractors to accept maintenance requests, how maintenance work orders are dispatched, how maintenance work orders are invoiced, and who is notified about maintenance services.
Once a PM service is set up, the following actions will occur:
- A work order will automatically generate for scheduled PM service and load based on the frequency cycle it is set for.
- A dispatch email will be sent to the contractor, alerting them their PM work order has been generated in the system.
- The work order will display on the Dashboard Summary Calendar so that the service manager will be alerted that a PM service has been scheduled.
Watch the video on how to mange planned maintenance services below or read this article till the end.
.jpg?version=1&modificationDate=1655280706662&cacheVersion=1&api=v2&width=600&height=337)
Adding a Planned Maintenance Service
- Navigate to PMs > PM Services. The list of PM Services currently in the system will display.
- Click Add New Service. Only add a new service if it does not currently exist in the system.
.png?version=1&modificationDate=1638956140437&cacheVersion=1&api=v2&width=600&height=298 "Navigating to PM services")
- Enter your desired information. The following fields are required (the descriptions for the remaining fields are listed in About PM Module Terminology):

- Trade*: Select the Trade Name as configured in Service Automation Admin. Contractors are attached to each location and trade name.
- Category*: Select the category into which you wish the work orders to load. The best practice is to use “Maintenance” as the category. By selecting “Maintenance,” the work order will display in the Dashboard. The work order will also expire at the end of the length of the work order.
- Priority*: Select a priority name. For PM Services the priority is usually Scheduled, Contracted Services, or 30 Days.
- FullStatus: The Status of all work orders generated through Planned Maintenance should be in when the service provider receives it. Typically, it is in the Open status.
- Description*: Enter the type of PM Service which will show on the work order to the contractor (for example, HVAC PM Service, Fire Extinguisher PM, Pest Control Planned Maintenance Service). The best practice is to enter a brief description of the type of service and to not enter Frequency or Service Provider in this area. The Frequency will be entered in the next step.
- Click Add New PM Service. The new service will display on the PM Services page.
The locations column will display how many locations are attached to that PM Service so you can easily make sure all locations are accounted for. Once you click on the frequency it will break down how many locations are attached to each frequency.
Editing a Planned Maintenance Service
You can edit or deactivate existing PM Services from the Services List. This list will appear on the PM Services page and also on the PM Locations page when you have selected a Location.
Whenever you make a change to PM Services, Locations, or Frequencies, the changes will not affect work orders that have previously loaded.
- Navigate to PMs > PM Services.
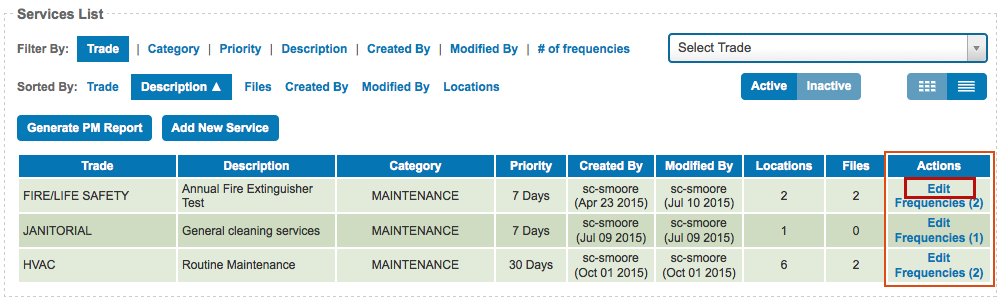
- Click Edit in the Actions column for the PM Service, you would like to modify.
- To edit a service, make your desired changes in the pop-up. (See About PM Module Terminology for more information about each of the fields.)
- Click Save.
Activating and Deactivating a Planned Maintenance Service
Once a PM Service is entered into the system, you can deactivate it when it is no longer needed.
A PM Service cannot be deleted. Deactivated PM Services can be reactivated and used again.
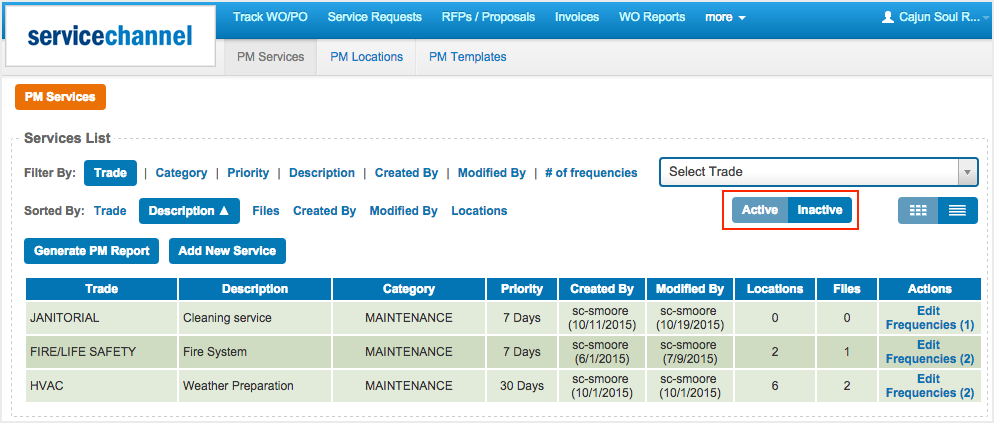
- Navigate to PMs > PM Services.
- Click Edit in the Actions column for the PM Service, you would like to Deactivate or Activate. You may need to click the Inactive filter button to see those services that are not currently active.
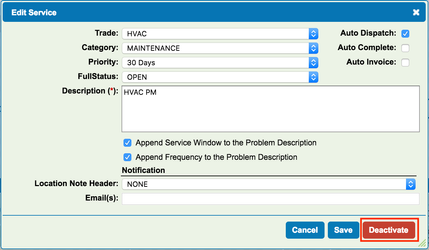
- You can now deactivate or activate the service:
- To Deactivate a service: Click the red Deactivate button. The service will be immediately deactivated and the Services List will appear. You can click the Inactive filter button to verify it is no longer active.
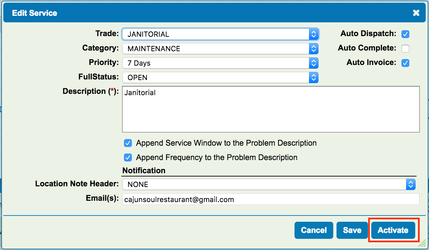
- To Activate a service: Click the blue Activate button. The service will be immediately activated and the Services List will appear. The service will maintain any previous settings you set up before deactivating it. You can click the Active filter button to refresh the list and verify it is active.
- To Deactivate a service: Click the red Deactivate button. The service will be immediately deactivated and the Services List will appear. You can click the Inactive filter button to verify it is no longer active.