Using PM Templates to Manage PM Work Orders

Should you need assistance with completing this template, please reach out to your ServiceChannel Account Executive. 

Adding an Attachment to PM Template

When uploading a PM template, you can include one attachment during the process and the file attaches to each work order when finalized. Adding a file allows for instruction, information, or images to be included during the original upload process and allows technicians to receive all the information at once. When a PM template is uploaded with an attachment, work orders are created and immediately visible on the list view and a system note is created for each work order. The attachment loaded with the PM template can be accessed on the ServiceChannel Provider App, the ServiceChannel Mobile App, and within the notes section of the work orders on the desktop. In addition, if the PM template loaded has the ‘AutoDispatch’ column set to TRUE or is left blank, a nightly email is sent to the service provider that includes a CSV file and a link to the attachment that was loaded. You must have the Power User secondary role in order to upload PM templates.
Formatting Alert: UTF-8 Format Required
When uploading information in the form of Spreadsheets, Templates, Text Documents and or copied and pasted to Service Automation or Provider Automation, the Content must be UTF-8 formatted. Content that is not UTF-8 formatted may be misread by our system and cause errors in how your data is interpreted.


 Windows Specific

Windows Specific

Open file in Notepad

Choose Save As

There are three items to update in the Save dialog that comes up.

Save as type: change this to All FilesFile

Name: name your file and add the .csv extension to it - e.g.: myupdates.csv

Encoding: click on the dropdown and choose UTF-8

Save!

 MAC Specific


Mac Specific

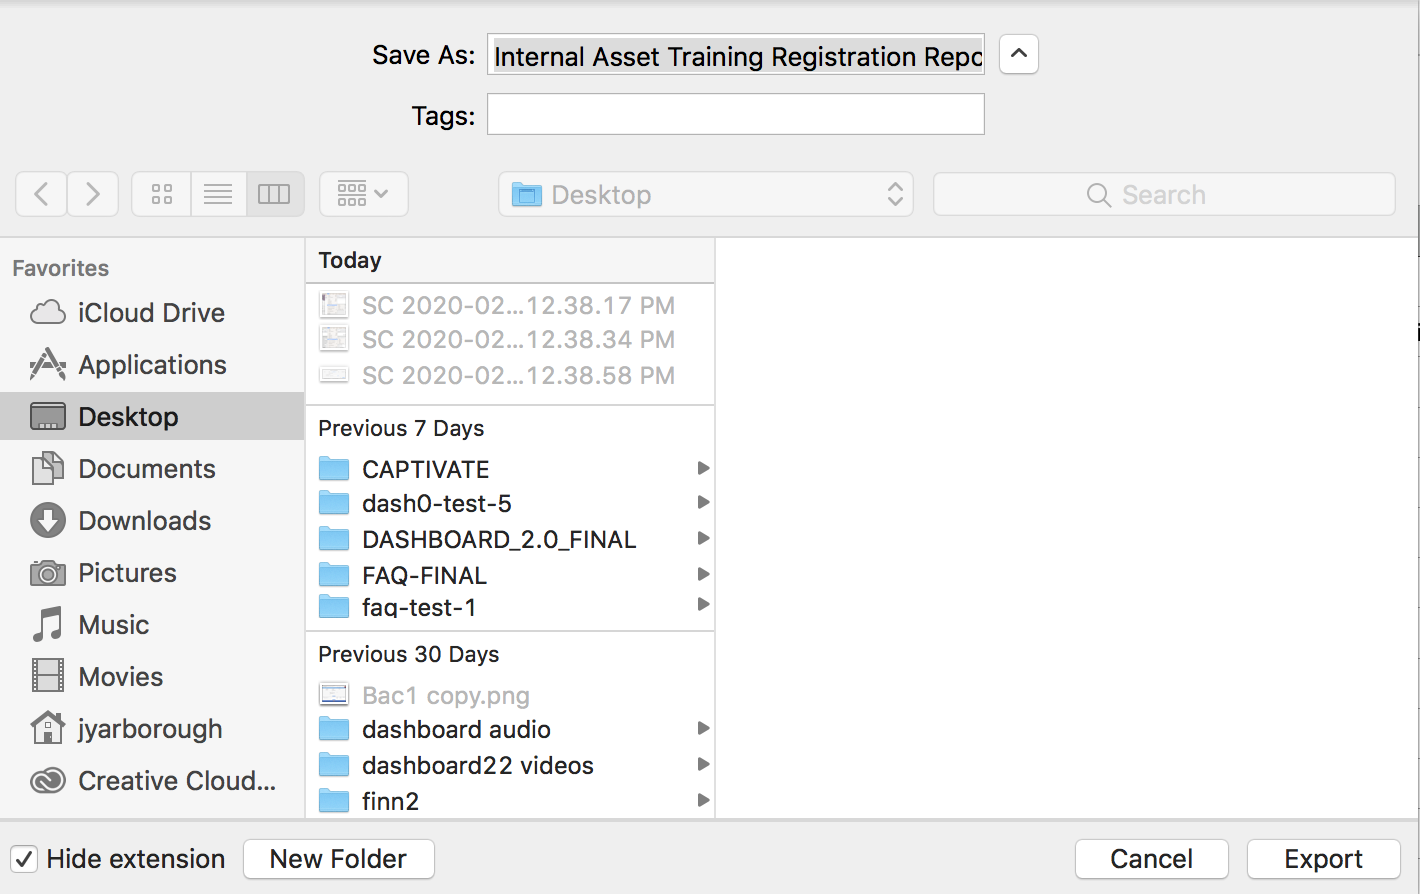
  1. Open file in Number
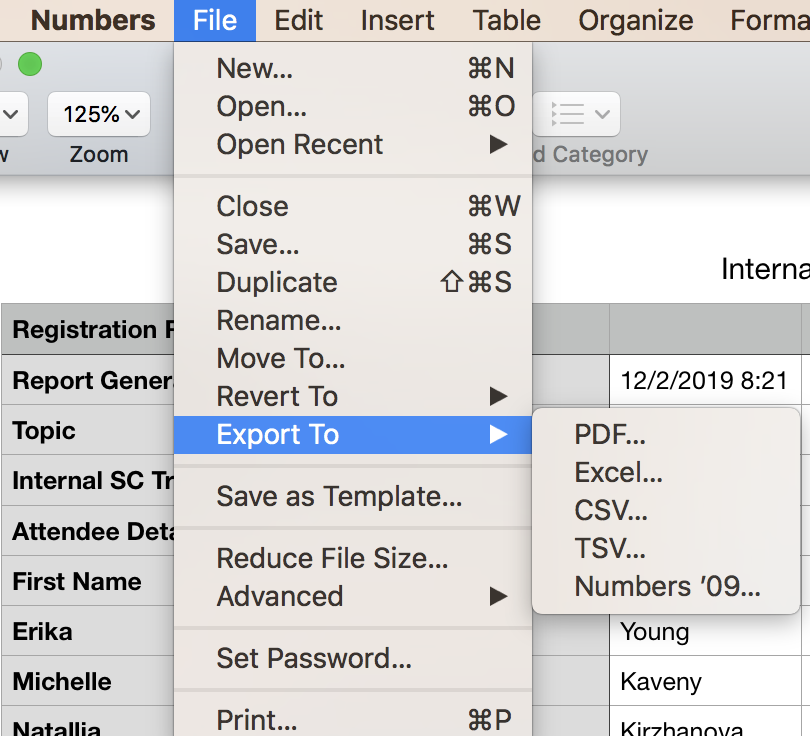
  2. Hover over Export

  3. In the submenu that appears, choose CSV
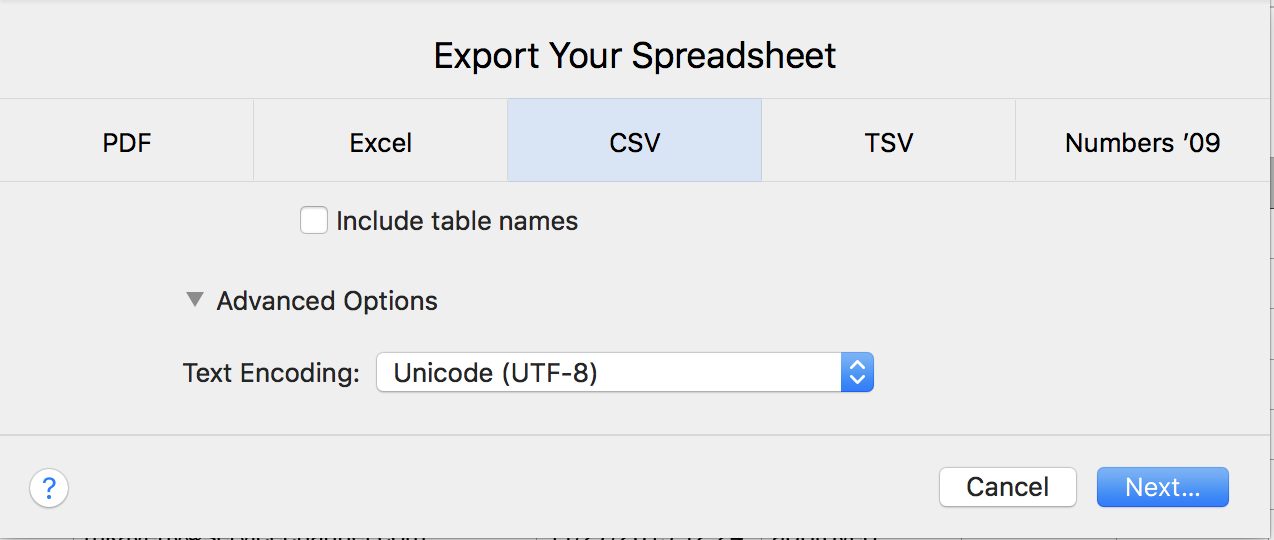
  4. Click on Advanced Options to show the Text Encoding dropdown
  5. Select Unicode (UTF-8) from the dropdown menu

  6. Click Next Export!


 Google Sheets Specific

Google Sheets

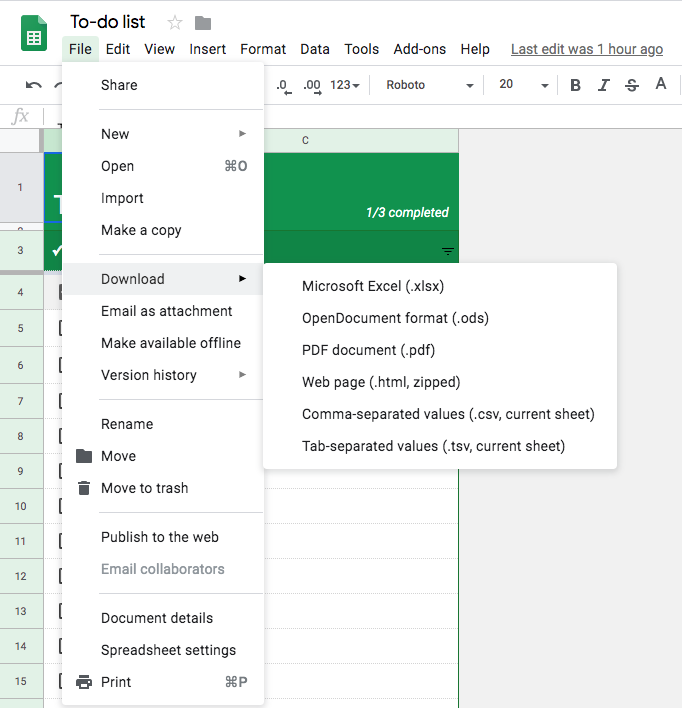
  1. Click File
  2. Click on or hover over Download As

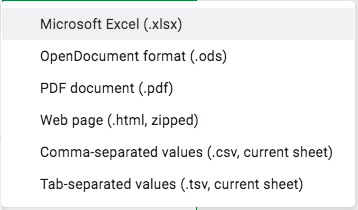
  3. Choose the option Comma-separated values (.csv, current sheet)

  4. After clicking on that option, your file will be automatically downloaded to your computer


Uploading a New PM Template

⦿ How to Download a Template
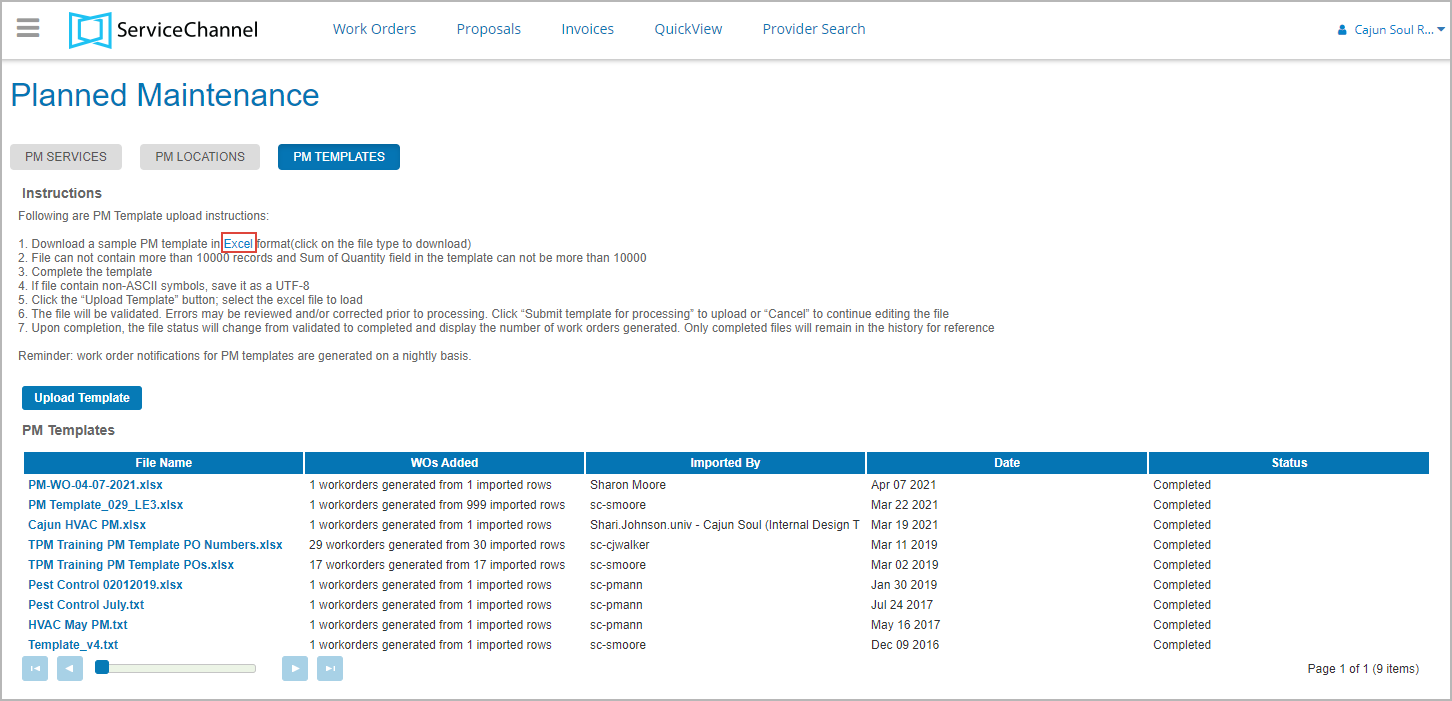
  1. In the hamburger menu, navigate to Planned Maintenance > PM Templates. The PM Templates page opens. 
  2. In the Instructions area, click the Excel link to download an empty PM template.
    Click the Excel link to download a template
    The empty PM template in the MS Excel format is downloaded to your device.

Should you want the template to be translated into your language and support international date formats, contact your ServiceChannel representative.  


⦿ How to Complete and Upload the PM Template
  1. Open the downloaded MS Excel file.
  2. Complete each column for each work order you wish to upload. The columns highlighted in yellow are required. (See Column Descriptions in the PM Template for column explanations.)
  3. Save the template as an XLSX file.
  4. Click Upload Template.
  5. When the template is uploaded, the system will validate it:
    1. If validation passes, the Validation Results section will show that all template records are valid. The template will be added to the PM Templates list with the status Validated.
      The template is successfully validated
    2. If validation fails, the Validation Results section will display which template records are valid and which ones have errors.
      The Line # column displays the rows where the errors have been detected; the Error column provides the error descriptions for each line.

      If validation failed with error records, click Cancel
      1. Click Cancel.
      2. Correct the errors.
      3. Save and upload the template again as in steps 3, 4, 5a.
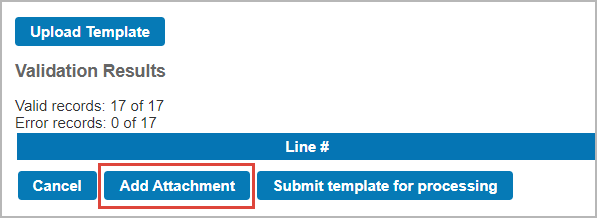
  6. (Optional) Click Add Attachment to select and upload one file to be attached to the Planned Maintenance work orders when they are generated.

    If you need to change the attachment, repeat the step of adding an attachment before submitting for processing.

    Click Add Attachment to attach a file

  7. Click Submit Template for Processing.
    When the processing is over, the status changes to Completed and the work orders are automatically generated.
    The template is successfully completed and PM work orders are generated