Planned Maintenance Module Terminology
- Joseph Yarborough (Unlicensed)
- Anastasia Medovkina (Deactivated)
- Uma Srinivasan (Unlicensed)
- Jing Tong (Unlicensed)
This page provides additional details for setting up new services and frequencies in the Preventative Maintenance module in Service Automation. Below you will find screenshots of the Add New Service and Add New Frequency windows and the definitions of the terminology used in them.
Add New PM Service Terminology
You can find the following field names and definitions on the Add New Service overlay in the Planned Maintenance module. To access this overlay, navigate to PMs > PM Services, and click Add New Service.
.png?version=1&modificationDate=1643785634372&cacheVersion=1&api=v2&width=600&height=442)
Add New Planned Maintenance Terminology
Field Name | Description | |
|---|---|---|
| 1 | Trade | The drop-down list to select trade name (type of provider). Contractors are attached to each location and trade name. |
| 2 | Category | The drop-down list for selecting the category you want the work orders to load into. The best practice is to use “Maintenance” as the category. By using “Maintenance”, the work order will display on the Dashboard Summary Calendar with the Clock icon (versus the Spanner icon). The Spanner icon indicates repairs, and the Clock icon indicates maintenance.
|
| 3 | Priority | The drop-down list to select priority name. For PM Services the priority is usually Scheduled, Contracted Services or 30 Days. |
| 4 | FullStatus | The drop-down list with Status/Extended Statuses, where you may select which Status/Extended Status work orders will be generated/loaded into. The main statuses are listed below.
The extended status, which follows the status, describes the current state of the work order. |
| 5 | Equipment Type | The textbox specifies non-traditional assets, for example, a parking lot. It allows monitoring the spending associated with the upkeep of the equipment/asset. You can enter a specific equipment type and, when work orders for this service will be generated, the Equipment/Asset Type field (Work Order List > Edit a Work Order > Edit Problem Description > Equipment/Asset Type field)will be automatically populated with the equipment type you've entered. Contact your Customer Success Manager to enable the feature. |
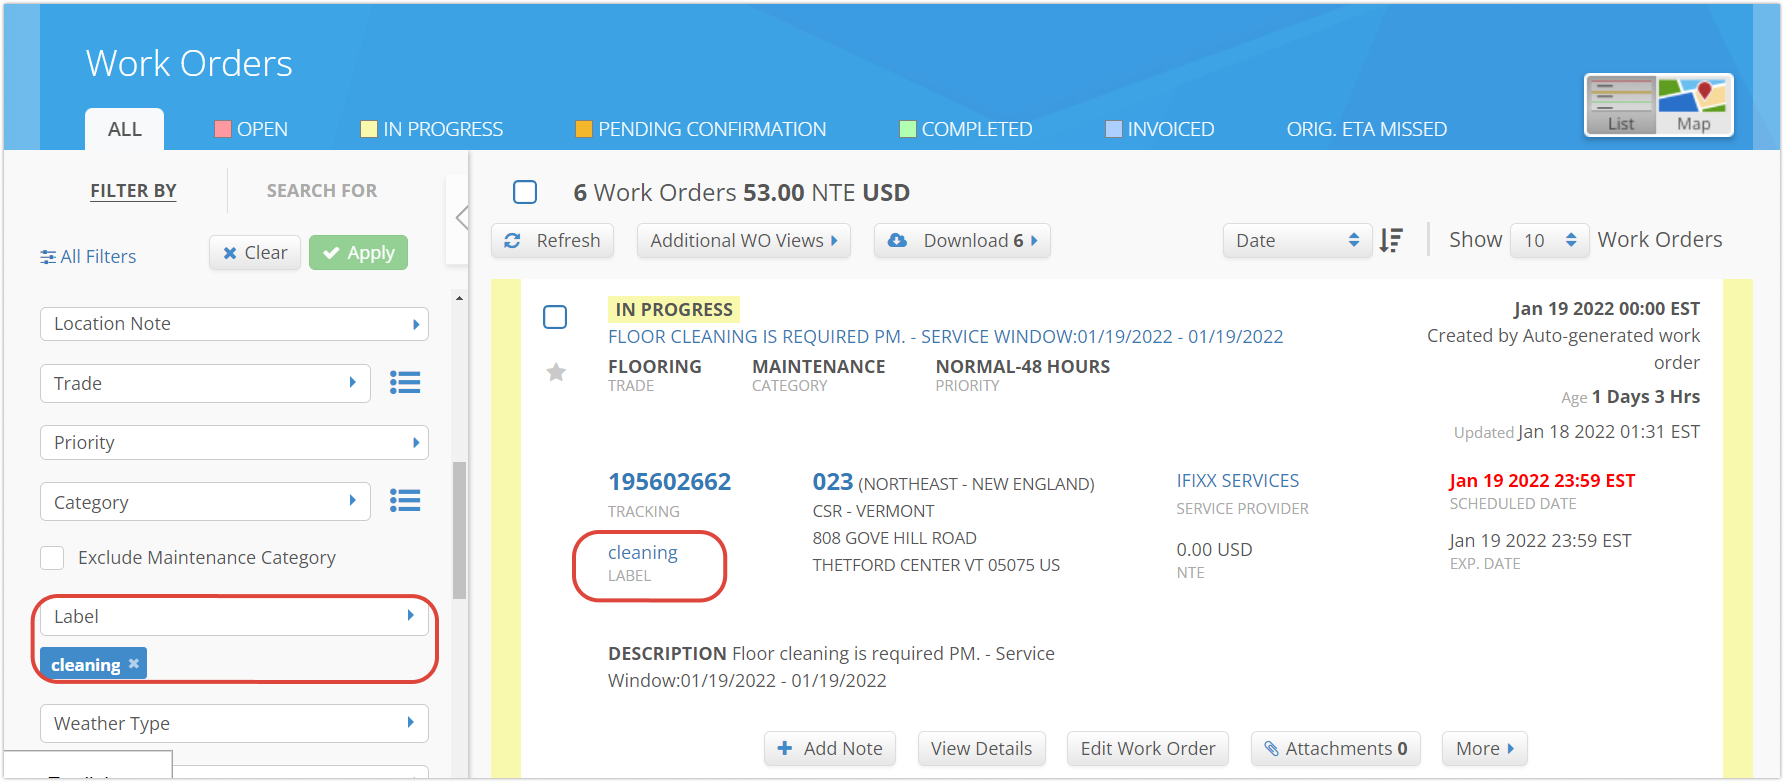
| 6 | Label
| The textbox is used to simplify the work order search in the list. When entered, it will appear on the work order details preview. You can also find your work order by entering the label in the filter.
|
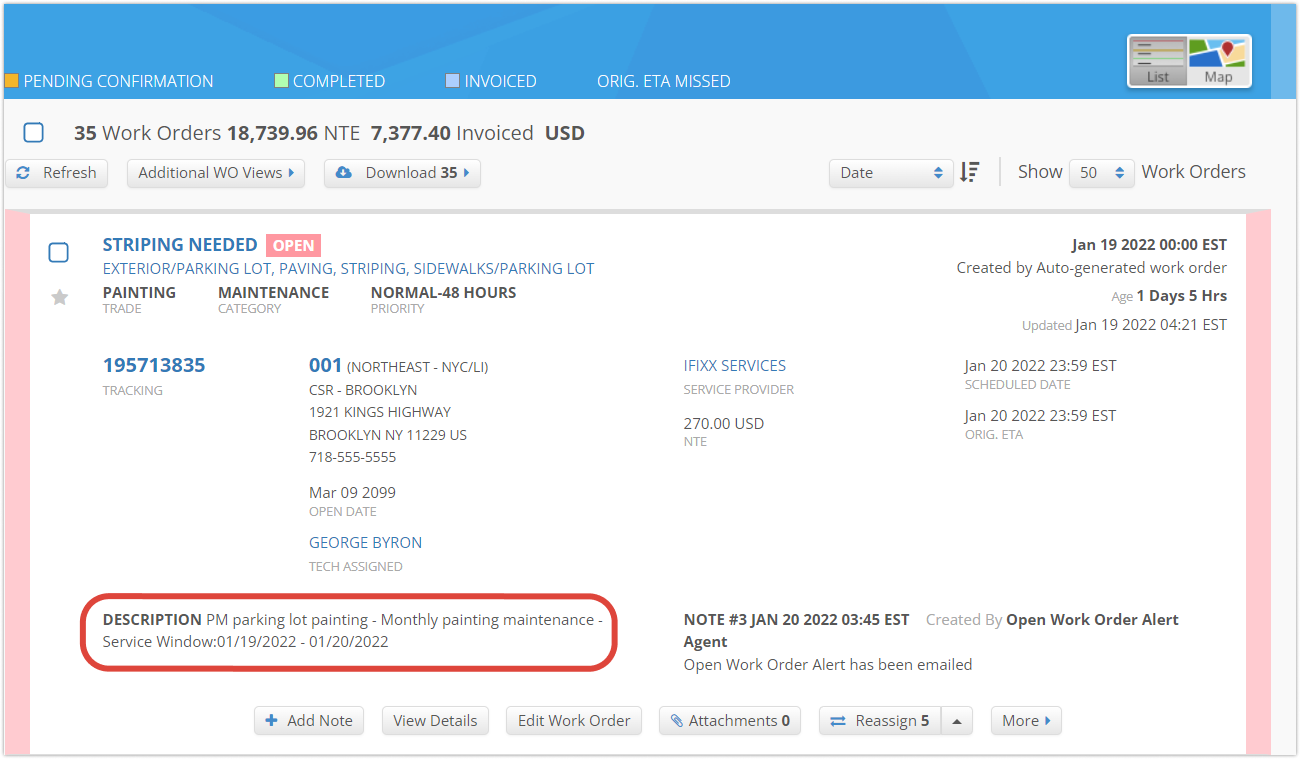
| 7 | Description | The textbox to enter the type of PM Service which shows on work order to contractor. Example: HVAC PM Service, Fire Extinguisher PM, Pest Control Planned Maintenance Service, etc. Best practice is to enter a brief description with type of service and to not enter frequency or contractor in this area. The frequency will be entered in the next step. |
| 8 | Append Service Window to the Problem Description | If this box is checked, a service window appears on the work order showing the length of time the service must be completed within. Example: A work order will show a service window of 1/19/2022 through 1/20/2022. This lets the contractor see the exact time frame that the service must be completed within.
|
| 9 | Append Frequency to the Problem Description | If this box is checked, the frequency description located in the Frequency area will appear directly after the service description, showing a more detailed description. Example: If the PM Service description box contains “PM Parking lot painting”, and the Frequency description box contains “Monthly,” when the work order loads it will read “PM Parking lot Monthly.”
|
| 10 | Location Note Header | When selecting a Location Note Header, the email attached to that Location Note Header will be notified 5 days before work orders load. It’s a pre-notification alert giving you (the client) time to stop or make changes before the work orders load. |
| 11 | Email(s) | The pre-notification alert can be sent to an actual email address instead of Location Note Header mentioned above. Note: If a Location Note Header is selected and an email address is entered, alerts will only be sent to the email address, not to the email address attached to the Location Note Header. Therefore, if you want to receive pre-notification before PM Service work orders load, then you will either need to have it sent to a Location Note Header or a specific email address, but not both. If you do not want to receive pre-notification alert then leave both the Location Note Header and Email blank. |
| 12 | Auto Dispatch | If this box is checked, the contractor will receive a dispatch email with an attached list of tracking numbers. This box defaults to being checked so uncheck only if you do not want the contractor to be notified when work orders load. Note: The contractor will only be sent one email with attached list of all tracking numbers. |
| 13 | Auto Complete | If this box is checked, work orders will auto-complete at the end of the frequency period without the contractor needing to check in/out. Check this box only if you do not expect the contractor to IVR in and out. Example: If a monthly work order loads at the end of the month the work order will automatically go from Open status to Completed status and be ready to invoice. |
| 14 | Auto Invoice | If this box is checked, the system will automatically create the invoice once the work order is in Completed status. Only use the Auto Invoice feature if the pricing for each location is 100% correct. Additionally, if Auto Invoice is checked, the system will generate an invoice number. Therefore, if a contractor wants to use his own invoice number, do not use the Auto Invoice feature. |