If you have enabled the Open Invitation option, service providers will be able to send requests to join your private network. Please contact your ServiceChannel representative for more information on how to enable this option.
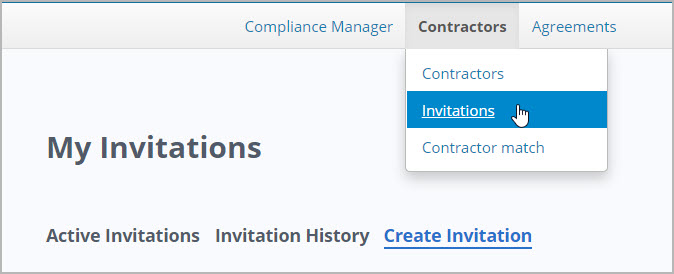
- On the Compliance Summary page, hover your mouse over the Contractors tab, and then in the displayed list of options, click Invitations. The Active Invitations page displays.
- Click Create Invitation.
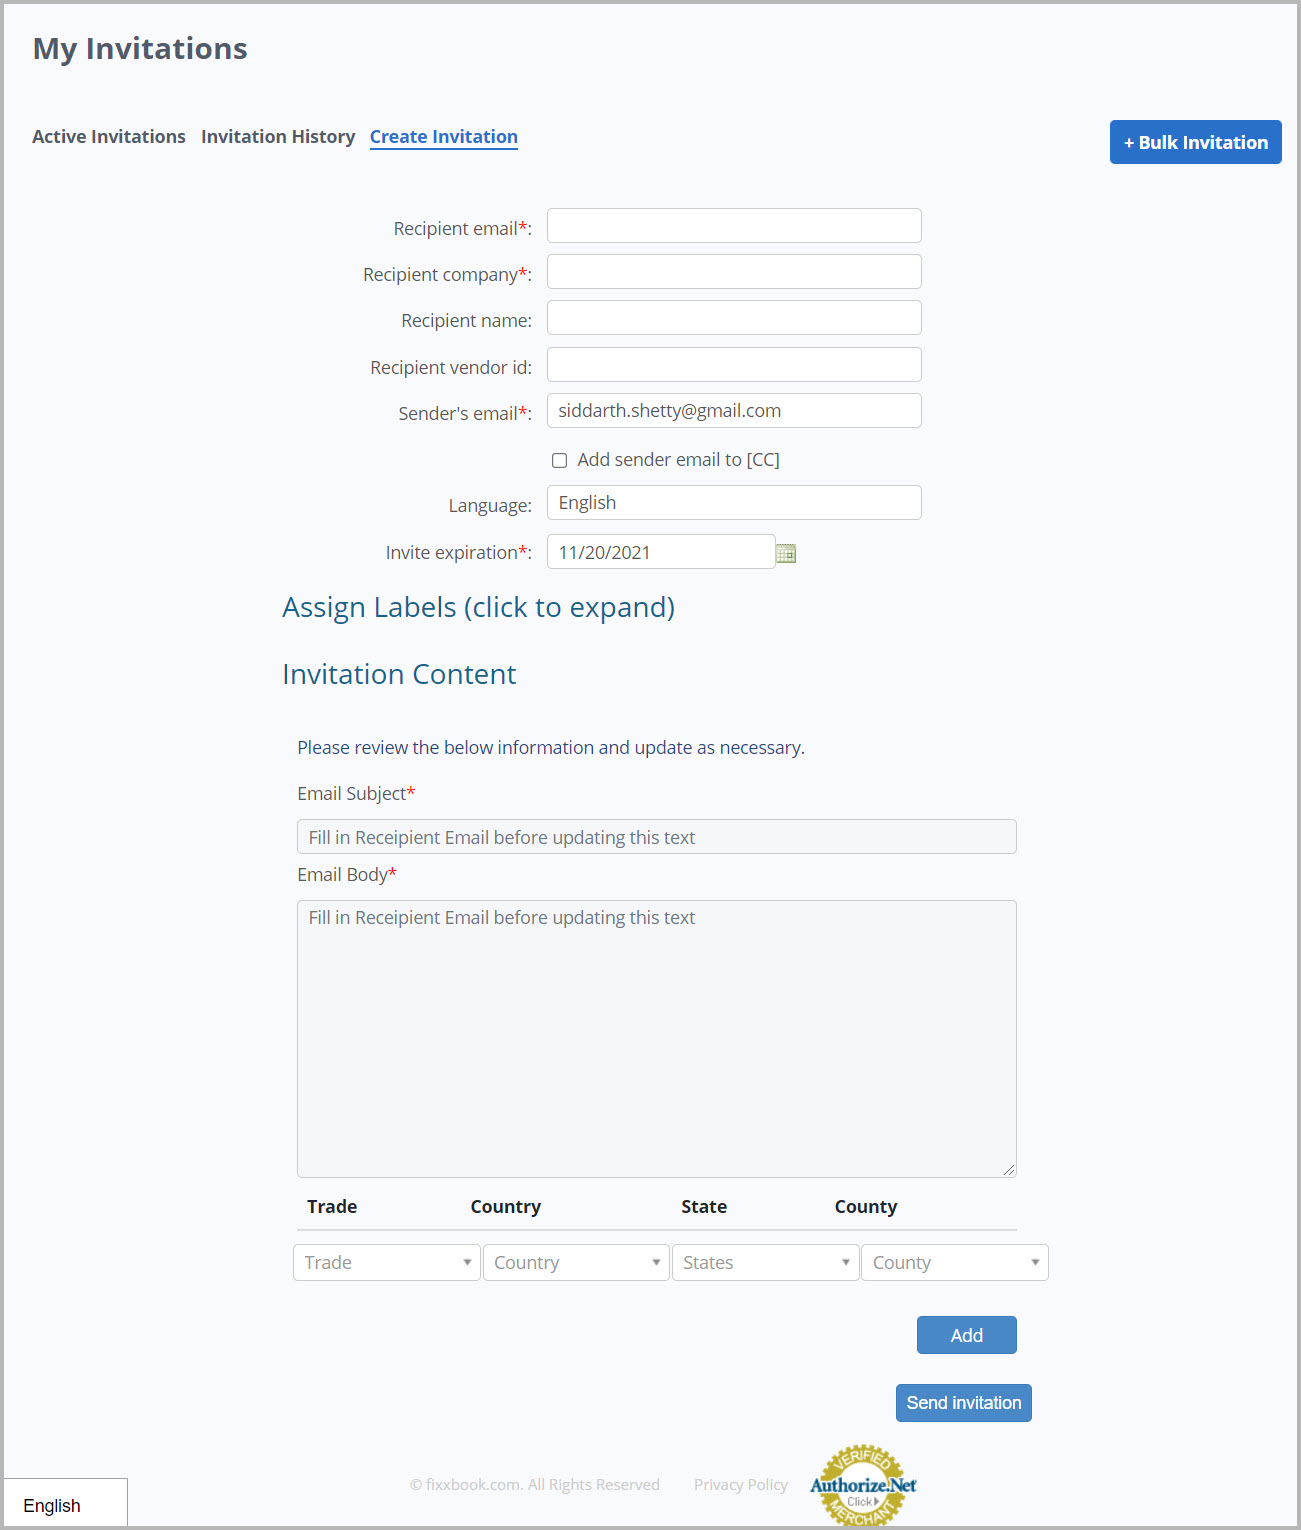
The Create Invitation page displays, with the Sender's email and Invite expiration date auto-filled. - In the Recipient email box, enter the service provider’s email.
- In the Recipient company textbox, enter the provider company name.
- (Optional) Enter the Recipient name.
- (Optional) Enter your company’s unique identification code for the service provider in the Recipient vendor id text field.
- (Optional) Select the checkbox next to Add sender email to [CC] to receive an email copy of the invitation.
- (Optional) Click the calendar and select a new date to change the default expiration date.
- (Optional) Click Assign Labels to assign a label to the invitation, and then in the list of labels displayed, select the checkbox(es) next to the required label names.
(Optional) Edit the prefilled Email Subject and Email Body.
The Email Body field holds a maximum of 7500 characters.
- (Optional) To add trade and region, in the Details for Trades section, select the trade, country, state, and county in the appropriate drop-down lists, and click Add. Repeat this step to add more trades.
- In the Email Signature textbox, enter the desired information.
- Click Send Invitation. The invitation is sent to the service provider.
- On the Compliance Summary page, hover your mouse over the Contractors tab, and then in the list of options displayed, click Invitations. The Active Invitations page displays.
- Click Create Invitation. The Create Invitation page displays.
- Click Bulk Invitation.
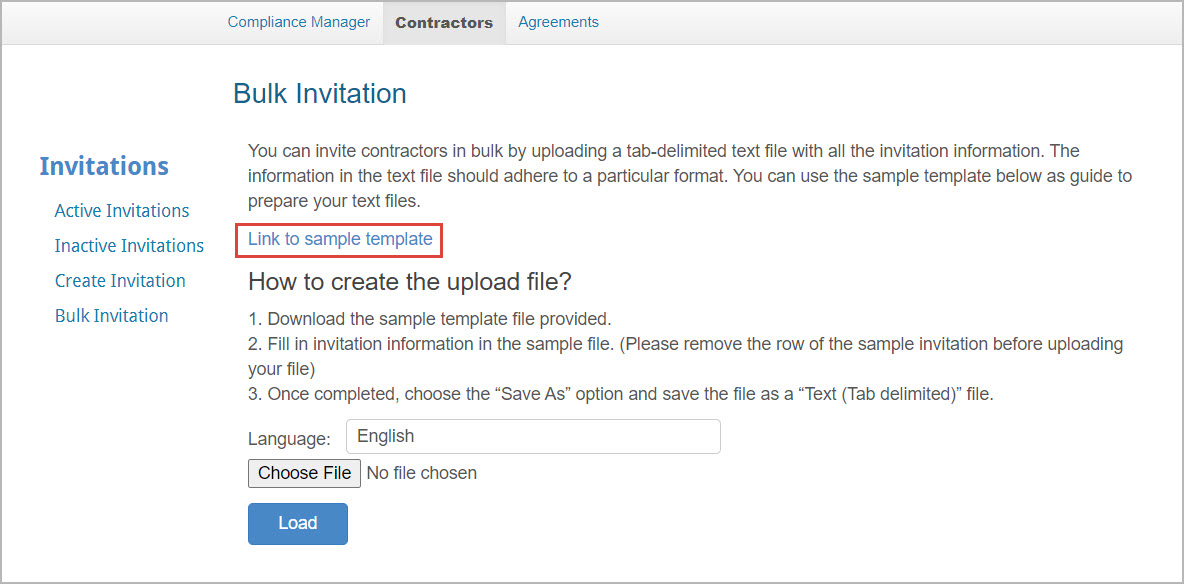
The Bulk Invitation page opens. - Click Link to sample template, and follow the on-screen instructions to complete downloading the template.
- Open the file, and delete the sample data provided. Enter the company information, recipient email, expiration date for each invitation, and other optional fields for each invitation you want to send.
- Save the file as Tab Delimited Text. Follow the on-screen instructions to continue saving the file in tab delimited text format.
- On the Bulk Invitation page, in step 3, click Choose File and select the required file.
Click Load. The Bulk Invitation page is refreshed and the list of recipients displays, along with the rest of the information fields needed to send the invitation.
- (Optional) Edit the prefilled Sender's Email when required.
- (Optional) Select the checkbox next to Add sender email to [CC] to receive a copy of the invitation email.
- (Optional) Select the checkbox(es) next to the required label names to assign a label(s) to the service providers you are inviting to your network.
- (Optional) In the Invitation Content section, edit the Email Subject, Email Body, and Email Signature if required.
- (Optional) To add trade and region, in the Details for Trades section, select the trade, country, state, and county in the appropriate drop-down lists, and then click Add. Repeat this step to add more trades.
Click Send Invitations.
Note that the Action/Error field name changes to Result after you send the invitations.


