Accepting or Declining the Provider into Your Network
You can accept providers to your Private Network if they have met your requirements or you can decide to decline some of the invitations.
Accepting Provider’s Invitation
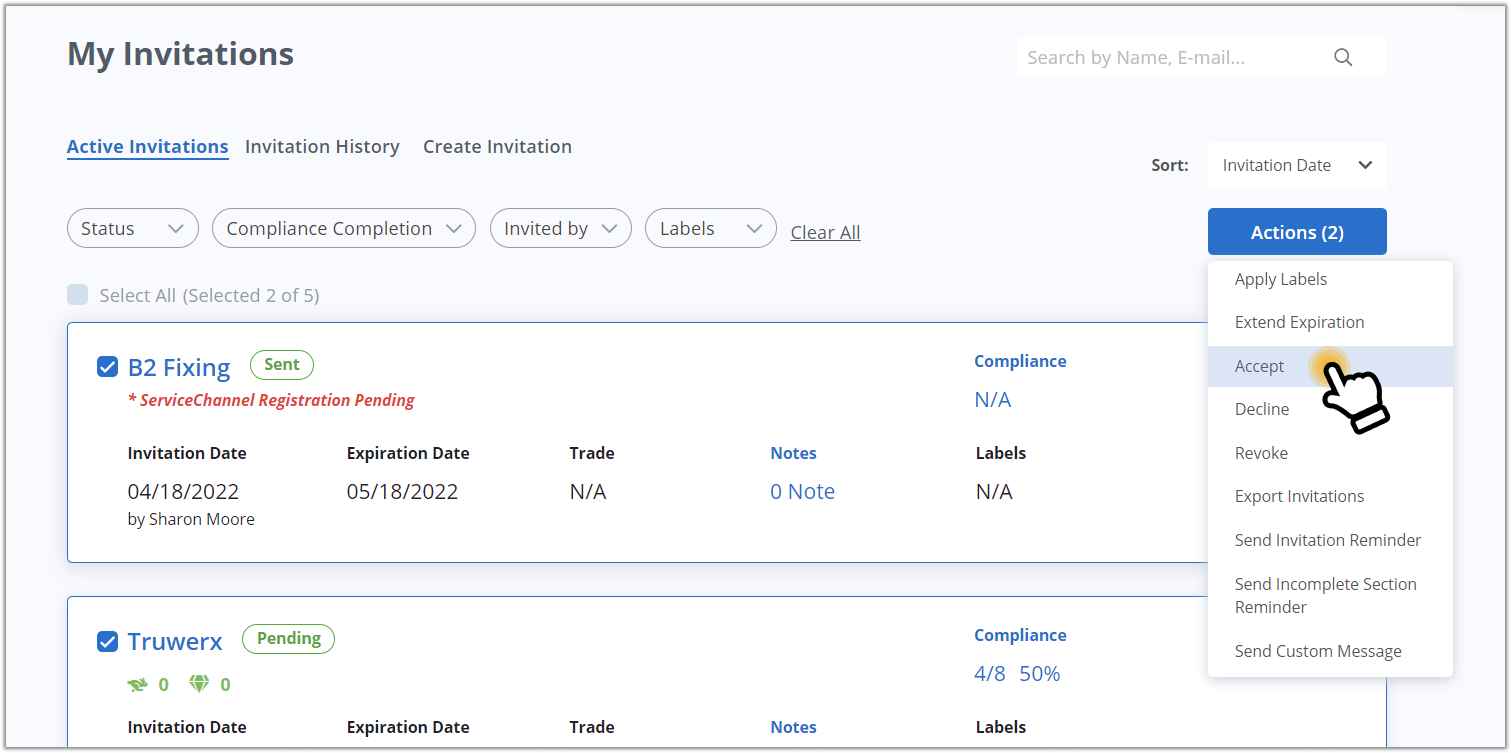
After a service provider accepts your invitation, the invitation status changes to Pending. Once the provider completes all your requirements, the invitation status changes to Replied. You can accept service providers into your network when the invitation status becomes Replied.
Note that you may accept service providers into your network either as soon as they add the dispatch preferences information or after they have completed all your requirements.
- From the Active Invitations page, click the Accept button, and then click Confirm on the pop-up window that appears.

- On the Active Invitations page, select the providers you want to accept.
- Click Actions.
- In the drop-down list that opens, click Accept.
- Click Confirm on the pop-up window that appears.

The selected invitation(s) has(have) been accepted, and the associated provider(s) is(are) now in your provider network.
Declining Provider’s Invitation
If you want for some reason to decline a Pending or Replied invitation, you have two options: decline it from the Active Invitations page or from the Invite Details page.
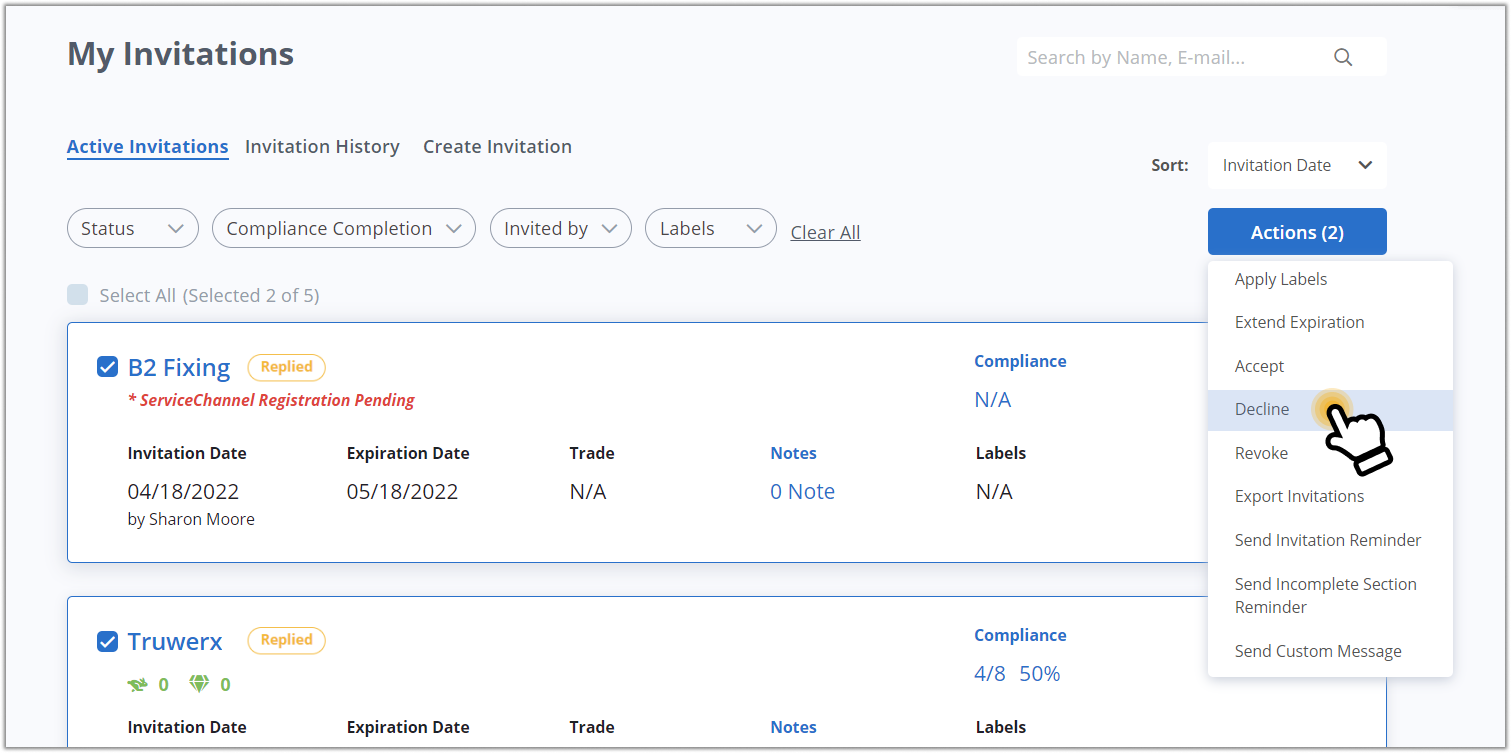
- On the Active Invitations page, select the provider(s) you want to decline.
- Click Actions.
- In the drop-down list that opens, click Decline.
- (Optional) Customize the message for the provider(s).
- Click Confirm on the pop-up window that appears.

Alternatively, on the Invite Details page of the invitations in the Pending or Replied status:
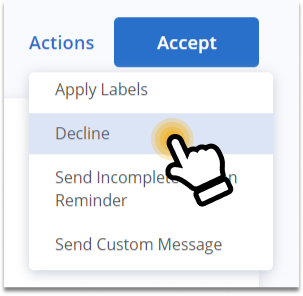
- Click Actions.
- Click Decline in the drop-down list that opens.
- (Optional) Customize the message for the provider.
- Click Confirm on the pop-up window that appears.

The Invitation(s) has(have) been declined.
-
Page:
-
Page:
-
Page:
-
Page:
-
Page:
-
Page:
-
Page:
-
Page:
