Inviting Providers into Your Network
Natalia Larina (Unlicensed)
Anastasia Medovkina (Deactivated)
Maria Tarnopolskaya (Unlicensed)
Lamont Eddins
When you find a provider you want to work with, you can invite them to join your Network.
Invite a Provider
The provider invitation flow includes 3 steps where you can:
- Specify the trades and locations your need services for.
- Customize the text of your invitation email.
- Add more information, e.g. invitation expiration date, labels, and attachments.

- On the Search Results page, locate a provider you want to connect with, and click Invite.

Alternatively, you can click the Invite button on the profile page of a particular provider. The Invite Provider overlay appears. - In step 1, select the trades and the locations you need services for.
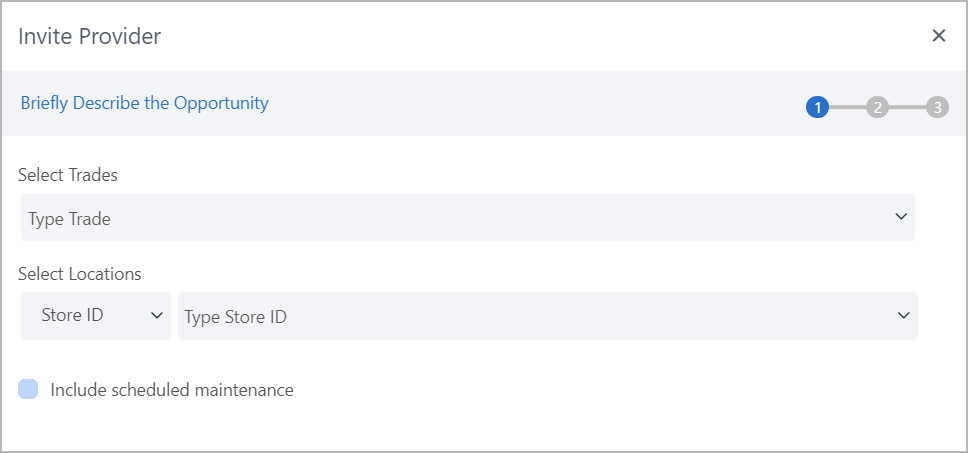
- To specify the trades, start typing the trade name in the Select Trades field. Click the corresponding option that appears on the list. The selected trades are displayed as below.

Alternatively, click the arrow to open the drop-down list, and select the trades from the list manually.
Click Select All to add all the trades.You can delete the trades you don’t want to specify by clicking the ⛒ icon next to the trade name on the label.
- To select the locations:
- First, choose the location look-up criterion:
- Store ID
- Region
- District
- State
- County
- City
Then, start typing either a Store ID or whichever look-up criterion you have selected — the corresponding item appears in the list, click it.
When you select a region, district, state, county, or city, all the locations that belong there are selected by default. If you want to exclude the specific items from the list, clear the checkbox next to them.
Alternatively, click the arrow to open the drop-down list, and select the items from the list.
Click Select All to select all locations.

Note
- All the selected Store IDs are grouped under the Other label. The label shows the name, the number of locations (in brackets), and the ⛒ icon to delete the label if necessary.
- All locations belonging to the selected Region, District, State, County, or City are grouped under the corresponding Region, District, State, County, or City name label.
The label shows the name, the number of locations (in brackets), and the ⛒ icon to delete the label if necessary.
- You can apply different search criteria to combine multiple labels. For example, you can add all the locations from a specific State, the ones located in a chosen City, and the locations selected by the Store ID, as shown in the screenshot below.

- First, choose the location look-up criterion:
- (Optional) If you need provider services for planned maintenance, select the Include Scheduled Maintenance checkbox. In the text field that appears, describe the required planned maintenance services. You can enter up to 250 characters.
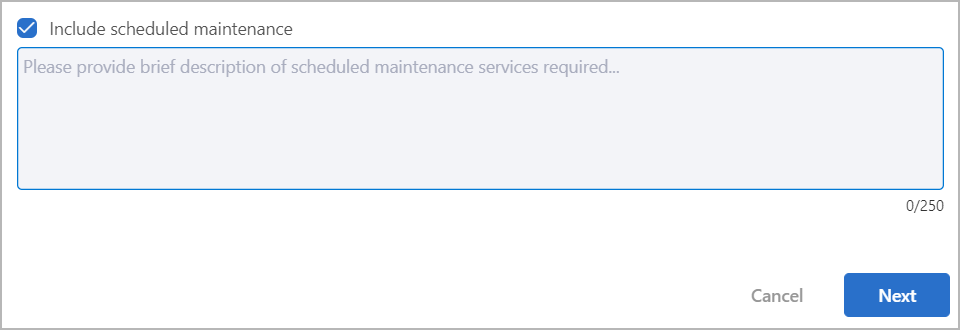
- Click Next to proceed to the Email message section.
You can get back to edit this section by clicking Previous anytime before you send the invitation.
- To specify the trades, start typing the trade name in the Select Trades field. Click the corresponding option that appears on the list. The selected trades are displayed as below.
In step 2, customize your Invitation Email Message.
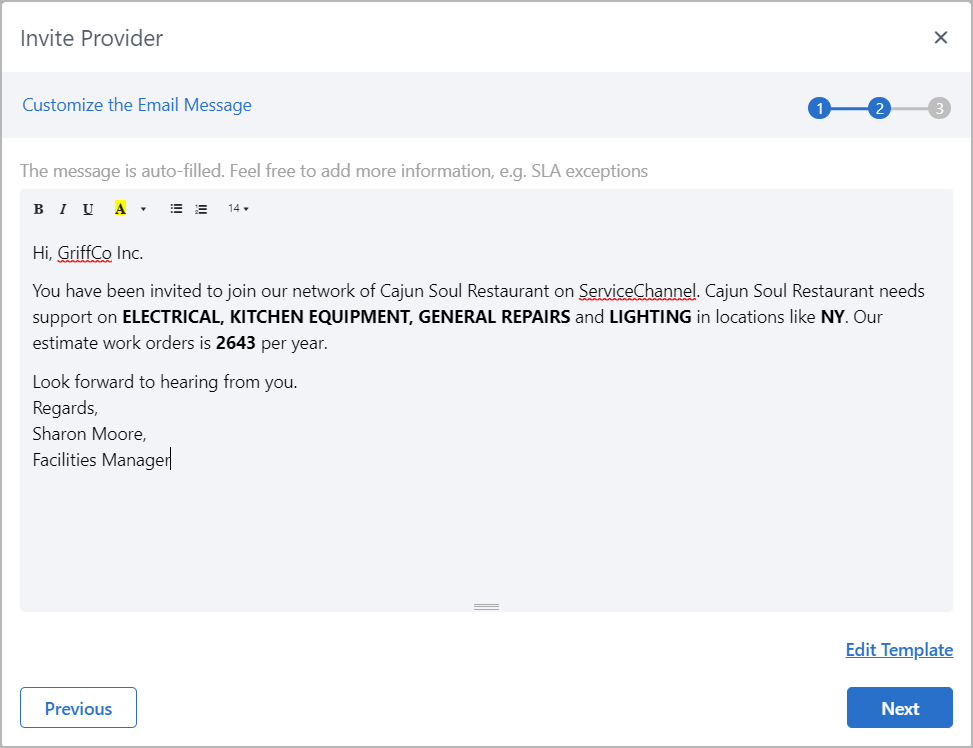
The Invitation email text is generated automatically based on the information about trades and locations you specified in step 1. The statistics on the number of work orders and work order priorities are aggregated for the past 12 months for the selected trades and locations.
- If you are satisfied with the invitation message, click Next.
If you want to edit the message, you have two options:
a. Make changes to the current textExpand to see the detailsi. Edit the text.
ii. Click Next.Making changes to the text itself modifies the current message only; it will not apply to your further invitations. If you click Previous to get back to the first step, your changes will not be saved.
b. Edit the text template
Expand to see the detailsi. Click Edit Template.
ii. Make necessary changes.
iii. Click Save.
iv. In the pop-up that appears, click Yes.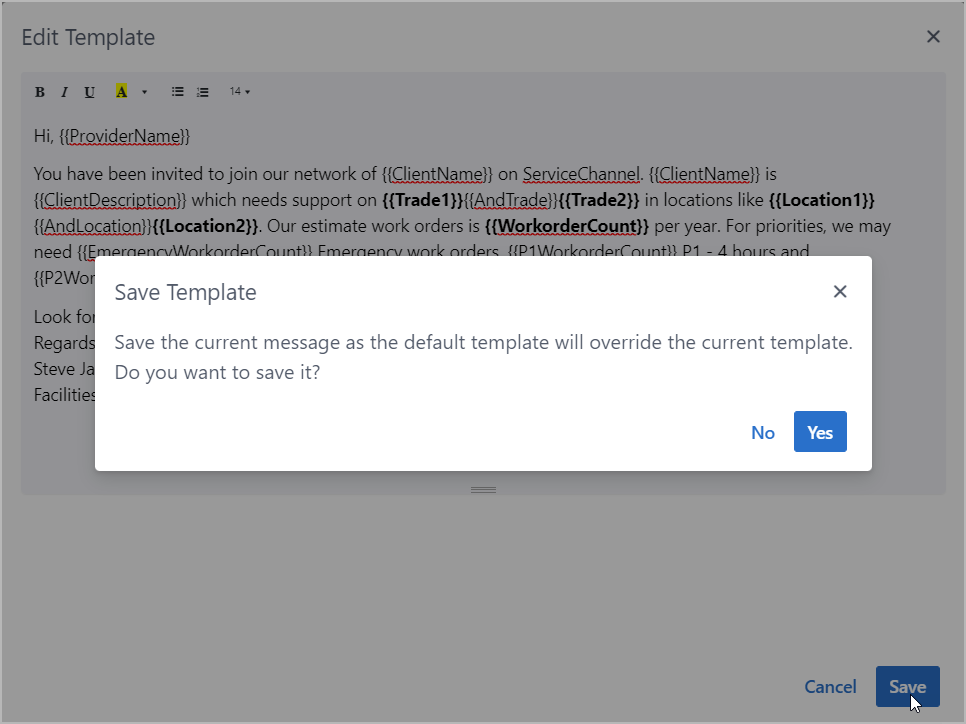
v. Click Next.
- In step 3, include additional information.
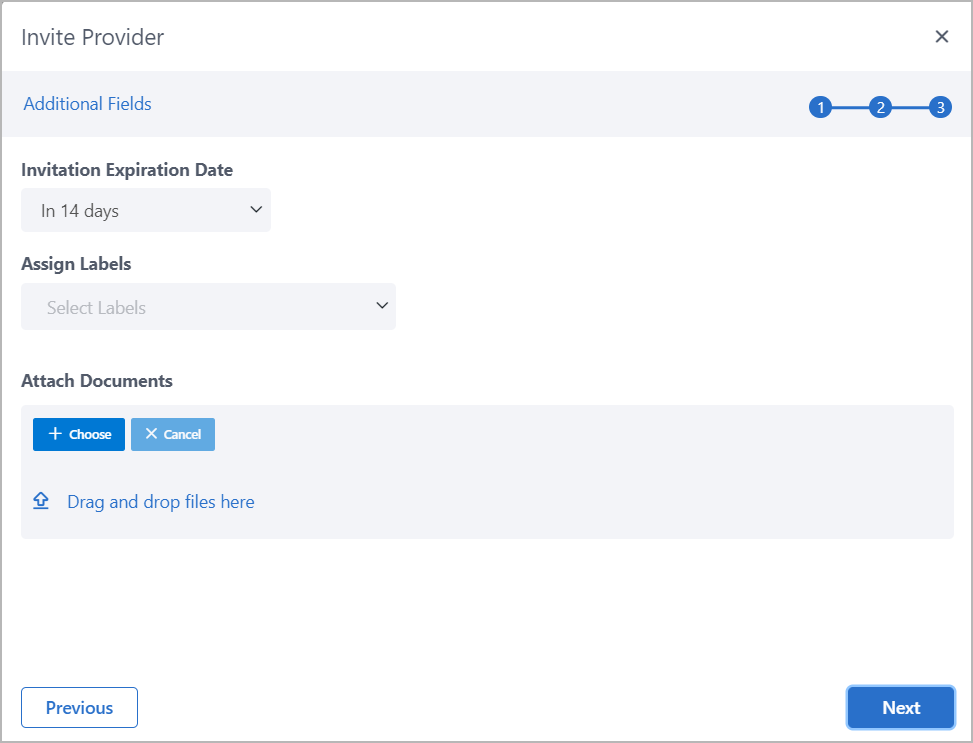
- Set the Invitation Expiration Date by clicking the arrow and selecting the desired option from the drop-down list that appears. The default expiration period is 14 days.
- (Optional) Assign labels to your invitation.
- (Optional) Add attachments. You can attach files by dragging and dropping the selected items over the Drag and Drop Files Here area. Alternatively, you can click the + Choose button and select the required file from your device.
- Click Next to review the Invitation Summary.
Review the Invitation Summary.
Expand to see what it includes- The Trades and locations you need service for. When you have selected many locations, click View All to check the whole list.
- The chart visualizes the number of work orders within the last 12 months.
- The invitation email message you have customized in step 2.
- Labels and attachments if you added any.
- The invitation expiration date.
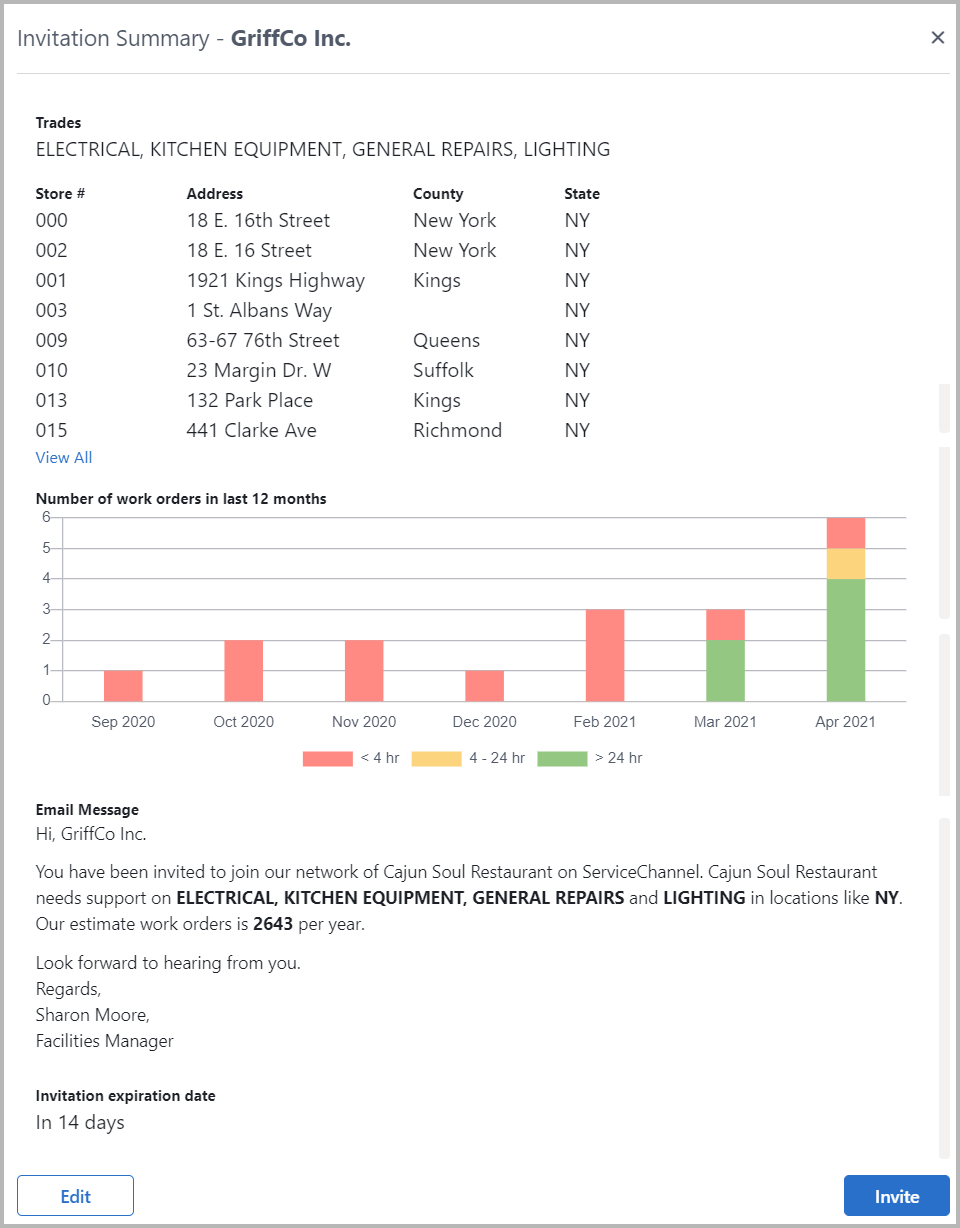
If you need to make any changes, click Edit. It will take you to the previous step.
- When the invitation is ready, click Invite.
The following notification appears to confirm that your invitation has been successfully sent to the provider.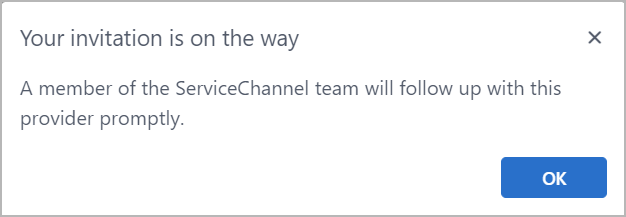
See Managing Active Invitations for more information on the actions you can take on invitations.
-
Page:
-
Page:
-
Page:
-
Page:
-
Page:
-
Page:
-
Page:
-
Page:
