Asset Rules
Lamont Eddins
Anastasia Troichuk (Unlicensed)
With Asset Rules, you get more control over asset management as well as can delegate some of your managerial functions to your trusted providers. All this magic happens through the following set of features:
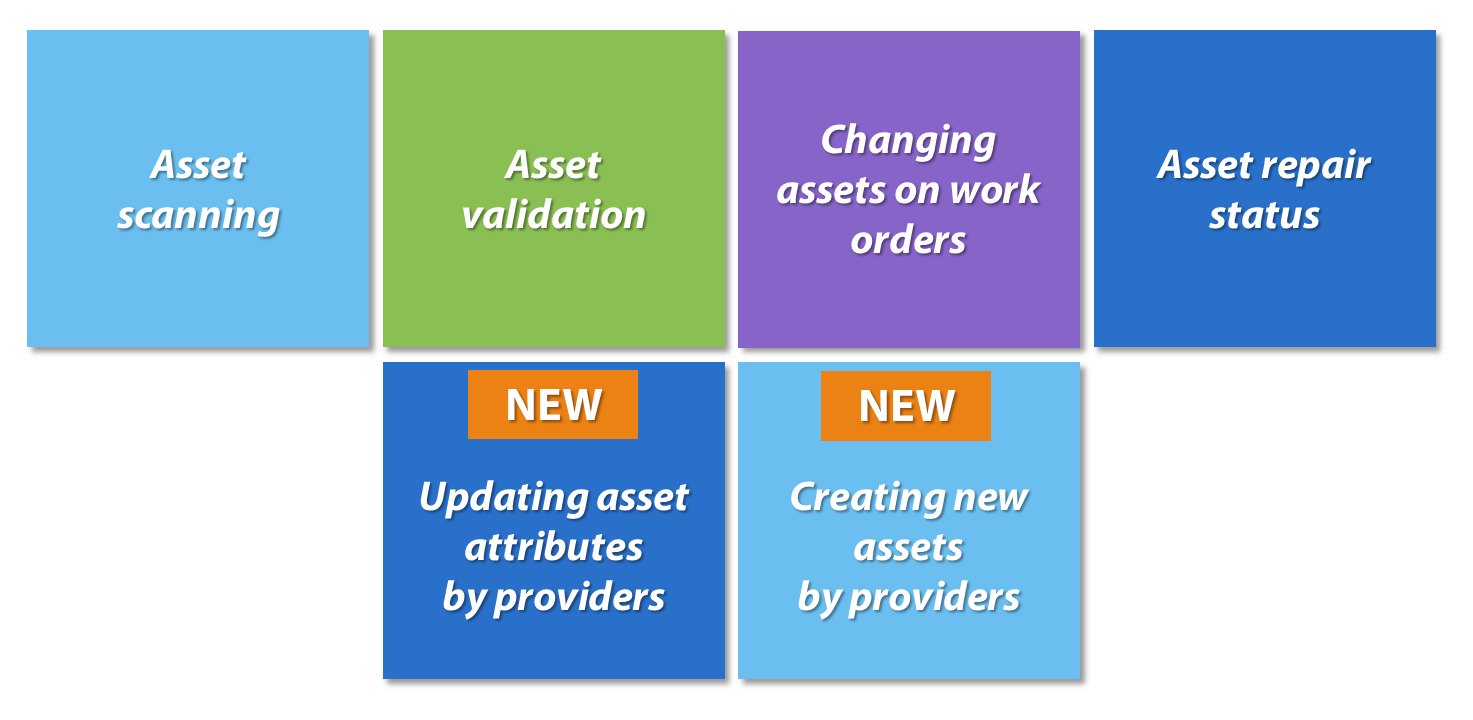
Pick and use the features that best work for your business.
- Asset scanning: You can enable asset scanning here for SC Mobile and SC Provider users. Additionally, you can specify the scanning method that your technicians and your employees are allowed to use.
- Asset validation: In case you want your technicians to validate assets on work orders before they get down to work, you can enable the asset validation process.
- Asset Association and Validation: Sends a prompt to the external provider in SC Provider Mobile on whether an asset is needed for a work order.
- Changing assets on work orders: How to prevent external providers and SC Mobile users from changing assets on work orders? There is a specific setting for that purpose on the Asset Rules page!
- Asset repair status: An additional feature allows you, for example, to track the whereabouts of the assets that got broken and were moved out of the location to another site for repair. Learn more about Asset Repair Statuses.
- Updating asset attributes by providers: Now you can empower your providers to edit asset information on work orders assigned to them via the SC Provider mobile app.
- Creating new assets by providers: You can let your providers (or the most trusted ones) add new assets to Asset Manager via the SC Provider mobile app.
- Uploading assets: Allowing your service providers the ability to upload assets with Standard and Custom Attributes on your behalf. When choosing the Selected Providers, you can include and/or exclude specific providers from uploading assets.
- Uploading asset attachments: Permitting providers to upload attachments which includes photos for an asset onto a work order or include attachments when creating a new asset on your behalf in SC Provider Mobile.
- Asset Inventory: Allowing providers to work on planned maintenance with asset inventory work orders.
- Asset Transfer: Moving an asset from one location to another while updating Service Automation.
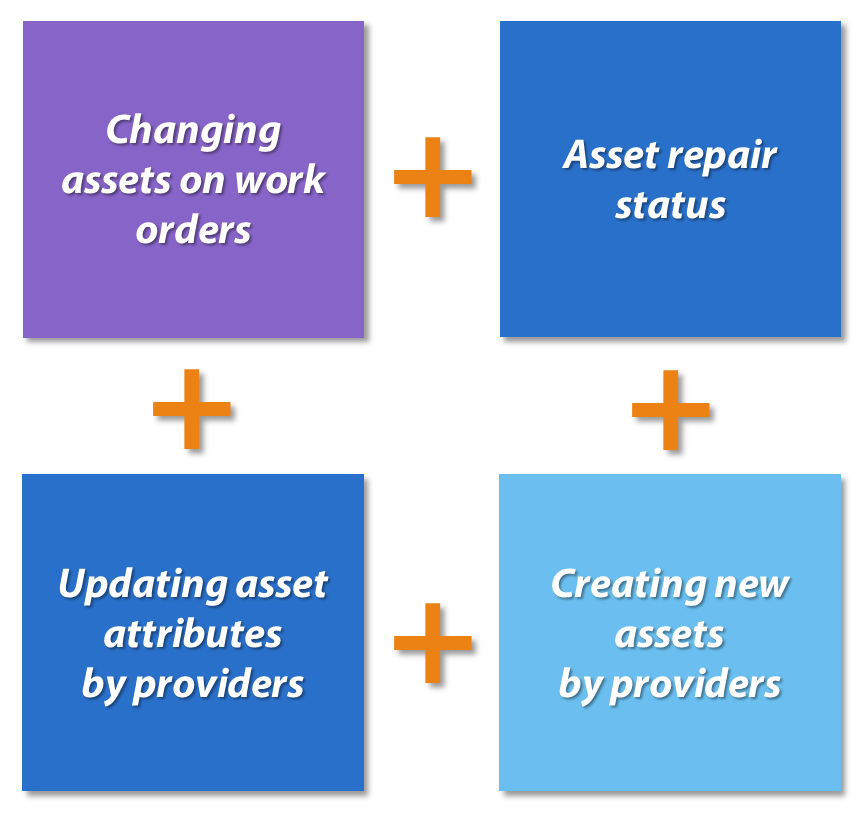
Here is how you can match the features to get better asset management experience.
Batch 1
Asset scanning and validation

Batch 2
Asset Management by Providers
Accessing Asset Rules
You should have the Administrator role within Asset Manager to be able to manage asset scanning rules. Check Managing Roles to learn how to set this role for an employee.
- Click the menu icon in the upper-left corner, and select Assets (Equipment) > Administration.
- Switch to the Asset Rules section.
Setting Up Asset Scanning and Validation Rules
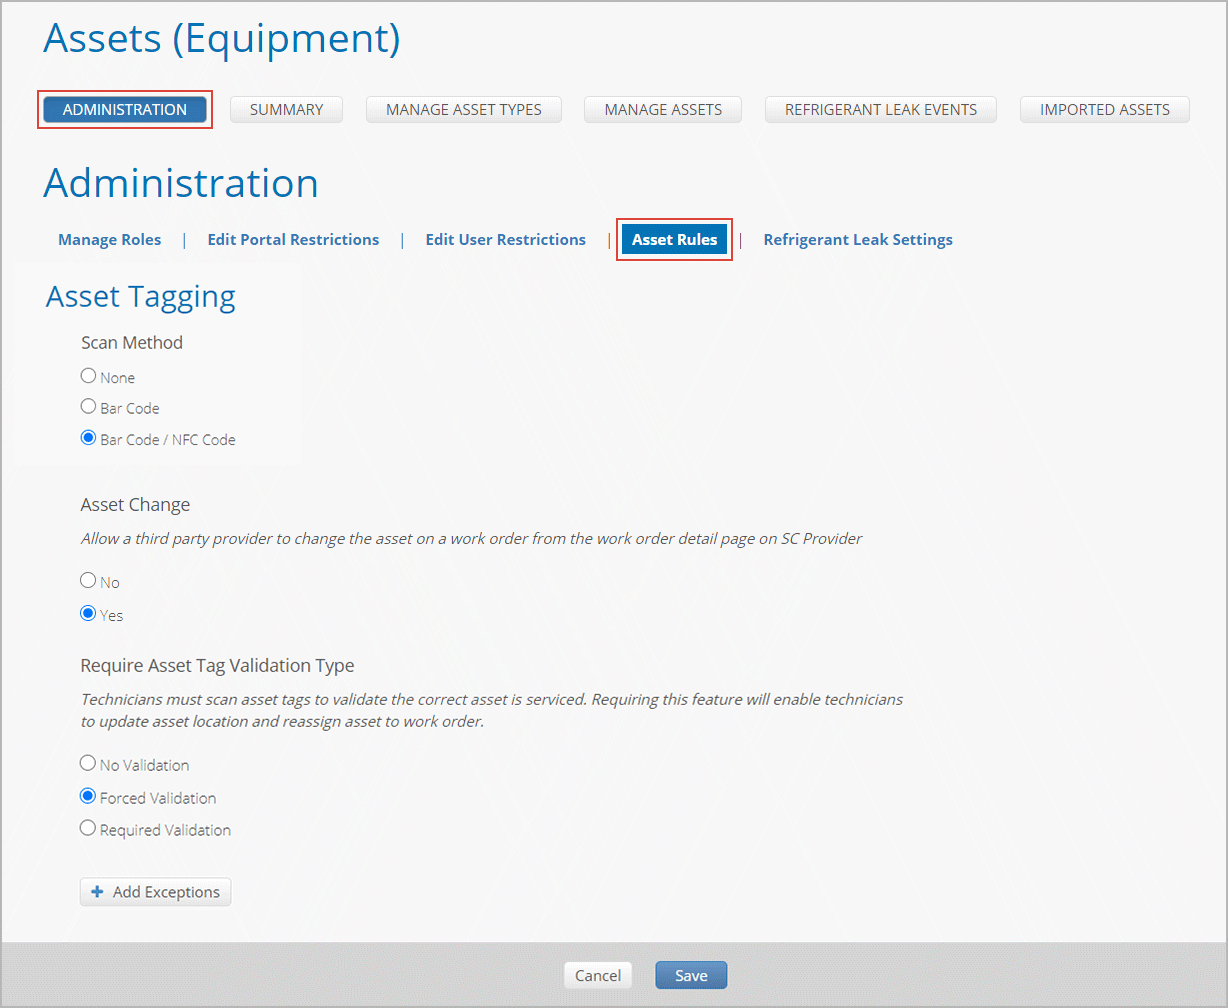
Here you can check what rules you can impose on your providers when it comes to scanning and validating assets on work orders. You can also set scanning rules for your employees who use the ServiceChannel mobile app.
- Navigate to the Asset Rules page.
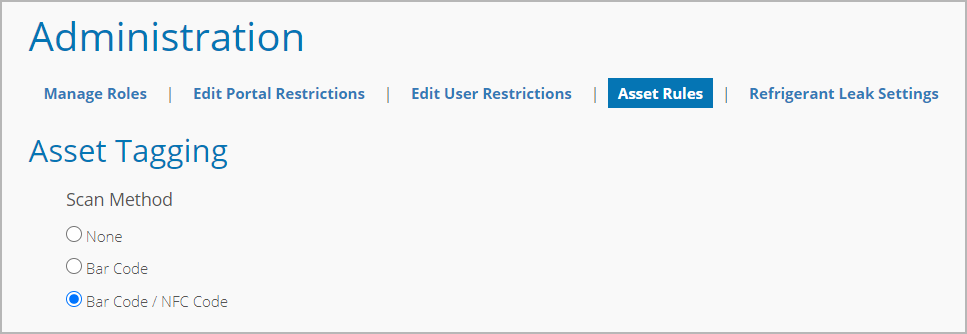
- Under Scan Method, opt for the preferred scanning method (for both SC Provider users and SC Mobile users):
- Bar Code: Allows scanning vertical barcodes
 including QR codes
  .
. - Bar Code / NFC Code: Permits scanning both barcodes and NFC codes.
- To prevent users (providers and your employees who use SC Mobile) from scanning asset tags, select None.
- Bar Code: Allows scanning vertical barcodes
Under Asset Change, indicate the following:
Whether external providers can change assets on work orders, remove assets from work orders as well as move assets from one location to another (in the Asset Manager database) via SC Provider.
Providers may need to change the asset in two cases:
- The scanned asset tag doesn’t match the asset tag linked to the work order.
- The location of the scanned asset doesn’t match the location of the asset linked to the work order.
Whether ServiceChannel Mobile app users can change assets on work orders.
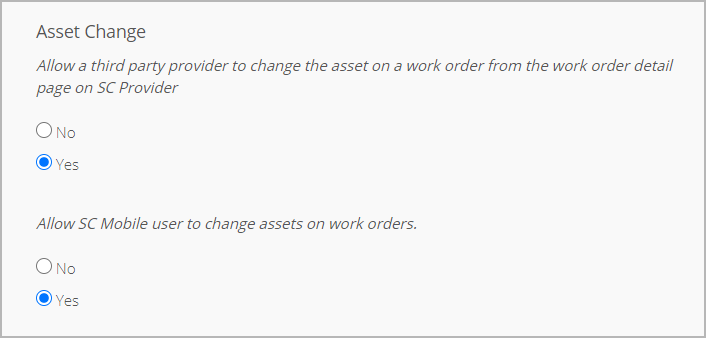
- Under Require Asset Tag Validation Type, specify whether or not asset validation is required.
- No validation: Technicians don’t need to validate assets to work on assigned service requests via SC Provider.
- Forced Validation: Technicians must validate assets to get down to work on assigned service requests.
- Required Validation: Technicians are required to validate the asset. If they cannot, the validation process can be skipped. In this case, technicians should specify the reason for being unable to validate the asset. The work order will contain a record saying that the asset isn’t validated.

- Asset Associated Prompt: Asking technician to verify an asset is required.

(Optional) Add exceptions to the configured rules.
Expand this section to view how to add exceptions.1. Click Add Exceptions at the bottom of the page. The overlay for creating exceptions appears.
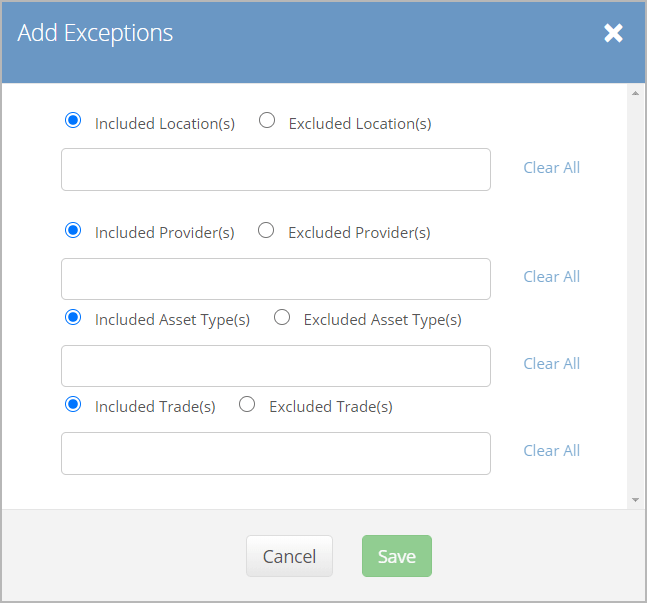
2. In the overlay, you can specify for which Locations, Providers, Asset Types, or Trades the scanning rules should be applied, or you can define for which of these criteria the rules should be ignored.- Want to apply the rules only for specific locations, providers, asset types, or trades?
Select the Included radio button to the left of the criterion, and pick the desired options from the drop-down list. - Want to apply the rules for all locations, providers, asset types, or trades except for some of them?
Select the Excluded radio button to the right of the criterion, and pick the options to be excluded from the rules.
3. Once all exceptions are specified, hit Save in the overlay. Exceptions get added to the Asset Rules page.
- Want to apply the rules only for specific locations, providers, asset types, or trades?
Click Save at the bottom of the page to put the rules into action.
Rules for Updating Asset Attributes by Providers
You can empower your providers to edit asset attributes on work orders via the SC Provider mobile app.
When working on service requests, providers may find that some of the asset data is not up to date or is missing. In this case, they will have the capability to change/add asset information.
Providers can update attributes only for those assets they have been requested to service.
FAQs
Answer
Who can update asset attributes on work orders?
FTM internal techs and external providers
Can only specific providers be empowered to update asset attributes?
You can grant the editing power to the most trusted providers only.
Can we prevent providers from updating certain types of assets?
You can specify which types of assets should never be edited by providers.
Where can providers update asset attributes?
Providers can update asset attributes on work orders assigned to them via the SC Provider mobile app.
Which asset attributes providers are allowed to update?
This is controlled on the asset type level. On the asset type details page, you can specify which asset attributes can be edited by providers.
How can we learn that providers updated asset data?
On the asset details page in Service Automation, you will see that updated assets have a specific status letting you know about the changes.
Learn more about Reviewing Asset Updates Made by Providers.
- You don’t have high quality information on your assets yet and want to empower your in-house technicians to be able to capture basic asset data, such as the asset tag, model and serial number, etc.
- You need your provider’s help with capturing more advanced asset data, for example, asset condition, age, remaining lifespan.
- From the hamburger menu, navigate to Assets (Equipments) > Administration.
- Switch to the Asset Rules tab.
- Scroll down to the Allow providers to edit attributes on work order section.

Select the required option:
By default, the rule is set to the All Providers option.
- None: None of your providers (FTM internal or external) will be allowed to modify asset attributes on work orders in SC Provider.
- All providers: All of your providers (FTM internal or external) will be able to modify asset attributes on work orders in SC Provider.
- Selected providers only: You can pick which of your providers should be able to make updates to asset attributes in SC Provider. Click the Add Exceptions button to select the providers.
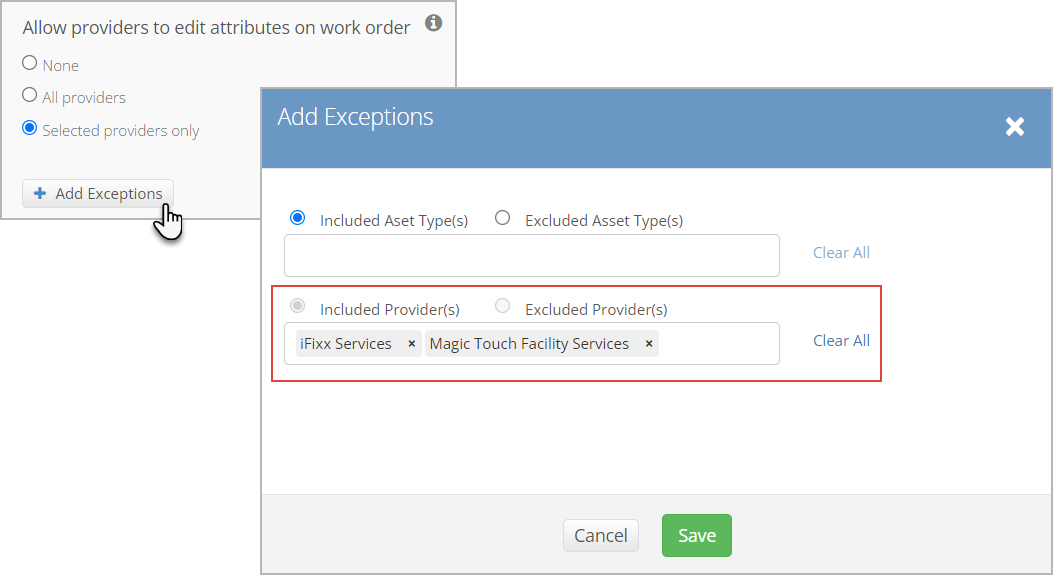
Instead of or in addition to selecting specific providers that should be included in or excluded from the configured Asset Rules, you can select specific asset types.
- Click Save at the bottom of the page.
Assets Types that Can/Cannot Be Edited by Providers
With asset types serving as filters, you can prevent your providers from editing some asset types or, vice versa, allow your providers to update only specific asset types.
- On the Asset Rules tab, scroll down to the Allow providers to edit attributes on work order section.
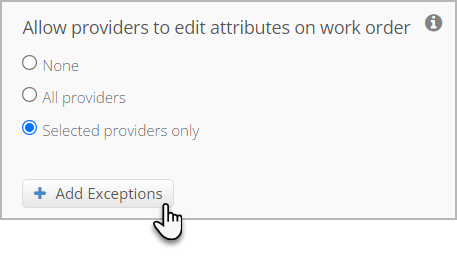
- Select the Selected providers only radio button, and then click Add Exceptions.
In the overlay that appears, select either the Included Asset Type(s) or Excluded Asset Type(s) radio button.
- Included Asset Type(s): Only assets of the types you select in step 4 can be edited by providers.
- Excluded Asset Type(s): Providers can edit assets of all the types except for the types you pick in step 4.
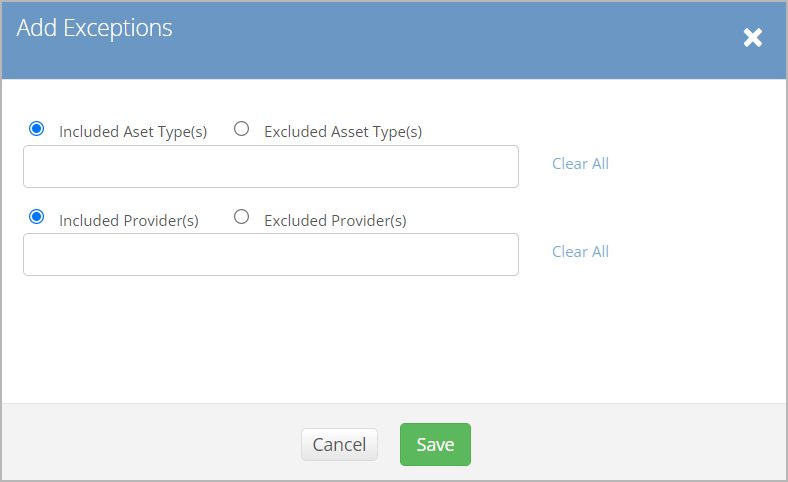
- In the drop-down below the radio buttons, pick the required asset types.
- If you don’t want to pick specific providers, leave the providers field blank.
If you want to restrict the providers’ editing power by an asset type + provider combo, then pick the corresponding options from both the providers list and the asset types list.
Click Save in the overlay. You get back to the main Asset Rules page.
Click Save at the bottom of the page to capture the changes.
What Asset Attributes Can Be Edited by Providers?
Providers’ editing power is not unlimited. It can be restricted by identifying the asset attributes your providers can and cannot modify.
Besides, all the updates from providers go through the review process, where a designated Asset Manager checks the suggested updates and then either approves or removes them.
- From the hamburger menu, navigate to the Manage Asset Types page.
-Manage-Asset-Types.png?version=1&modificationDate=1653295080857&cacheVersion=1&api=v2&width=350&height=208)
Click the desired asset type to configure the editing rules.
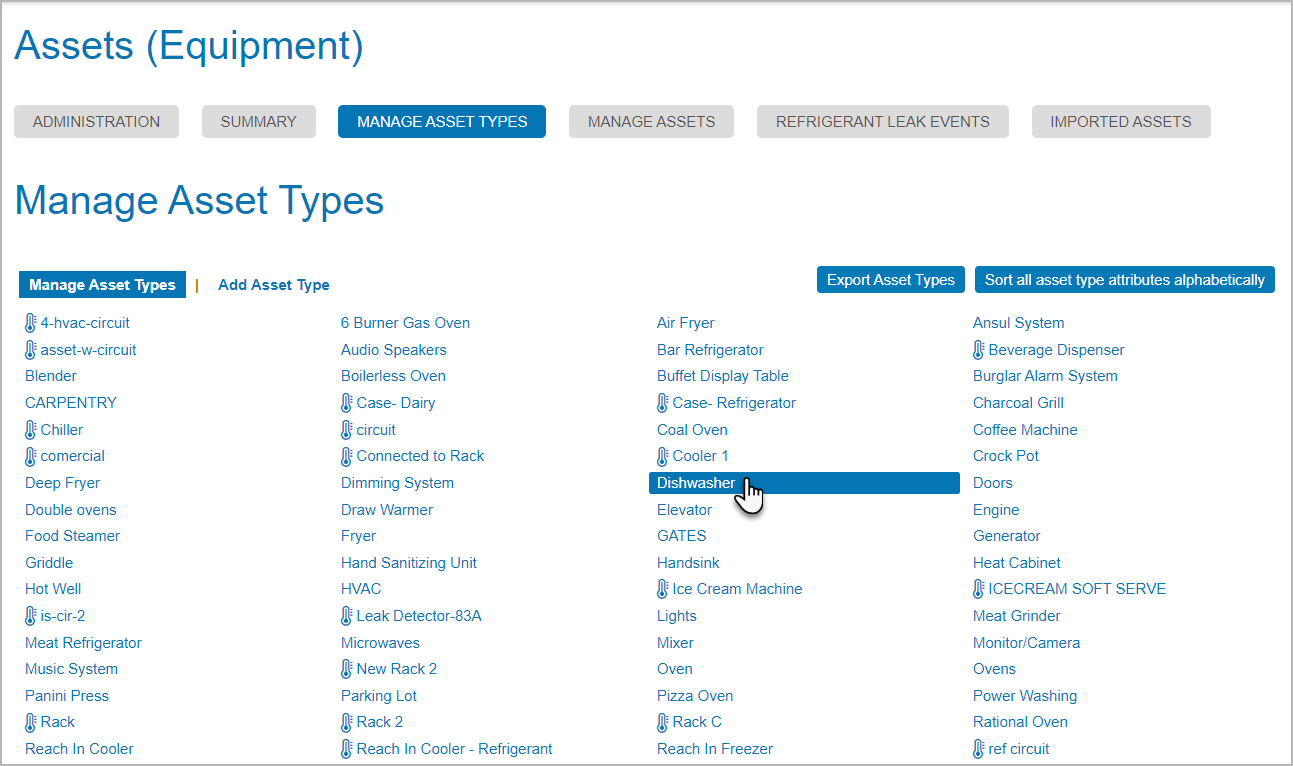
You land on the asset type details page.- Scroll down to the Standard Attributes section.
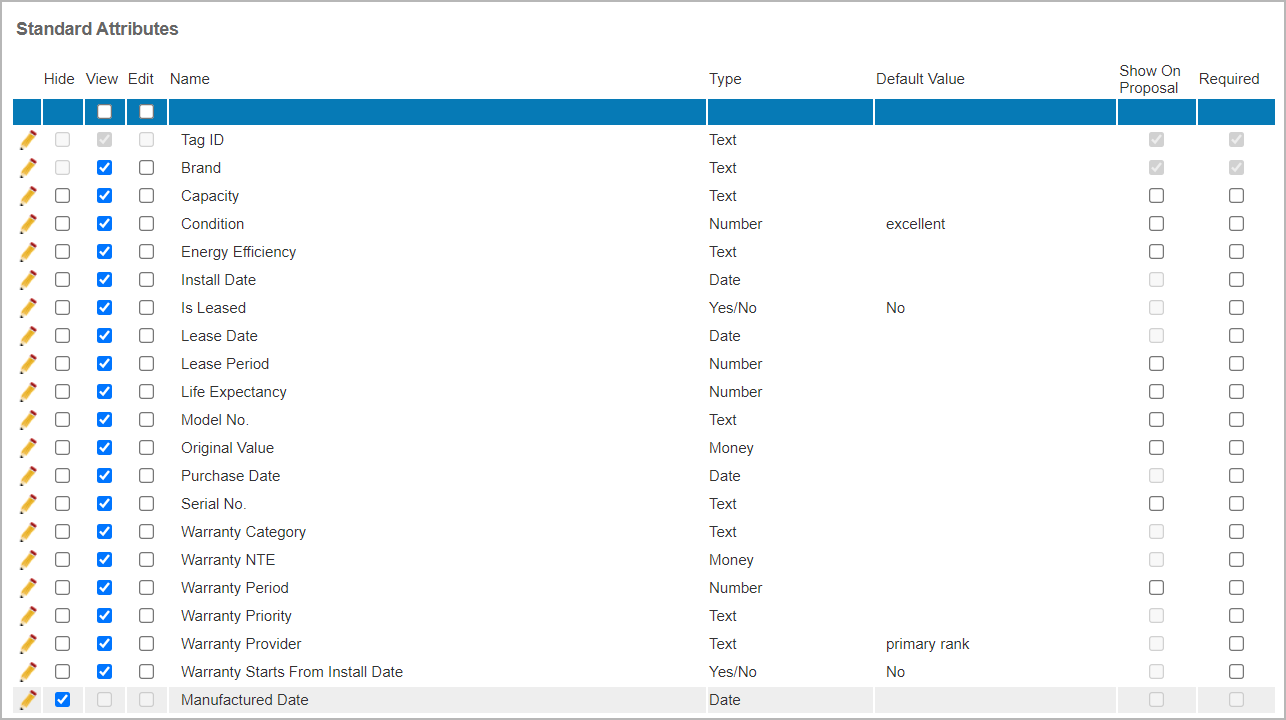
- Select the Edit checkbox next to the standard asset attributes that you want your providers to be able to update. The changes you make are saved automatically.
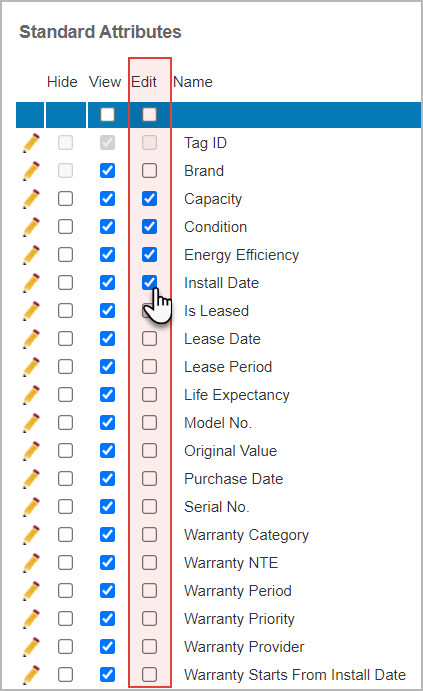
If you want to make some of your custom attributes editable as well, scroll down to the Custom Attributes section, and select the Edit checkbox next to the desired attributes.
- Repeat steps 1–5 to configure editing rules for other asset types.
Now that you have configured the editing rules, your providers can update the specified asset attributes on work orders assigned to them.
Rules for Creating New Assets by Providers
New assets can now be added by providers. While completing a service request assigned to them, providers may need to create a new asset and associate it with the service request via the SC Provider mobile app.
- You are not able to identify the source of the problem with your equipment. You empower your provider to associate the work order with the right asset once they locate the root cause. If the asset doesn’t exist in your catalog, the provider will be able to create one.
- A Planned Maintenance service request was created with several assets linked. While working onsite, the provider decides to associate one more asset with that maintenance request.
On the Asset Rules tab, locate the Asset Change rule, and ensure it is set to Yes.
When a provider creates a new asset and associates it with the assigned work order, you will be able to navigate to the asset detailed view from the work order. Note that the asset will have the New Unconfirmed status until you confirm this addition.
Managing Asset Attachments by Providers
To help manage the asset attachments, specifically photos, providers can support this task when granted access. This allows technicians while on location to add, edit, and move attachments for assets in SC Provider Mobile.
On the Asset Rules tab, locate Manage Asset Attachment rule

- Scroll down to the allow providers to manage asset attachments and select the required option:
- None: None of your providers will be allowed to manage attachment from work orders
- All providers: All your providers can add asset attachments on work orders and creating new assets in SC Provider
- Selected providers only: You can pick which of your providers should be able to add attachments in SC Provider
- Click theAdd Exceptions button to select the providers.
- Click the Save button to finalize selection(s).
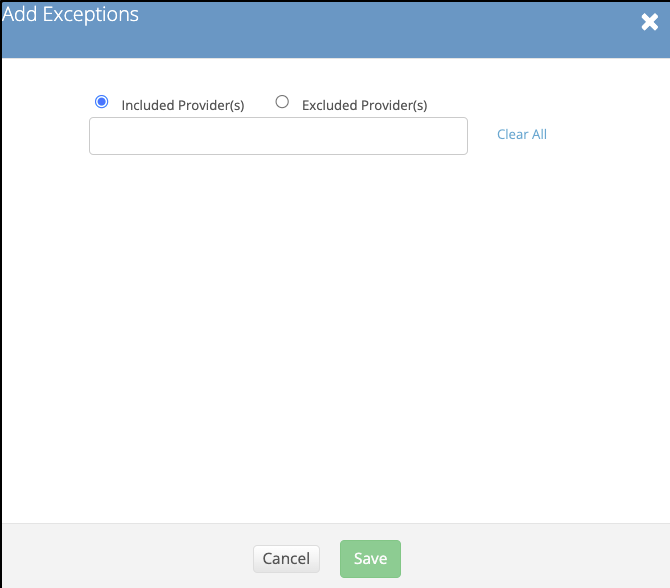
- Click the Save button to finalize permissions.
Allowing Providers to Work Order on Planned Maintenance Asset Inventory Work Orders
To support asset inventory, providers can be granted access to complete asset inventory during maintenance work orders. You can include the option of wanting a failure reason during a failed asset inventory for each asset.
On the Asset Rules tab, locate Asset Inventory Work Orders rule
- Click the Yes button to allow providers access to planned maintenance asset inventory work orders
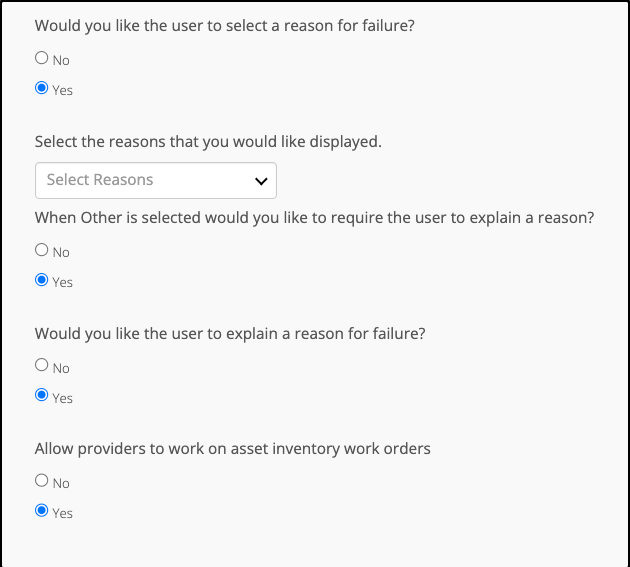
- Optional: Click the Yes button if the technician needs to select a failure reason
- Optional: Use the drop-down arrow to expand the reasons display list
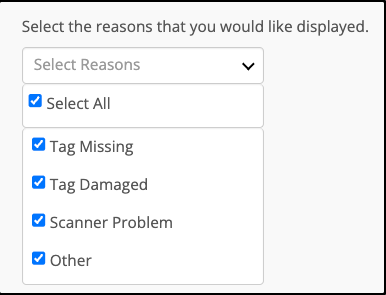
- Optional: Select or deselect which failure reasons to include
- Optional: Click the Yes button if you require an explanation when choosing Other
- Optional: Click the Yes button if you want the technician to provide a summarize reason for failure
- Click the Save button to finalize selections.
Allowing Providers to Transfer Assets to other Locations
Assets that are housed or used at a specific location and requires a transfer to another location, a work order can be submitted strictly to conduct the asset transfer. The process provides documentation by updating Service Automation that an asset was physically moved. When an asset is selected for transfer from the Managing Asset and Asset Detail pages, the asset transfer work order’s Category and Trade is determined by what is selected in the Transfer Rules.
Selecting a Checklist for the Asset Transfer
As part of the transfer process, a checklist needs to be added to ensure the process has been completed. It is necessary to ensure the checklist does not have any specific locations selected, otherwise, it is not shown in the drop-down.
Select All Provider or Selected Provider by clicking the specific radio button
- If Selected Provider is chosen, click the Add Exceptions button to add providers

- If Selected Provider is chosen, click the Add Exceptions button to add providers
- Choose whether providers can create linked work orders by clicking the radio button
- Use the drop-down arrows to select the:
- Trade
- Category
- Priority
- Optional: Add a note for the Asset Transfer work order

- Use the drop-down arrow to select an available checklist
- Select Assign Transfer Provider by clicking the specific radio button

- Click the Save button to confirm selections or changes
It is recommended to create a category and trade in Work Order Properties and on the Issue List before assigning the Trade and Category for Asset Transfer
Please contact your ServiceChannel representative to enable this feature.
-
Page:
-
Page:
-
Page:
-
Page:
-
Page:
-
Page:
-
Page:
-
Page:
