Asset Dashboard Summary
Lamont Eddins
The Asset Dashboard Summary offers real time detailed portfolio data and statuses about your assets. The insight received from the Dashboard Summary supports decision making and upkeep on assets. Individual asset information is taken from all locations to compile the various data points on the dashboard. The drop-down filters allow the dashboard to be controlled and helps present specific information on assets.
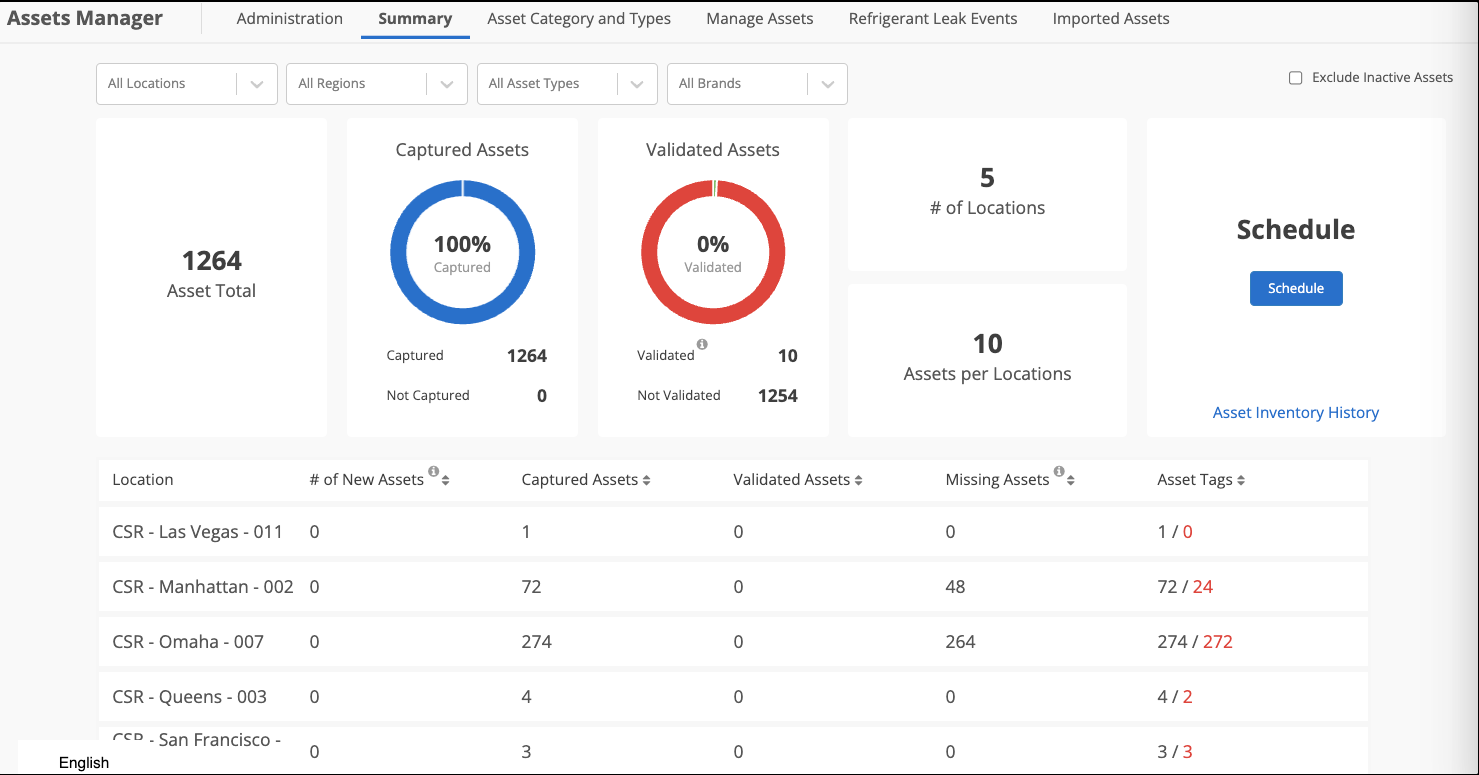
The following filters are:
- Location: Filters the dashboard results to one or more locations
- Region: Filters the dashboard results to one or more regions
- Asset Type: Filters the dashboard to one or more specific asset types
- Brand: Filters the dashboard to one or more brands
The dashboard changes and provides a summary based on the filter's choices. When certain or multiple items are selected from a filter, the dashboard creates a summary to reflect those selections.
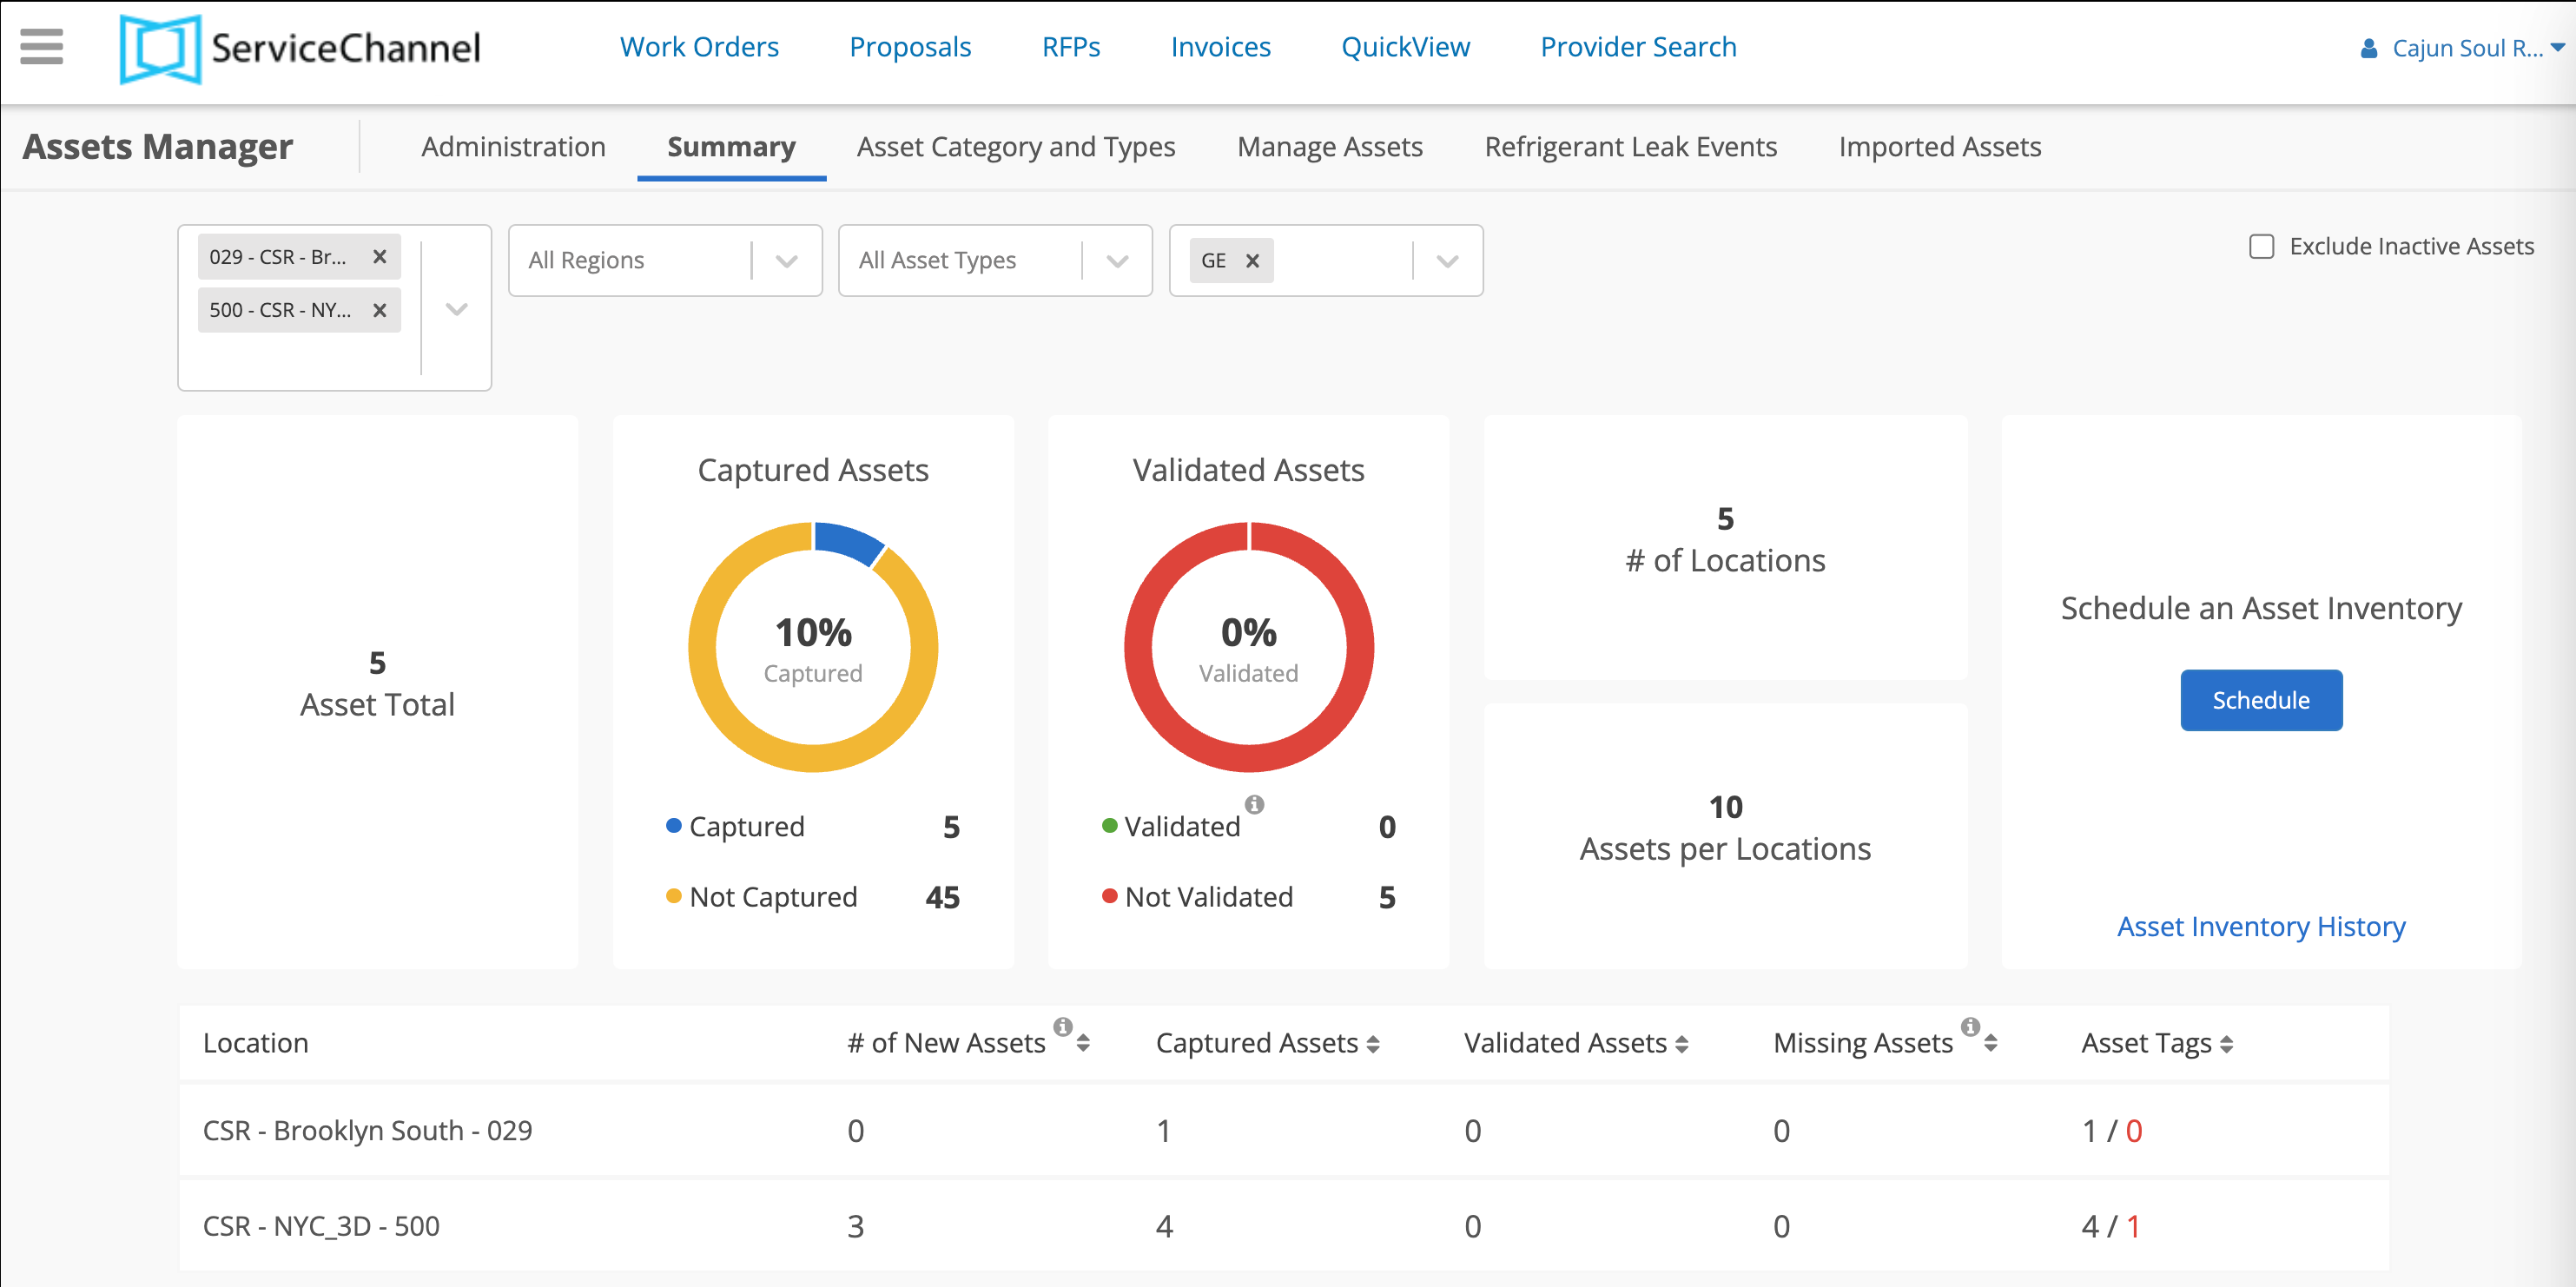
You can select multiple choices under each filter.
Viewing Main Summary Displays
The main summary displays represent various information to help with analyzing your assets. When assets are updated in Service Automation, the dashboard is automatically reflected on the summary displays. The following main summary displays are:
- Asset Total: The number of assets that are within the asset module. This includes assets that are inactive
- Note: The Exclude Inactive Asset checkbox removes all inactive assets from the Asset Total number
Captured Assets: Assets entered in the Asset Module
Validated Assets: Assets that have been validated through Asset Inventory
- # of Locations: Number of active locations where assets will be tracked
- Assets per Locations: Indicate the average number of assets per location
Scheduling an Asset Inventory
Scheduling an asset inventory on work orders validates assets on your behalf. When assets become validated, data is updated and the dashboard shows those changes. Once an asset inventory has been scheduled, you can use the Asset Inventory History link to view current statuses.
- Click the Schedule button to open the modal
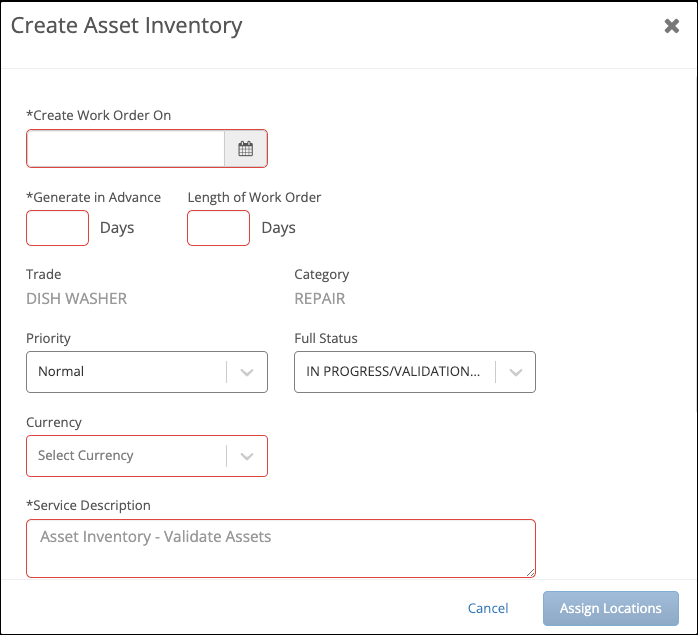
- Optional: Use the drop-down arrow to change the Priority
- Optional: Use the drop-down arrow to change the Full Status
- Optional: Use the drop-down arrow to select a Currency
- Click the radio button for a specific Assignment Rule
- Optional: Check the box for auto dispatch work orders
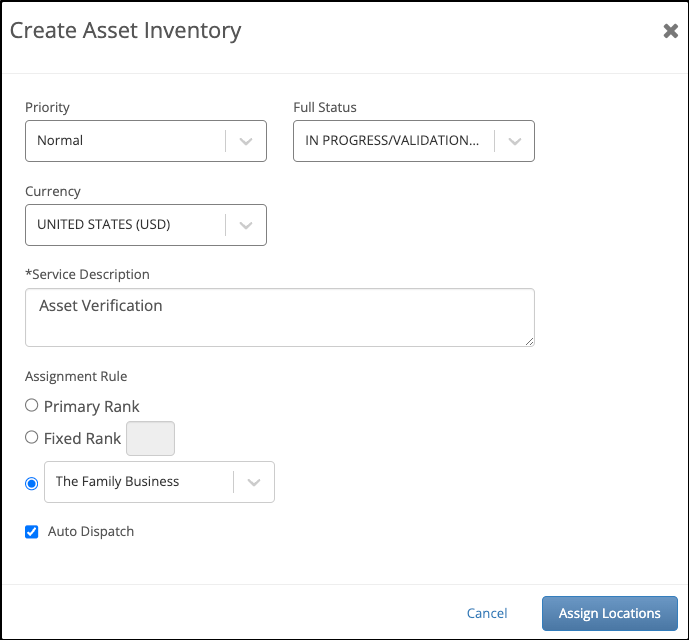
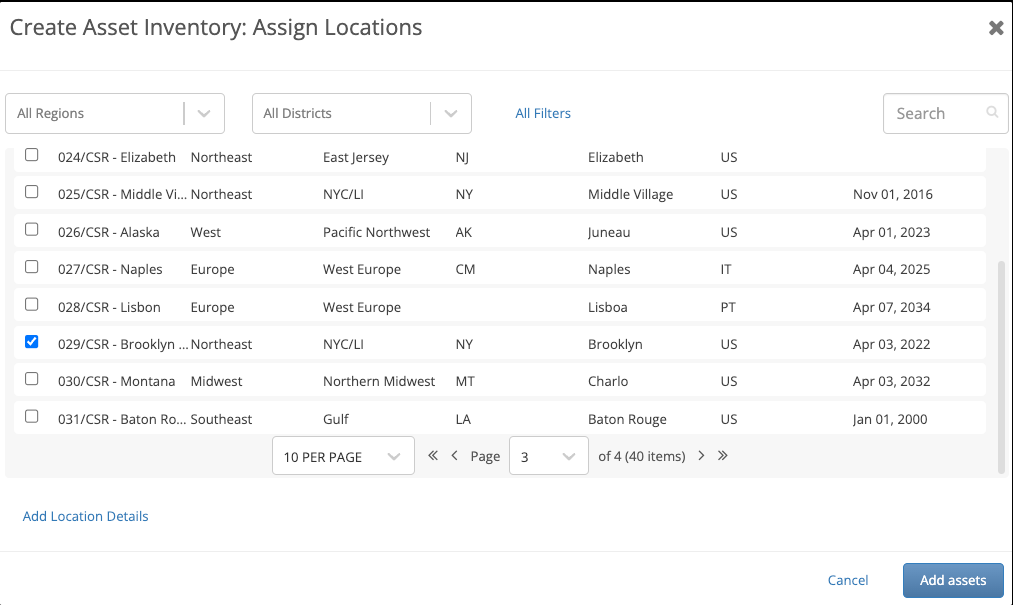
- Click Assign Locations button to add location(s).
- Click the checkbox to add location(s) to the inventory
- Optional: Click the Add Locations Details link to additional details
- Click Add assets button to add assets
- Use the drop-down arrow to select how assets are added into the inventory
- All Assets: All assets at the location(s)
- By Trade: Assets associated with a trade
- By Asset Type: Assets associated with a specific asset type
- Select Assets Manual: Self-selection of assets
- Click the Assign Locations button to assign the inventory
Viewing Location Dashboard
Location Dashboard permits you to go inside a location to view specific information pertain to assets. From the landing page, the column for each location reflects Captured and Validated Assets from the Main Summary Displays as well as additional information. Simply clicking on a location from the list opens the location’s dashboard.
Hover your mouse over the information icon to receive a definition for each column.
Observing a Location Dashboard
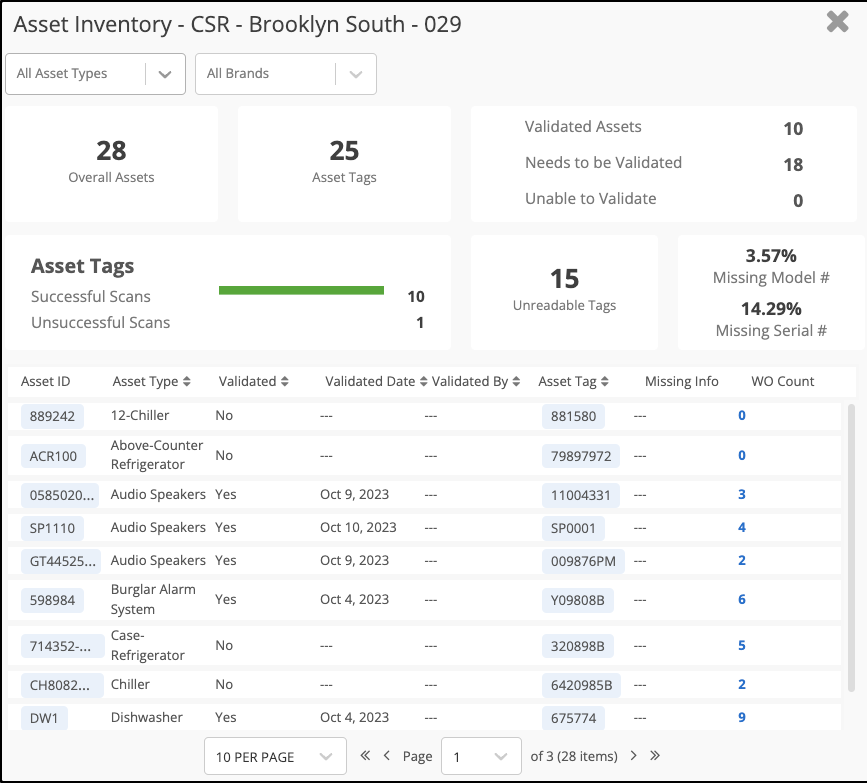
The Location Dashboard has wide-ranging of information that relates to assets within a location. There is the ability to filter the dashboard by Asset Type and Brand. Based on the information from the dashboard, clicking on the Asset ID or Asset Tag opens the Asset Details page where updates can be made on the asset. When changes are made on an asset, the numerical figures are immediately updated and reflected on the dashboard.
-
Page:
-
Page:
-
Page:
-
Page:
-
Page:
-
Page:
-
Page:
-
Page: