Conducting a Site Audit in Service Automation
- Caroline Antoun
Now you can seamlessly conduct your Site Audits in Service Automation on a tablet or computer. In Site Planning Reports, there is a new button + Create Reports on the main Site Planning Reports page that will lead you to the Site Audit form to conduct your audit. The audits are the same audits like you've been doing for years now in SC mobile, only here you can see the entirety of your site audit on one page, modify your checklists, and bulk rate checklist items.
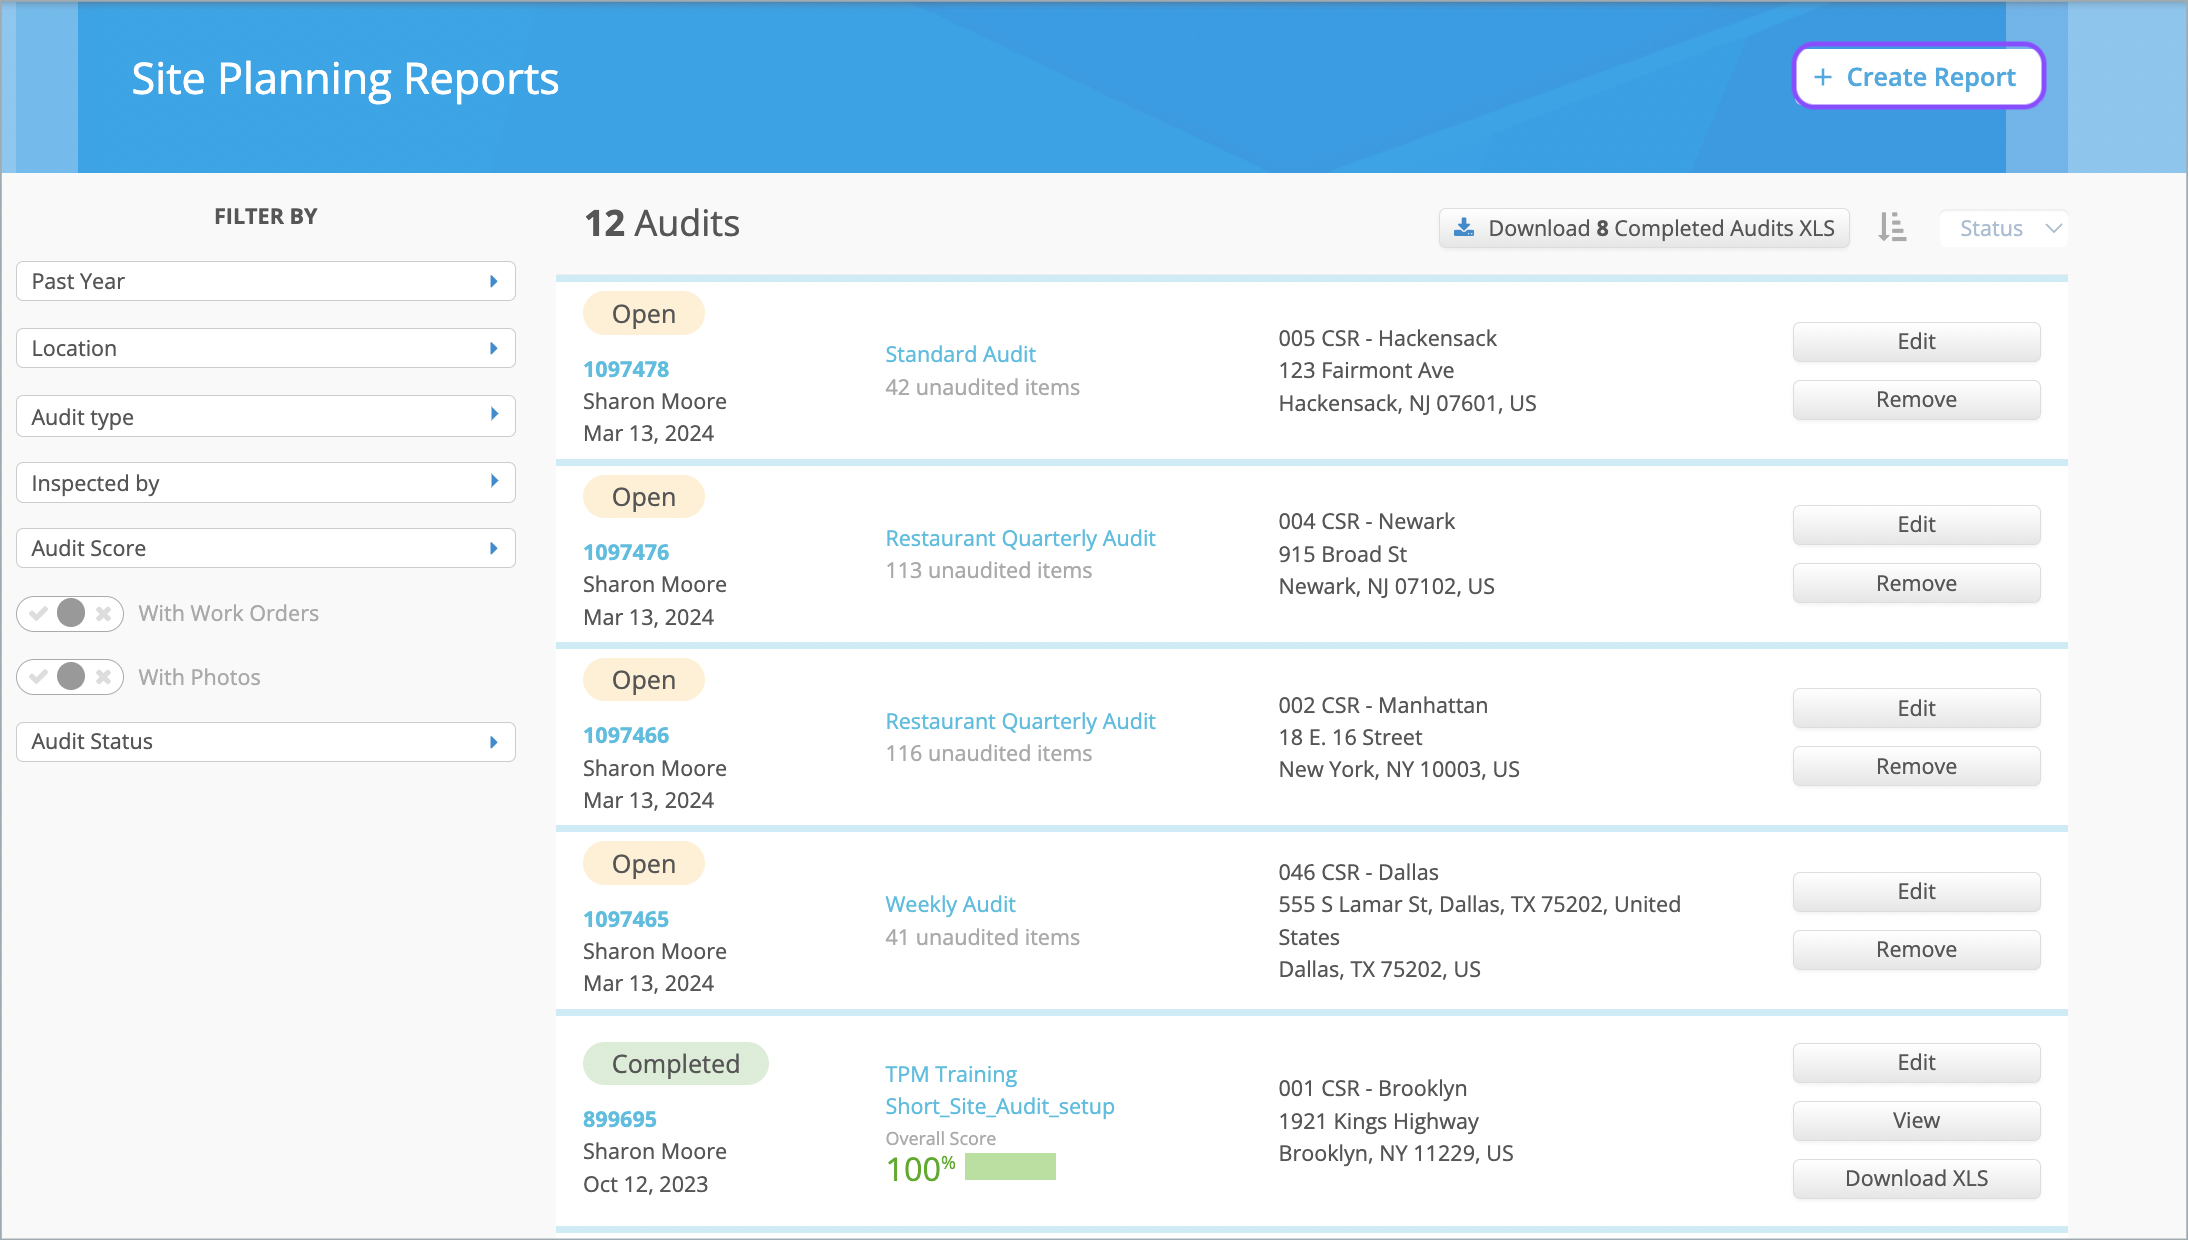
If you do not see the + Create Report button, contact your ServiceChannel administrator to check your user permissions.
There can be up to 10 open same type audits for the same location at a time.
Starting a Site Audit in Service Automation
- Click on + Create Report. The Create Report Window Pops up.
- Choose your Location.
- Choose your Report Type.
- Click Create.
Navigating the Site Audit Report
There are 4 sections to the Site Audit Report in Service Automation.
- Location Details, Type of Audit, Inspector's Name. Confirm this information before proceeding with your report!
- Checklist Panel - Edit your checklist, view items that have been rated or not, and bulk rate items here.
- Audit Details Panel - Rate the checklist items, enter comments, and create work orders here.
- Submit, Save, or Cancel a Report - Choose to submit, save, or cancel a report you are working on.

Checklist Panel
The Checklist Panel gives you an overview of your Site Plan and can help you quickly navigate through your Site Report.
In the Checklist Panel, you can do four things:
- Conducting a Site Audit in Service Automation#Edit your Site Plan
- View whether items have been rated or not
- Conducting a Site Audit in Service Automation#Bulk Rate checklist items
- Conducting a Site Audit in Service Automation#Navigate quickly through the Audit Details Panel
Edit your Site Plan
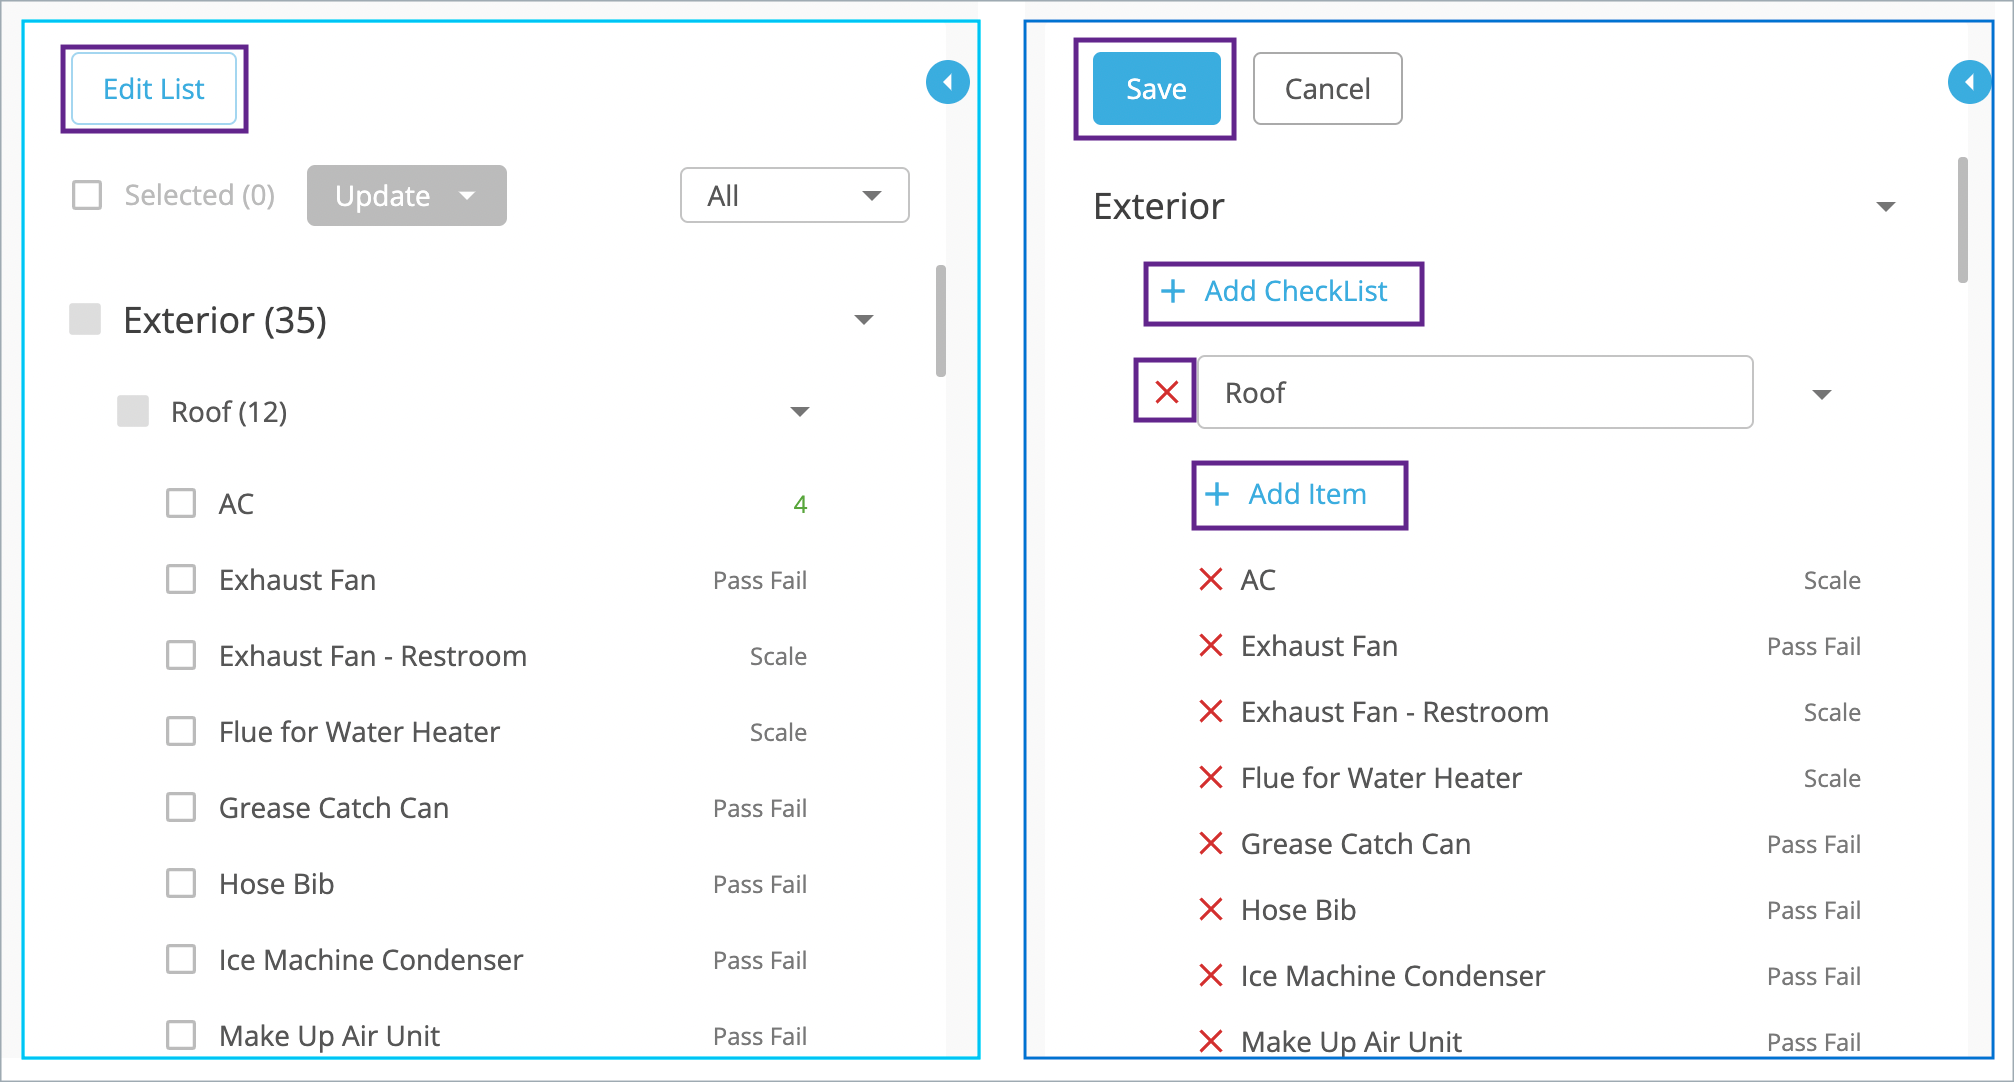
Not all pre-configured checklists perfectly match every location, requiring them to be modified. Simply click on Edit List.
You can:
- add Checklists by clicking on Add CheckList
- delete Checklists by clicking on the red X
- edit Checklist name by typing in the text field
- add items to the list by clicking on Add Item
- delete items by clicking on the red X
Only the checklists in this audit will be modified. Former and future Site Plans will not be impacted.
You cannot edit, create, or remove an Area from a checklist in Service Automation.
When you are finished, click Save.
View Checklist Item Ratings
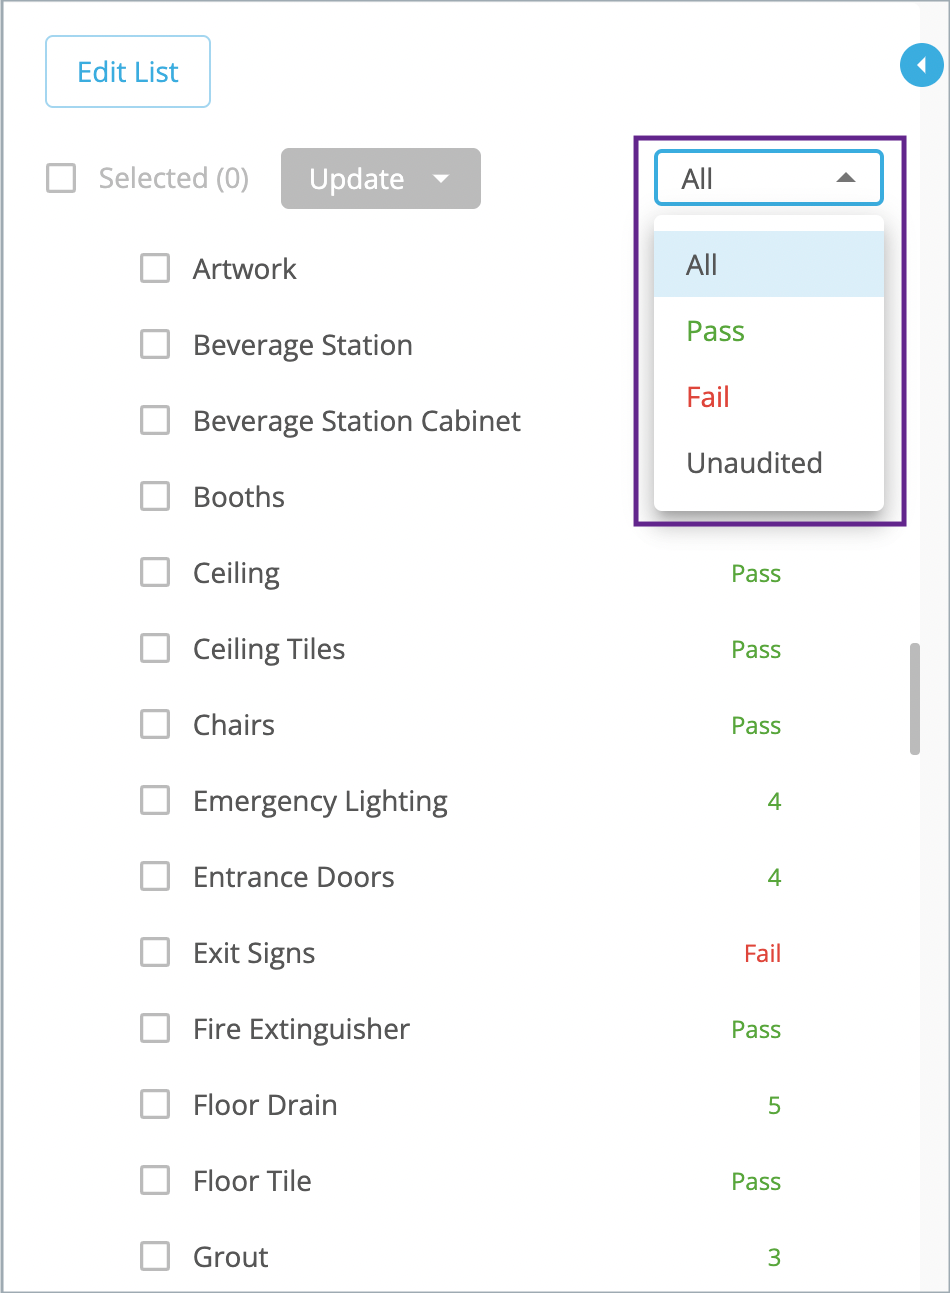
View ratings by scrolling down the Checklist Item Panel. The default setting shows everything.
You can filter for Pass, Fail, and Unaudited by clicking on the triangle in the filter. When you click on the desired criteria, it automatically filters.
The Unaudited filter is very helpful when you try to submit, but you get an error message stating there are still items needing to be audited.
Bulk Rate Checklist Items
Quickly bulk rate more than one checklist item that is the same type. When you click on the first item, only the same rating type (P/F, Scale, Percentage) will be clickable. Every other type will automatically be greyed out.
- Click on items to be rated that are the same rating type.
- Click on the update button.
- Choose the rating score. Scores will automatically be reflected.
Navigate Quickly through Audit Details Panel
When you click on a checklist item in the Checklist Panel, you are brought to that checklist item card so you can rate it. This is a huge time saver when you have an extensive audit list.
Audit Details Panel
Each checklist item will have its own card that will display the description of what to audit and the specific rating system. You will also see previous ratings from past audits of this item and can click on the Audit # in blue to view the entire audit details.

For each item, you can:
- rate the item
- add comments including photos
- create a work order if the item needs repair
- specify how many items you audited
For an item to be considered audited, you minimally have to give a rating.
Submitting Your Report
At the conclusion of your audit, whether you have finished or not, you have three options to exit the audit.
- Click Save & Close to save as a draft and complete later.
- Click Submit to upload a completed report.
- If your report is incomplete and you click submit, you will see a pop-up window prompting you to choose to Save as Draft - which will save and exit out of the report-- or click cancel to continue working on the report.
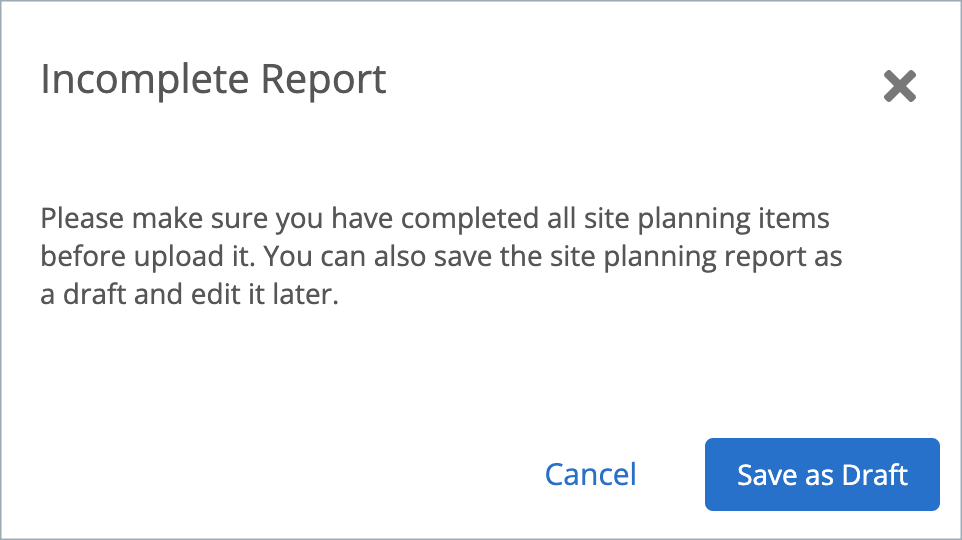
- If your report is incomplete and you click submit, you will see a pop-up window prompting you to choose to Save as Draft - which will save and exit out of the report-- or click cancel to continue working on the report.
- Click Cancel to exit the report and not save your report;
- Ex: You realized this was the wrong report type and do not wish to keep this report.
- Ex: You realized this was the wrong report type and do not wish to keep this report.
Once you click cancel, it will automatically delete the report and WILL NOT SAVE any data you have input.
You cannot move on to another audit in Service Automation before either submitting or saving the report you are working on.
Editing an Audit
If you need to return to either a completed or incompleted audit to change something, you are able to do this in both Service Automation - Editing Site Audits and ServiceChannel Mobile - Editing an Audit.

Filter by label
There are no items with the selected labels at this time.