Managing Custom Requirements
- Chellie Esters
- Anastasia Medovkina (Deactivated)
- Anastasiya Dashuk (Unlicensed)

Client Custom Requirements
Many clients will have information they need you to review and agree to, or information they need to gather to conduct business with you. This section allows clients to upload custom requirements for your review, completion or acceptance.
There are four ways in which a client can request custom requirements:
- Accept online with name and date
- Upload a document
- Download a document, fill out the document and upload the document
- View link and confirm with name and date
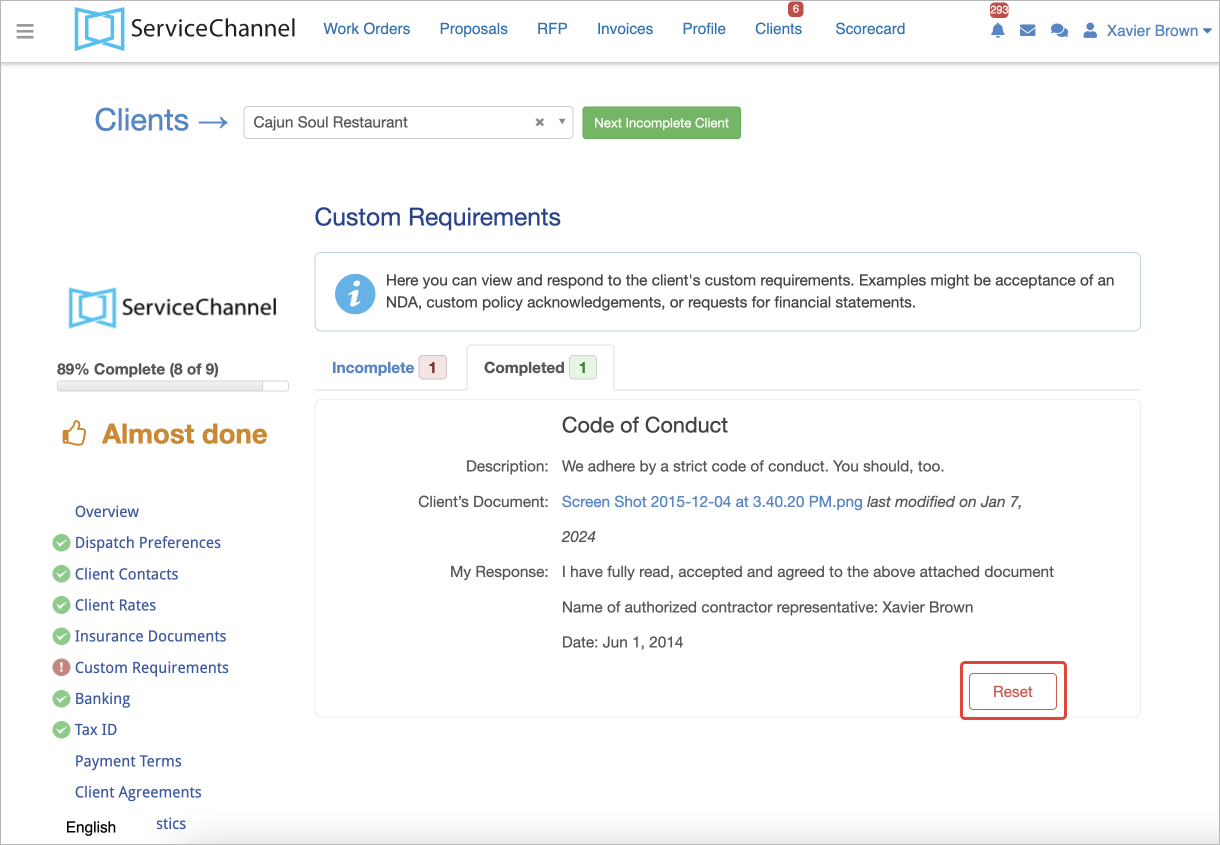
You can always view your Incomplete and Completed requirements, but once you have completed a requirement you are not able to modify the details.

Note that you and your client may revert the saved requirements to the Incomplete status again by clicking the Reset button. In this case, you will have to submit the requirement again.
Accept Online With Name and Date
When asked to complete this type of custom requirement there will be a description letting you know about the document you will be reviewing. Once you click and view the document you will confirm you have reviewed the information so your client has a record of when it was reviewed and accepted.
- From the top navigation bar, click Clients. The Clients page appears.
- Click Continue next to the desired client. The Clients page for the applicable client appears.
- In the left navigation bar, click Custom Requirements. The Custom Requirements page appears.
- Review the document by clicking the link.
- Check the box, “I have read, accepted and agreed to the above attached document”.
- Modify Name, if applicable. (Note: Name pre-populates with name of logged in user.)
- Modify Date, if applicable. (Note: Date pre-populates with today’s date.)
- Click Confirm Completion. The requirement moves to the Completed section of Custom Requirements.

Upload Document
When asked to complete this type of custom requirement there will be a description letting you know what document the client is asking for you to upload. Once you have uploaded the requested document you will confirm completion of the requirement so your client can review.
- From the top navigation bar, click Clients. The Clients page appears.
- Click Continue next to the desired client. The Clients page for the applicable client appears.
- In the left navigation bar, click Custom Requirements. The Custom Requirements page appears.
- Review the Description to confirm what document the client wants uploaded.
- Click Choose File. Your computer navigation overlay appears.
- Select File to upload. File name you uploaded appears next to Choose File.
- Click Confirm Completion. The requirement moves to the Completed section of Custom Requirements.

Download, Fill Out and Upload
When asked to complete this type of custom requirement there will be a description letting you know about the document you will be filling out. Once you download, fill out and upload the completed form you will confirm completion of the requirement so your client can review.
- From the top navigation bar, click Clients. The Clients page appears.
- Click Continue next to the desired client. The Clients page for the applicable client appears.
- In the left navigation bar, click Custom Requirements. The Custom Requirements page appears.
- Review the Description to confirm how the client wants the document completed.
- Download the document by clicking the applicable link.
- Fill out the document you downloaded.
- Upload the completed document.
- Click Confirm Completion. The requirement moves to the Completed section of Custom Requirements.

View Link And Accept Online With Name and Date
When asked to complete this type of custom requirement there will be a description letting you know about the link you will be reviewing. Once you click and view the link you will confirm you have reviewed the information in the link so your client has a record of when it was reviewed.
- From the top navigation bar, click Clients. The Clients page appears.
- Click Continue next to the desired client. The Clients page for the applicable client appears.
- In the left navigation bar, click Custom Requirements. The Custom Requirements page appears.
- Click the link to review information supplied by your client.
- Check the box, “I have read, accepted and agreed to the above link”.
- Modify Name, if applicable. (Note: Name pre-populates with name of logged in user.)
- Modify Date, if applicable. (Note: Date pre-populates with today’s date.)
- Click Confirm Completion. The requirement moves to the Completed section of Custom Requirements.

