Managing Financial Information
Chellie Esters
Anastasia Medovkina (Deactivated)
Natalia Larina (Unlicensed)

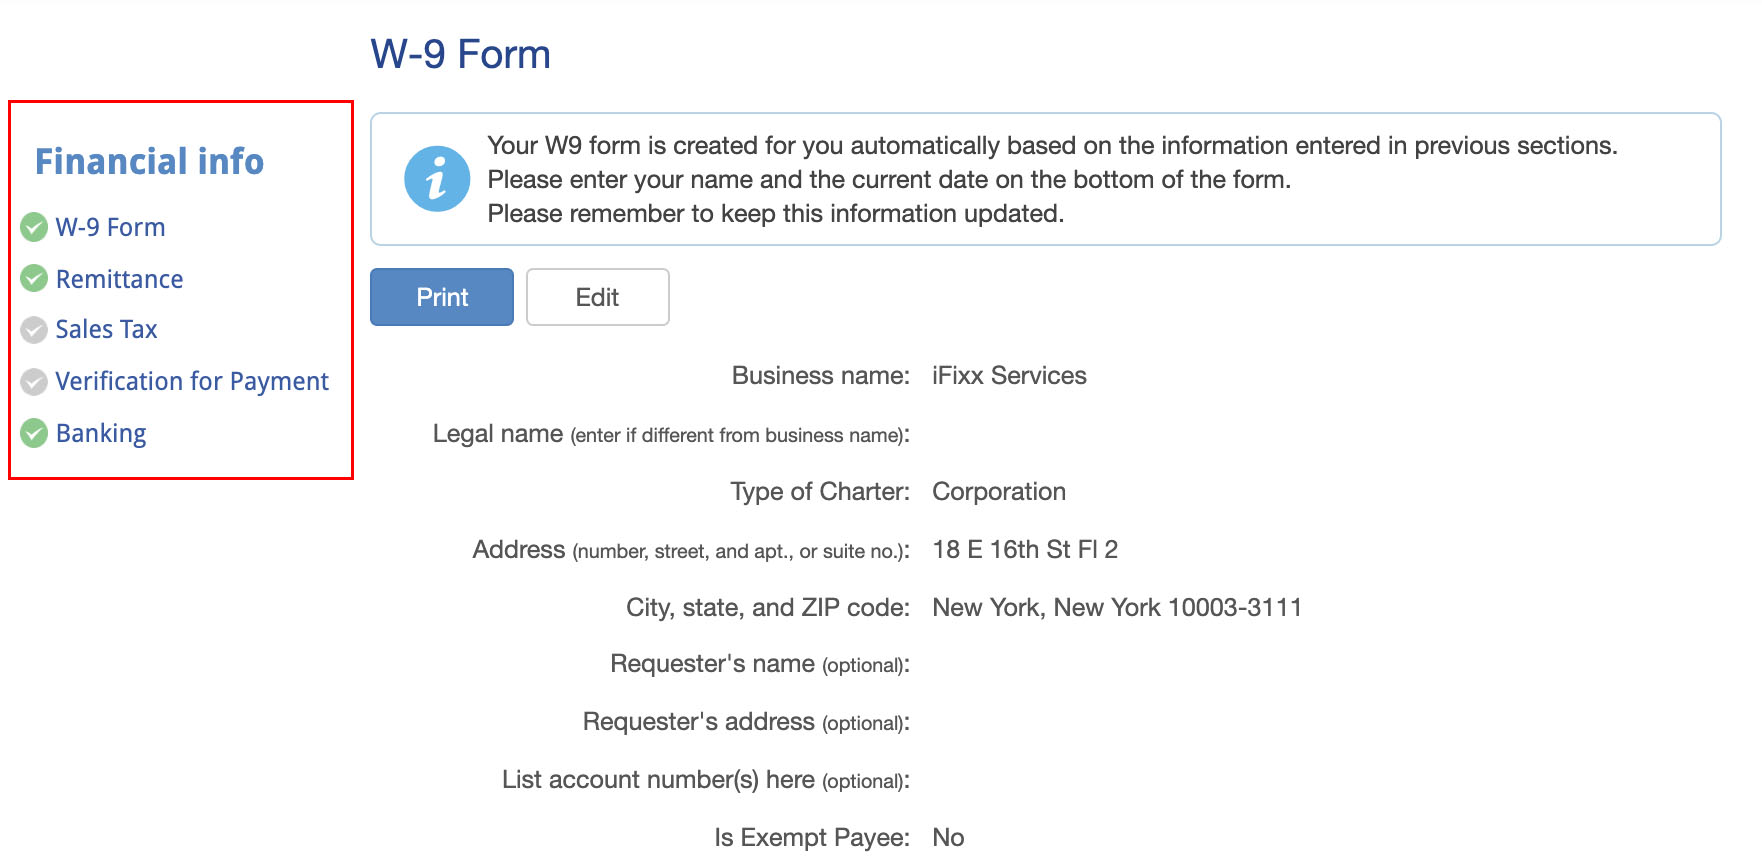
The Financial Info section in the Provider Automation allows you to manage pertinent financial forms and information. This is beneficial because you do not have to send physical copies of this information to your ServiceChannel clients, as those who require it can review it securely in your profile.
We recommend that you complete all 3 sections, as ServiceChannel clients may require you to complete them for payment processing.
There are 3 financial forms:
W-9 Form: Completing this IRS form in Fixxbook allows your ServiceChannel clients to review and print it at anytime. ServiceChannel clients may print a copy of the form in the official IRS format, as needed, without you mailing or faxing a physical, paper form.
This form is only available for contractors performing work in the United States.
- Remittance: As your Fixxbook profile is linked to Service Automation, your remittance address is pulled from your Fixxbook profile into Service Automation invoices. You may manage which remittance address appears on those invoices.
- Sales Tax: Entering and managing this data alerts your clients that you collect and remit taxes, and that your tax information is compliant with state and local laws.
Managing the W-9 Form
You may add or edit any information on your W-9 form, in compliance with IRS rules.
This form is only available for contractors performing work in the United States.
You must complete the Company Information section of your profile before completing W-9 information as your Business Name, Type of Charter, Address and Tax ID Number/ EIN / SSN are pulled from that section. Completing the W-9 Form before the Company Information section will result in a system error.
Once you are accepted into at least 1 client network, your Company Name and Tax ID cannot be edited through this method. You must contact our Support team to edit this information.
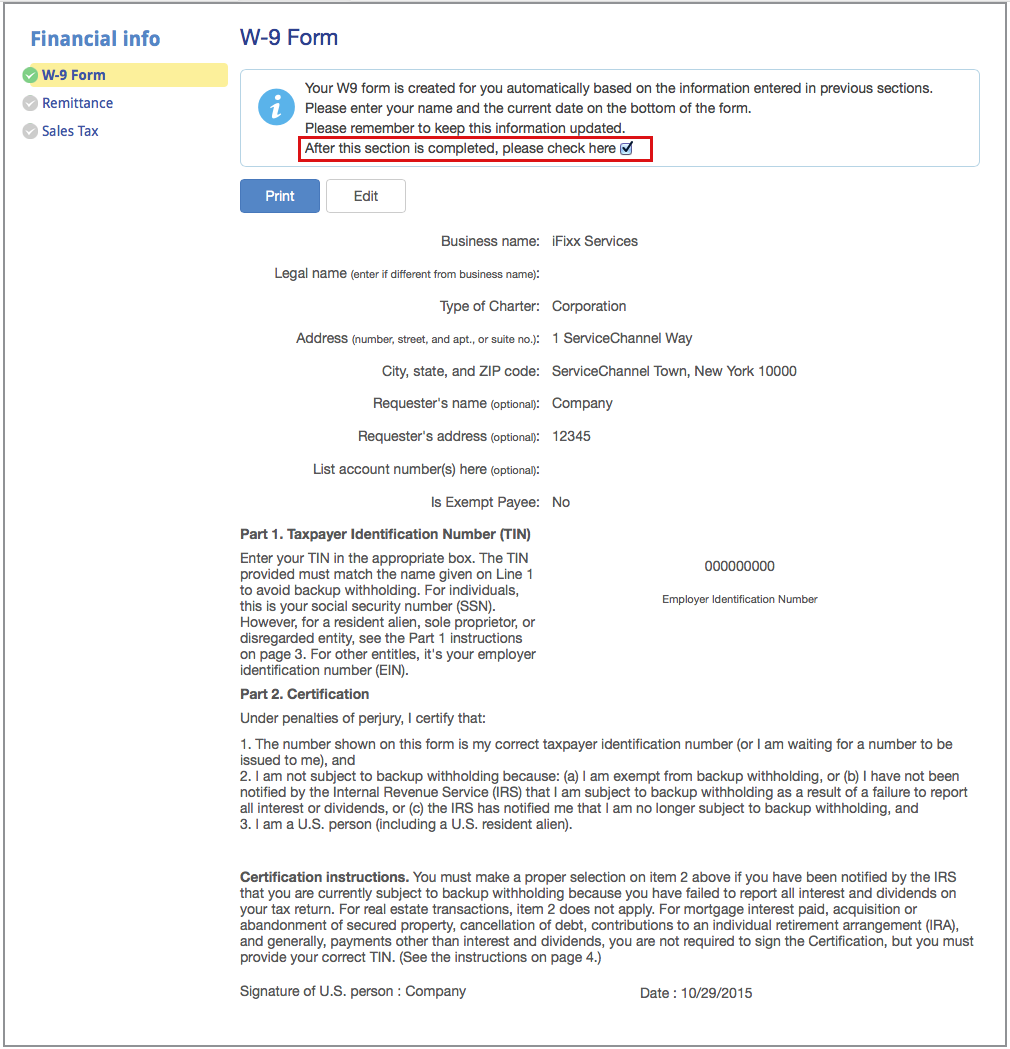
- On the Financial Info page, click W-9 Form. The W-9 Form appears.
- Click Edit. The Edit W9 Form appears with the Business Name, Type of Charter, Address and Tax ID Number/ EIN / SSN pulled from your Fixxbook Profile.
- (Optional) Enter a Legal name, Requester’s name and address, and Account number(s), if applicable.
- (Optional) Indicate that you are an Exempt Payee, if applicable.
- Under Part 2 Certification, indicate your backup withholding status.
- At the bottom of the form, Sign and Date.
- Click Save. The W-9 Form appears.

You must edit your Business Name, Type of Charter, Address and Tax ID Number/ EIN / SSN in the Company Information section of your profile.
- On the Financial Info page, click W-9 Form. The W-9 Form appears.
- Click Edit. The Edit W9 Form appears with the Business Name, Type of Charter, Address and Tax ID Number/ EIN / SSN pulled from your Fixxbook Profile.
- (Optional) Change the Legal name, Requester’s name and address, and Account number(s), if applicable.
- (Optional) Change the Exempt Payee status, if applicable. In case you mark your business as Exempt Payee, select the applicable code from the drop-down list that appears.
- Under Part 2 Certification, change your backup withholding status, if applicable.
- At the bottom of the form, change the signature and date, if applicable.
- Click Save. The W-9 Form is updated.
Managing Remittance
It is very important to keep this information updated or your client may send payment to the wrong address. You may add as many remittance addresses as needed and when invoicing in Service Automation all remittance addresses will be available to select from.
Remittance Payment Types
Payment type allows you to indicate to your ServiceChannel clients all accepted forms of payment. You may add up to 6 payment types per remittance location.
- On the Financial Info page, click Remittance. The Remittance page appears.
- Click Add a remittance location. The Add a remittance location overlay appears.
- Enter the business name, address, phone number, and email. (Required fields are indicated by a red asterisk.)
- Click Save. The list will populate with the new remittance location.
Some clients will require remittance address changes be approved by them before taking effect in the system. When your client requires this, edits you make to your remittance will be placed in the pending status until approved by your client.
- On the Financial Info page, click Remittance. The Remittance page appears.
- Click Edit next to the desired remittance location. The Edit remittance location overlay appears.
- Modify the desired fields.
- Click Save. The list will populate with the modified remittance location.
- On the Financial Info page, click Remittance. The Remittance page appears.
- Click Remove next to the desired remittance location. The Remove remittance location overlay appears.
- Click Remove. The remittance location is removed from the list.
Managing Sales Tax
You may add, edit or delete any information about your sales tax, as needed.
You must Assign Trades to Regions before completing Sales Tax information as the State/Province field is pulled from that section. Completing the Sales Tax section before you Assign Trades to Regions will result in a system error.
Non-collection of Sales Tax
Those who do not collect sales tax may indicate this in Fixxbook. See How to Indicate non-collection of sales tax, below.
- On the Financial Info page, click Sales Tax. The Sales Tax page appears.
- Select the I collect and remit taxes radio button.
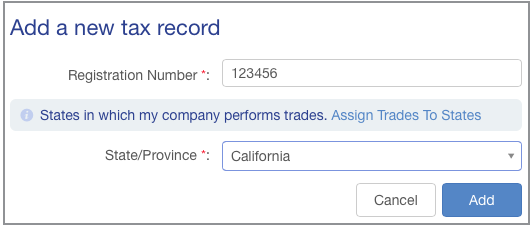
- Click Add a new tax record. The Add a new tax record overlay appears.
- Enter the Registration Number as assigned by the desired state.
- Select the State/Province to which the above Registration Number is assigned. (Note: Only those states/provinces you have setup and assigned to trades will appear in this list.)

- Click Add. The list will populate with the new sales tax record.
- On the Financial Info page, click Sales Tax. The Sales Tax page appears.
- Click Edit next to the desired sales tax record. The Edit tax record overlay appears.
- Modify the desired fields.
- Click Save. The updated sales tax record appears in the list.
- On the Financial Info page, click Sales Tax. The Sales Tax page appears.
- Click Remove next to the desired sales tax record. The remove sales tax record overlay appears.
- Click Remove. The sales tax record is removed from the list.
- On the Financial Info page, click Sales Tax. The Sales Tax page appears.
- Select the I don’t collect or remit taxes radio button.

Managing Banking
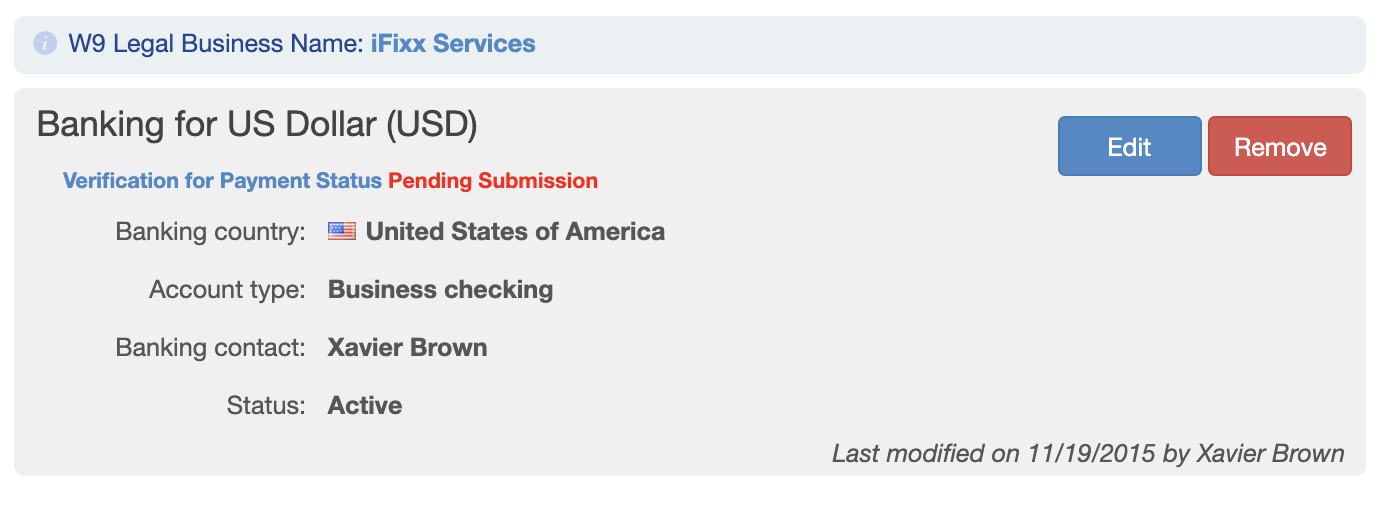
It is very important to keep your direct deposit information so clients can use this information to pay you via direct deposit. It will reduce the time it takes for you to receive payment.
-
Page:
-
Page:
-
Page:
-
Page:
-
Page:
-
Page:
-
Page:
-
Page:


