Using Templates to Create Projects
Chellie Esters
Jason Gauntz (Unlicensed)
Lamont Eddins
Using templates gives you the flexibility of entering projects without having to create a project within the Projects Module. You can use a template to upload a single or multiple projects at once by adding information onto an Excel file. A project can also be created by using a pre-designed template created in the Templates Tab. Using a pre-designed template will save time when having to create a project.
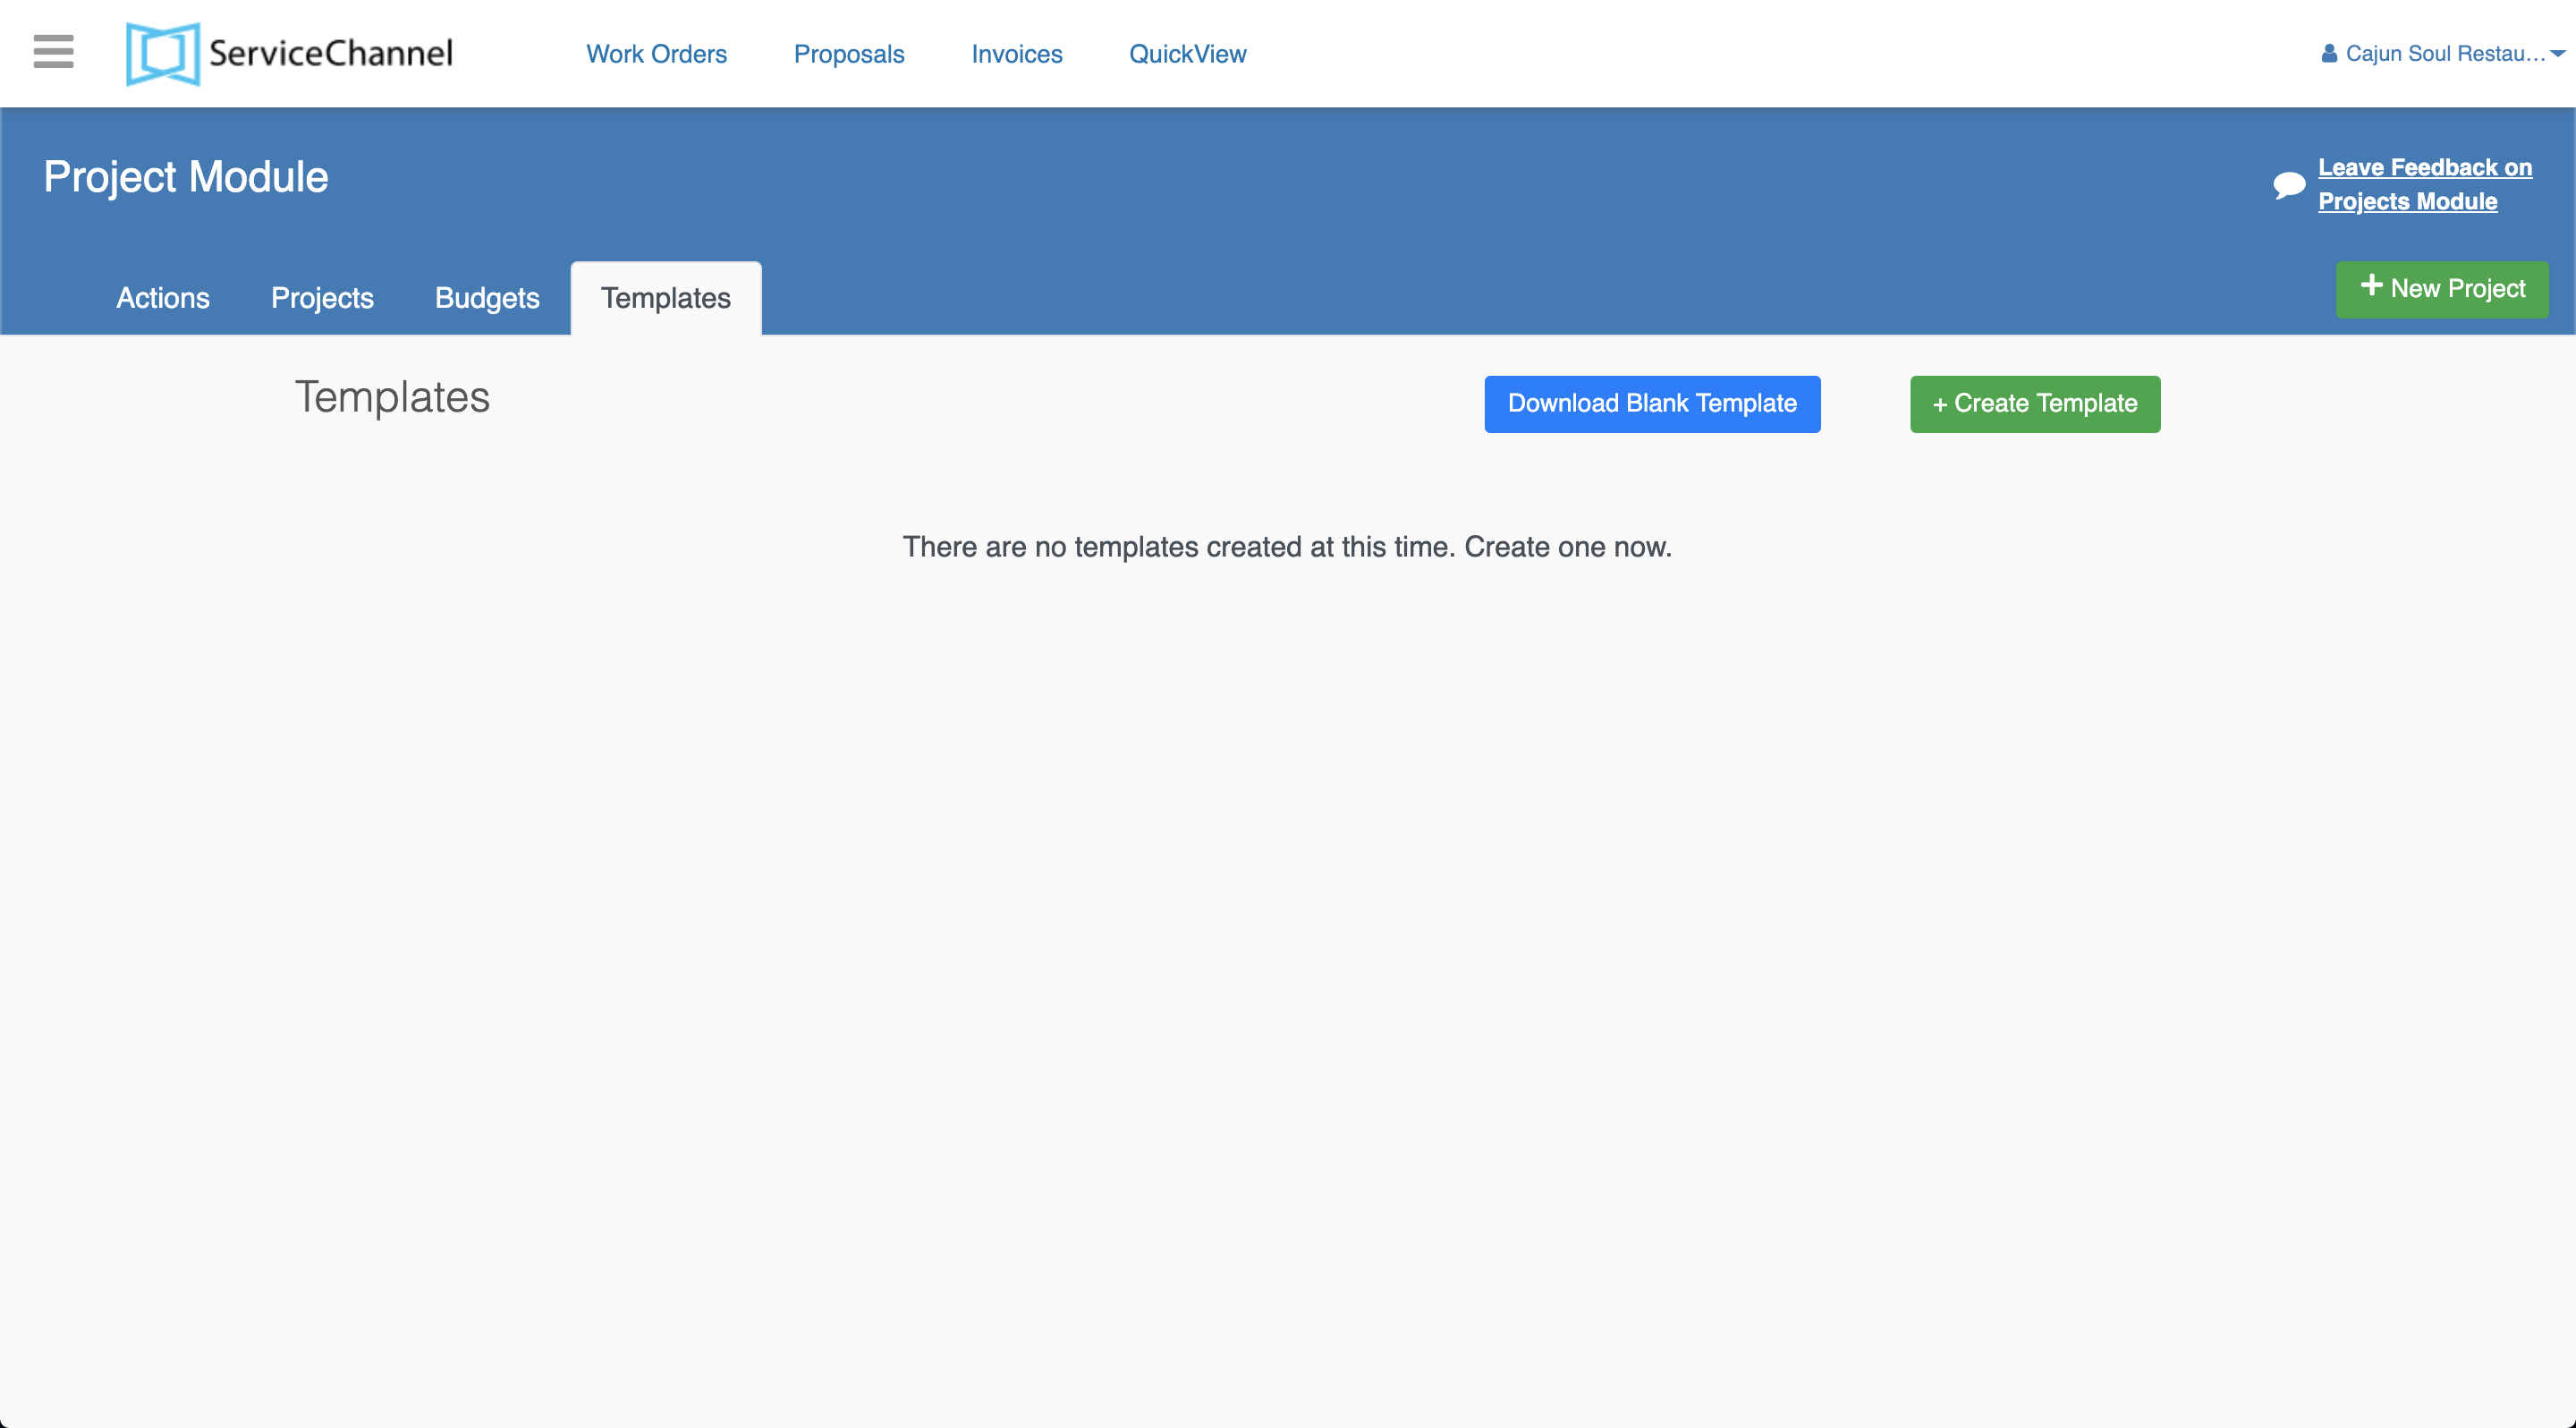
In the Templates Tab you can:
Creating a Project from an Excel Template
When creating a Project from a template, the following fields are required, depicted with an asterisk ( * ) next to the name:
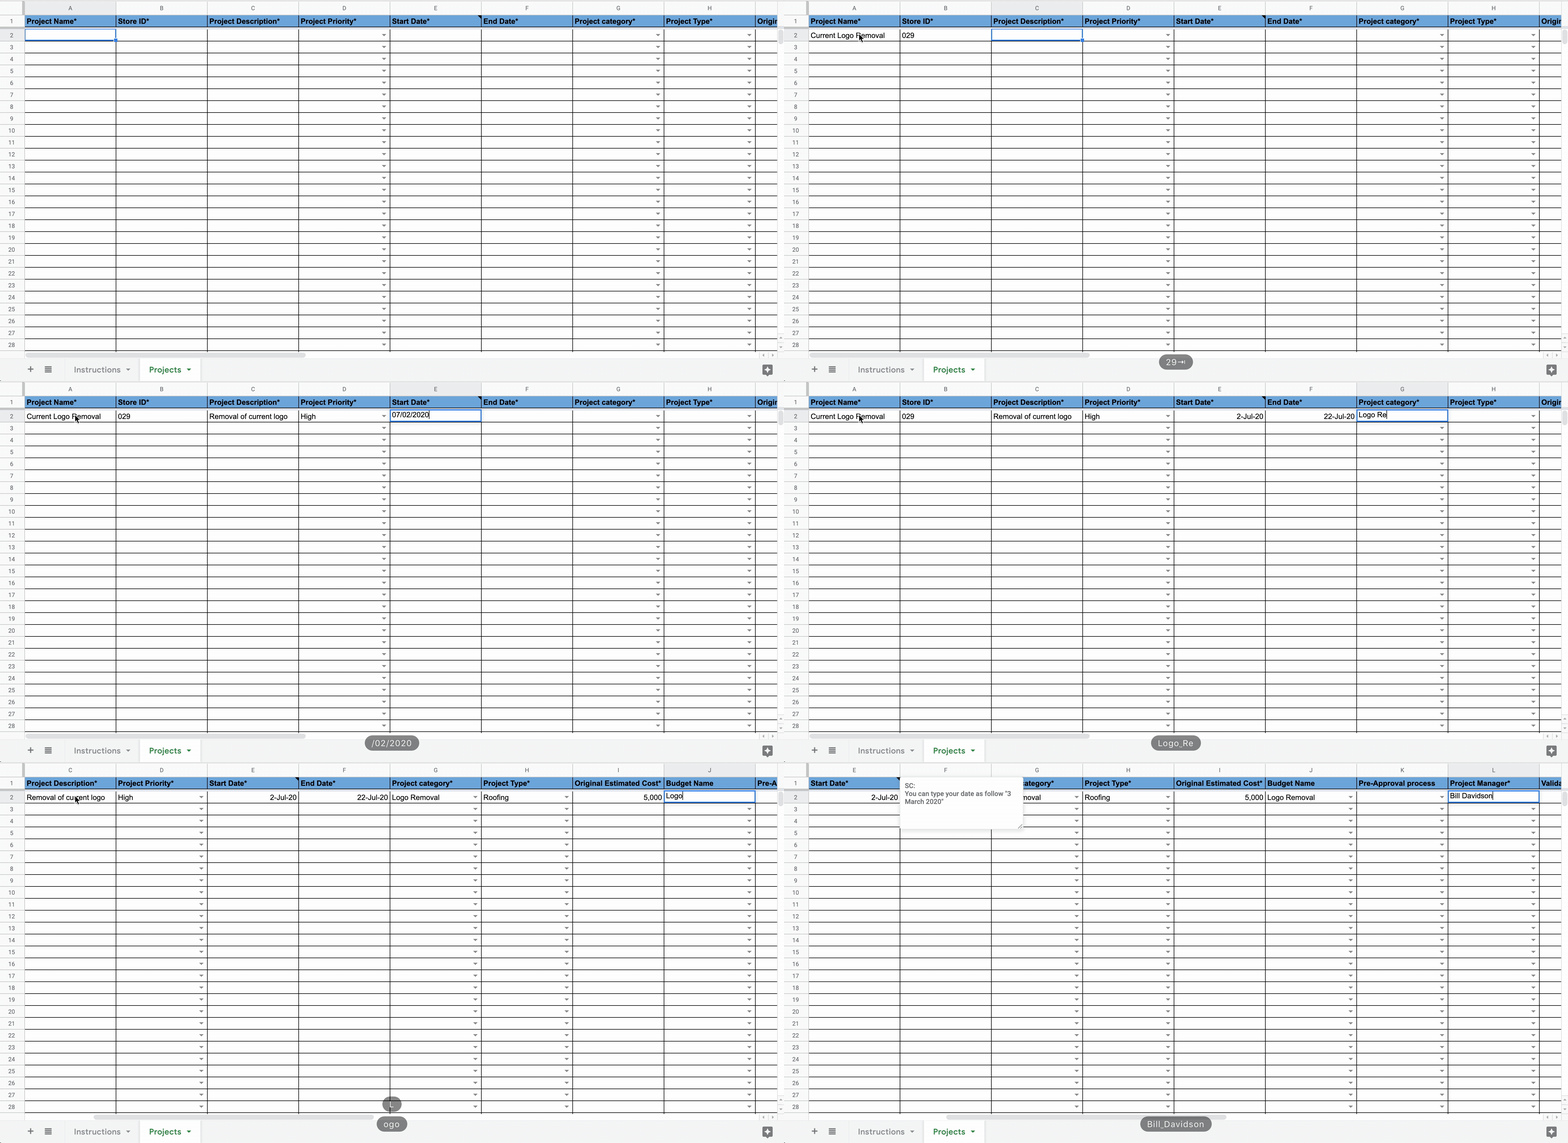
Project Name*
Store ID*
Project Description*
Project Priority*
Start Date*
End Date*
Project category*
Project Type*
Original Estimated Cost*
Project Manager*
Two additional columns — Budget Name and Pre-Approval process — are optional.
The field Validation Results must be left blank. If there are any errors in the template, they will list here after you upload it.
- Enter the Templates Tab to download a Blank Template.
- Click the Download Blank Template button to download the Excel file.
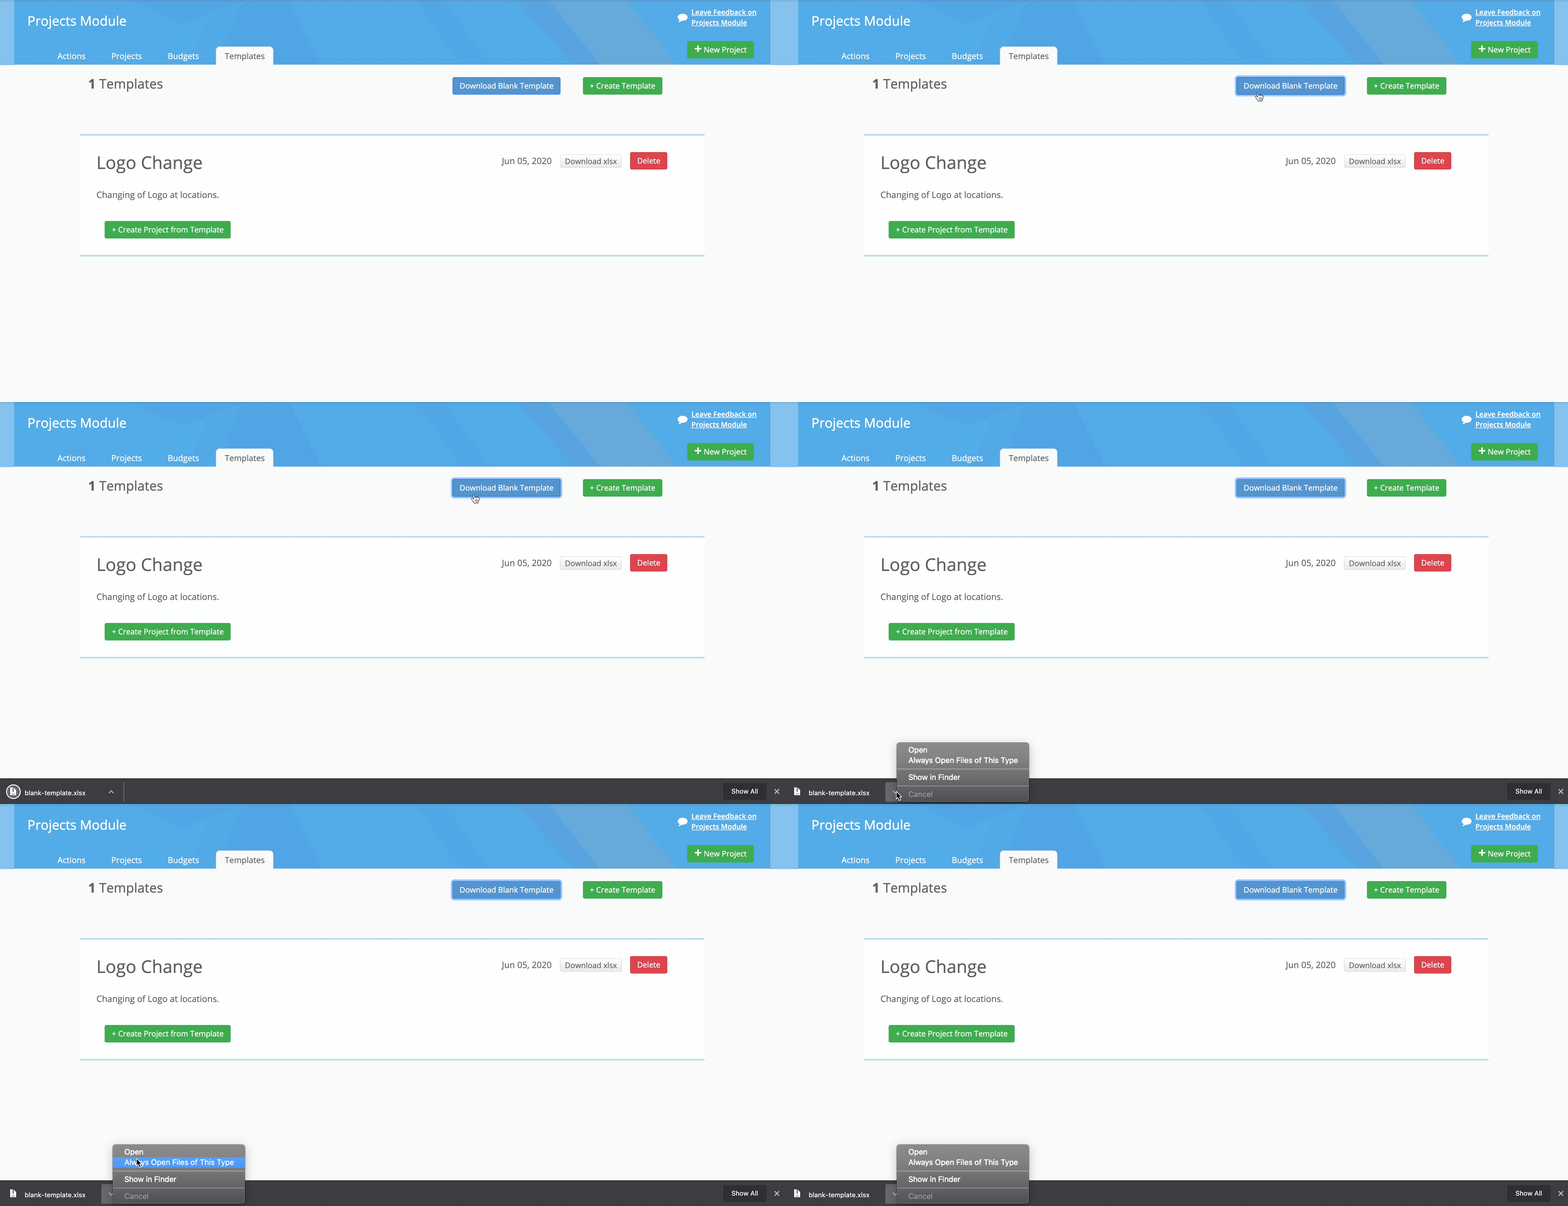
- Open the file to fill out the Blank Template.
Fill out all required columns and any optional information.
Required columns will have a * character next to the column name.
- Save the file when completed.
Click the +New Project Button to enter Create Project page.
Click the Create Template button to upload Excel file Template.
Click the Upload New Template button to open the Upload Project Template Box.
Drag or add file of choice.
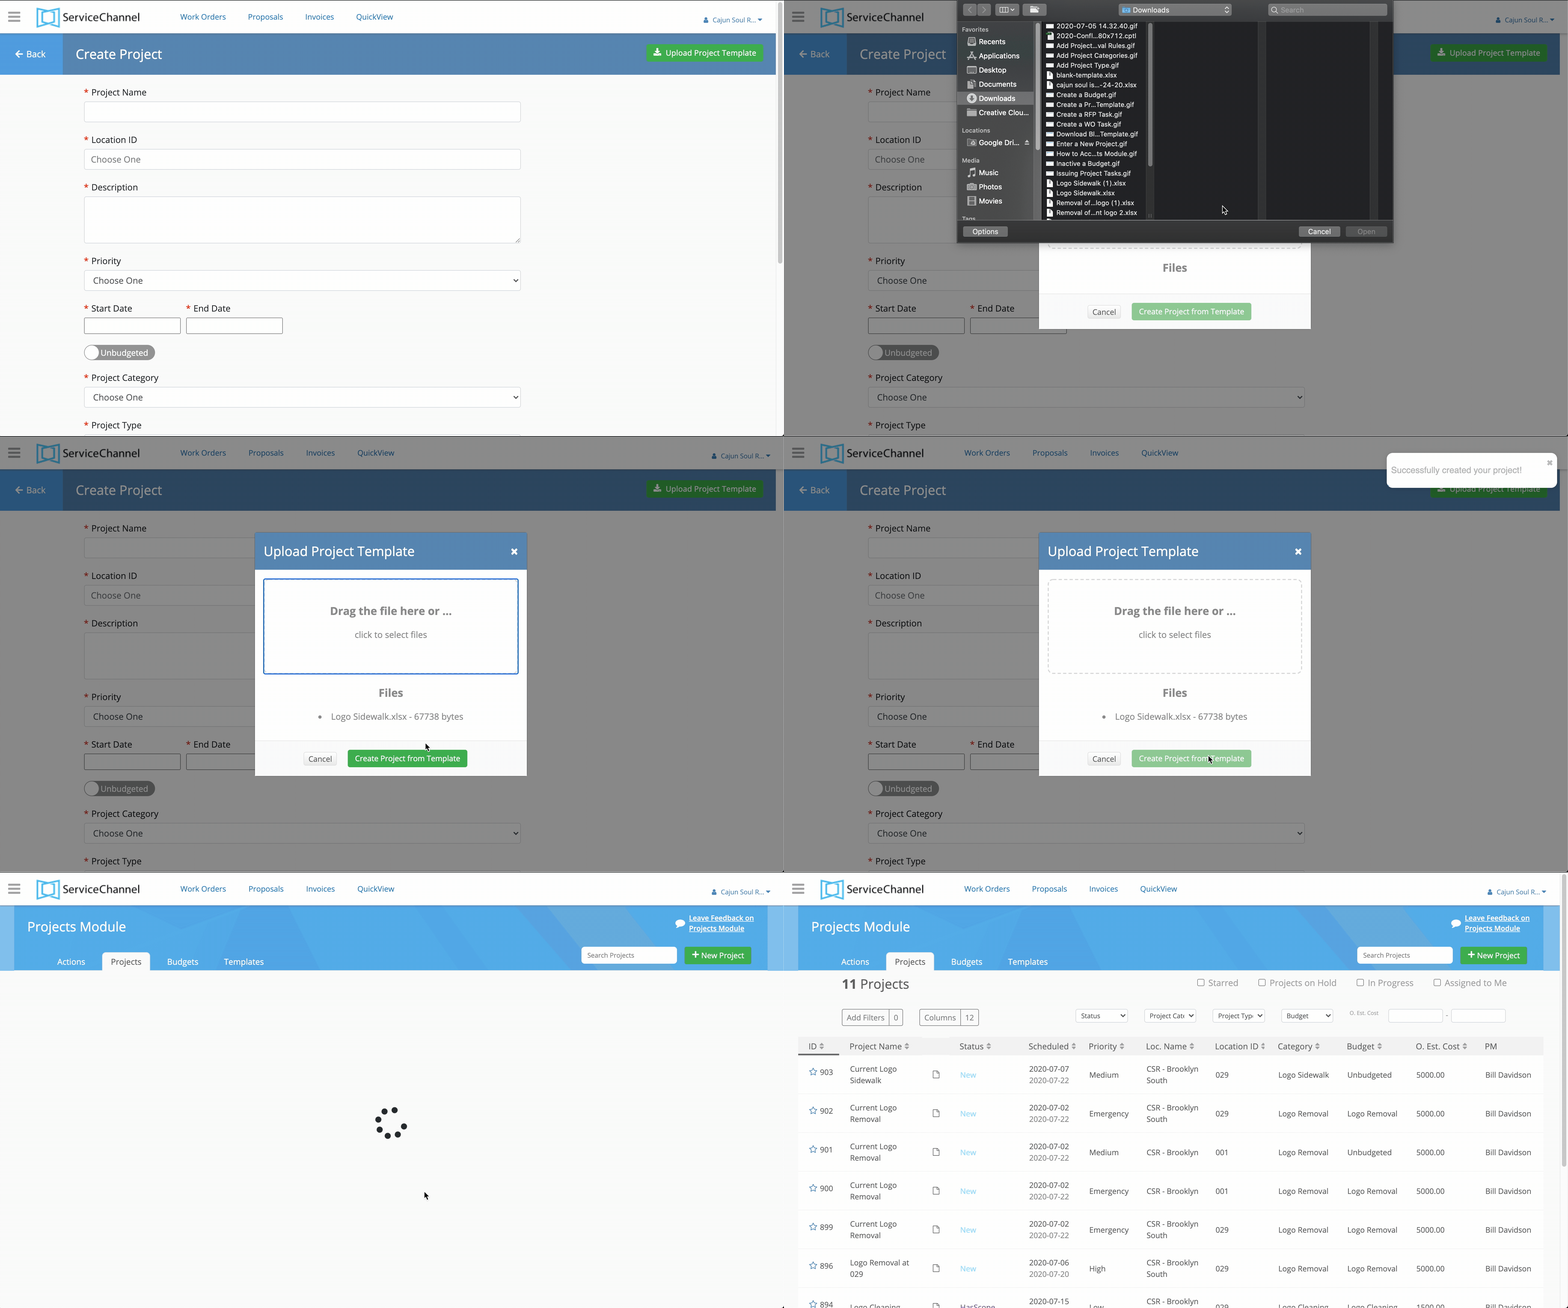
Click the Create Project from Template button to upload file and information is viewable on the Projects Tab.
Creating a Template in the Templates Tab
A template can be created in the Templates Tab and used to create a project. Having templates pre-designed is beneficial where the information is pre-loaded for when a project needs to be created. The only information required to build a template is the name and description. It is optional for the remaining sections to be completed. Having only two requirements provides flexibility for specific information to be added that supports a single project. Once a template has been added into the Templates Tab, it can be downloaded onto an Excel file or create a project. When the template is no longer need, it can be deleted. You would click the red Delete button located on the template.
- Enter the Templates Tab to create a template onto the Templates Tab.
- Click the +Create Template button to start creating the template.
Fill out all required columns for the template.
Required columns will have a * character next to column name and you can use the drop-down arrow or type-in feature to fill out the columns.
Enter any (optional) information on the template.
Click the Create Template button. Your template appear under the Templates Tab.
- Enter the Templates Tab to create a project from a template.
- Find the template needed for the project and click on the +Create Project from Template button.
Fill out all required columns for the template.
Required columns will have a * character next to column name and you can use the drop-down arrow or type-in feature to fill out the columns.
Click the Create Project button. Your project will appear under the Projects Tab.
Creating Template in a Project
You can create a template when modifying a project. You may decide during the Project Lifecycle of a particular project, the need to create a template for similar projects in the future. Instead of going into the Templates Tab to create a template, it can be built while in a project. The process for creating a template in a project differs from creating a template through the Templates Tab. The required information is name and description for the template. The result of creating the template in a project gets added onto the Templates Tab.
- In a project, click the Actions button to open the button options.
- Click the Create Template link to open the Create Template Fill in Box.
Create a Name and Description for the template.
- (Optional) Click the checkbox for any additional information needed for the template.
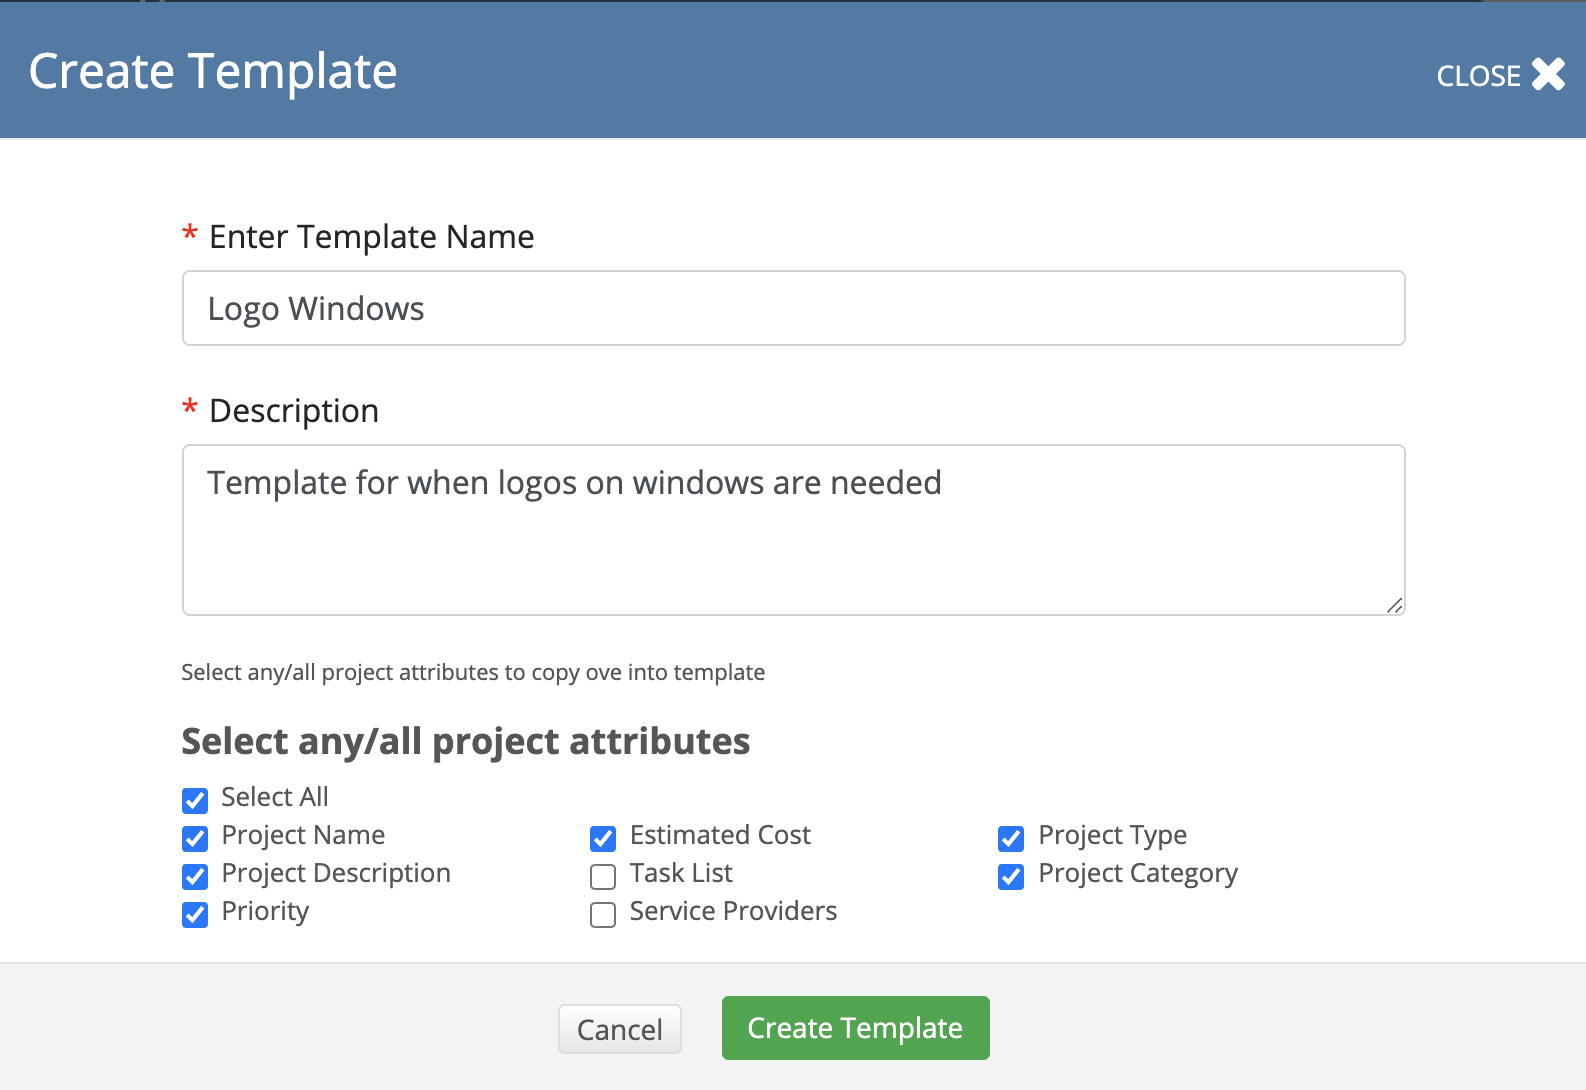
- Click the Create Template button. Your template appears under the Templates Tab.
-
Page:
-
Page:
-
Page:
-
Page:
-
Page:
-
Page:
-
Page:
-
Page:
