Adding the Audit Type and Uploading the Site Audit Template
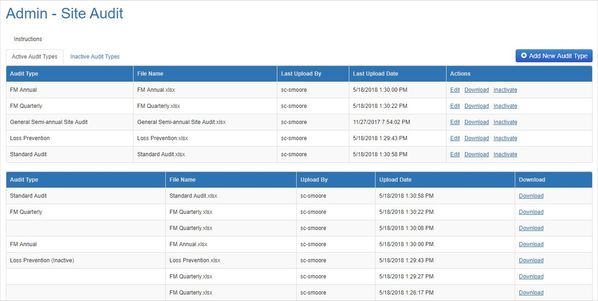
Once the Site Audit Template is complete, upload it as an audit type. In Site Planning Manager - Admin, you may see a list of existing audit types already configured for your organization.
First-time Site Planning Manager users will see a blank page.
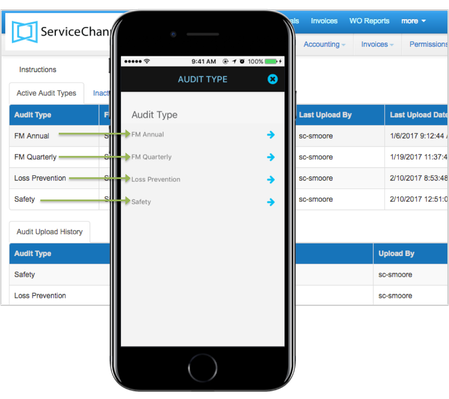
When choosing to name an audit type, we recommend a descriptive name that your auditors can easily identify. The audit type name configured in Site Planning Manager - Admin is the exact name that will appear in SC Mobile and in Site Planning Manager - Reports where your auditor will complete the reports.
 How to Add an Audit Type
Once you save an audit type, its name cannot be changed. Also, once an audit type is added, it cannot be deleted, only inactivated.

- In Site Planning Manager - Admin, click Add New Audit Type at the top of the table. The Add New Audit Type modal appears.
- In the Name field, enter an audit type name.
- Click Browse, select your Site Audit Excel Template, and confirm your choice.
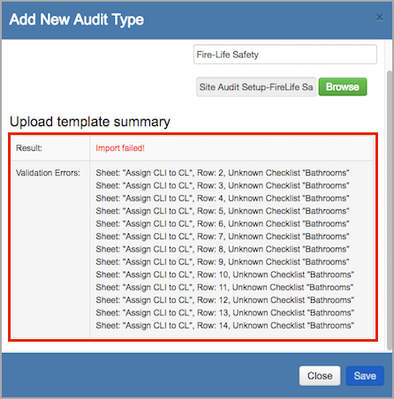
- Click Save. The Upload Template Summary section appears indicating whether your template passed or failed validation.
- If the import is successful, click Close. The new audit type appears under the Active Audit Types tab.
If the import fails, open your Site Audit Template, fix the errors, and upload the template again.
The report in the Upload Template Summary section indicates the exact sheets, rows, and columns where errors exist, so keep the report open while you review each line item listed against the template.