Configuring Multilevel Invoices (MLI)
Multilevel Invoice Approval (or MLI Approval) allows you to structure a workflow where invoices advance from one person to another in a hierarchy until the invoice is finally approved (or rejected) by the highest person in the hierarchy. Multilevel Invoicing Approval may occur using any combination of Trades, Categories, and/or Invoice Amounts, meaning users may approve invoices based on what trade and/or category the invoice is in, and/or the currency amount of invoice at predetermined thresholds.
The MLI Approval process is automated so to save the time and frustration of manually sending and receiving invoices between service providers, facility operations, and accounting operations.
The below illustrates an example of an MLI approval workflow. You may configure a workflow that best represents your business needs.

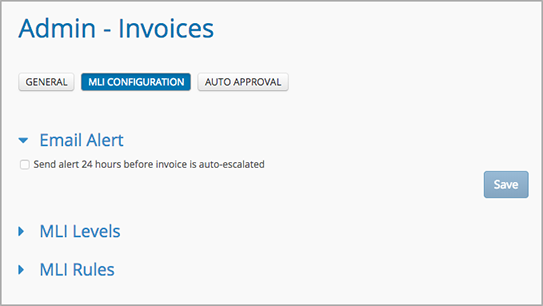
- At the top-left corner of the screen, click the menu icon and select Admin > Invoices > MLI Configuration. The MLI Configuration page appears.

MLI Configuration
MLI Approval configuration consists of three parts:
- Email Notifications: Approvers in the MLI hierarchy are notified 24 hours before invoices are automatically escalated.
- MLI Levels: hierarchal lists of users who are appointed to approve invoices, and the location(s) for which those users are permissioned to approve invoices.
- MLI Rules: the workflow of the overall approval process. MLI Rules are configured using a hierarchy of MLI Levels and diverging approval paths for invoices under differing trades and categories.
You must create MLI Levels before creating MLI Rules. Best practice is to create all MLI Levels first so you can easily select them while creating MLI Rules.
You may use either the user interface within the Service Automation Admin module or the MLI Levels template.
-
Page:
-
Page:
-
Page:
-
Page:
-
Page:
-
Page:
-
Page:
-
Page: