/
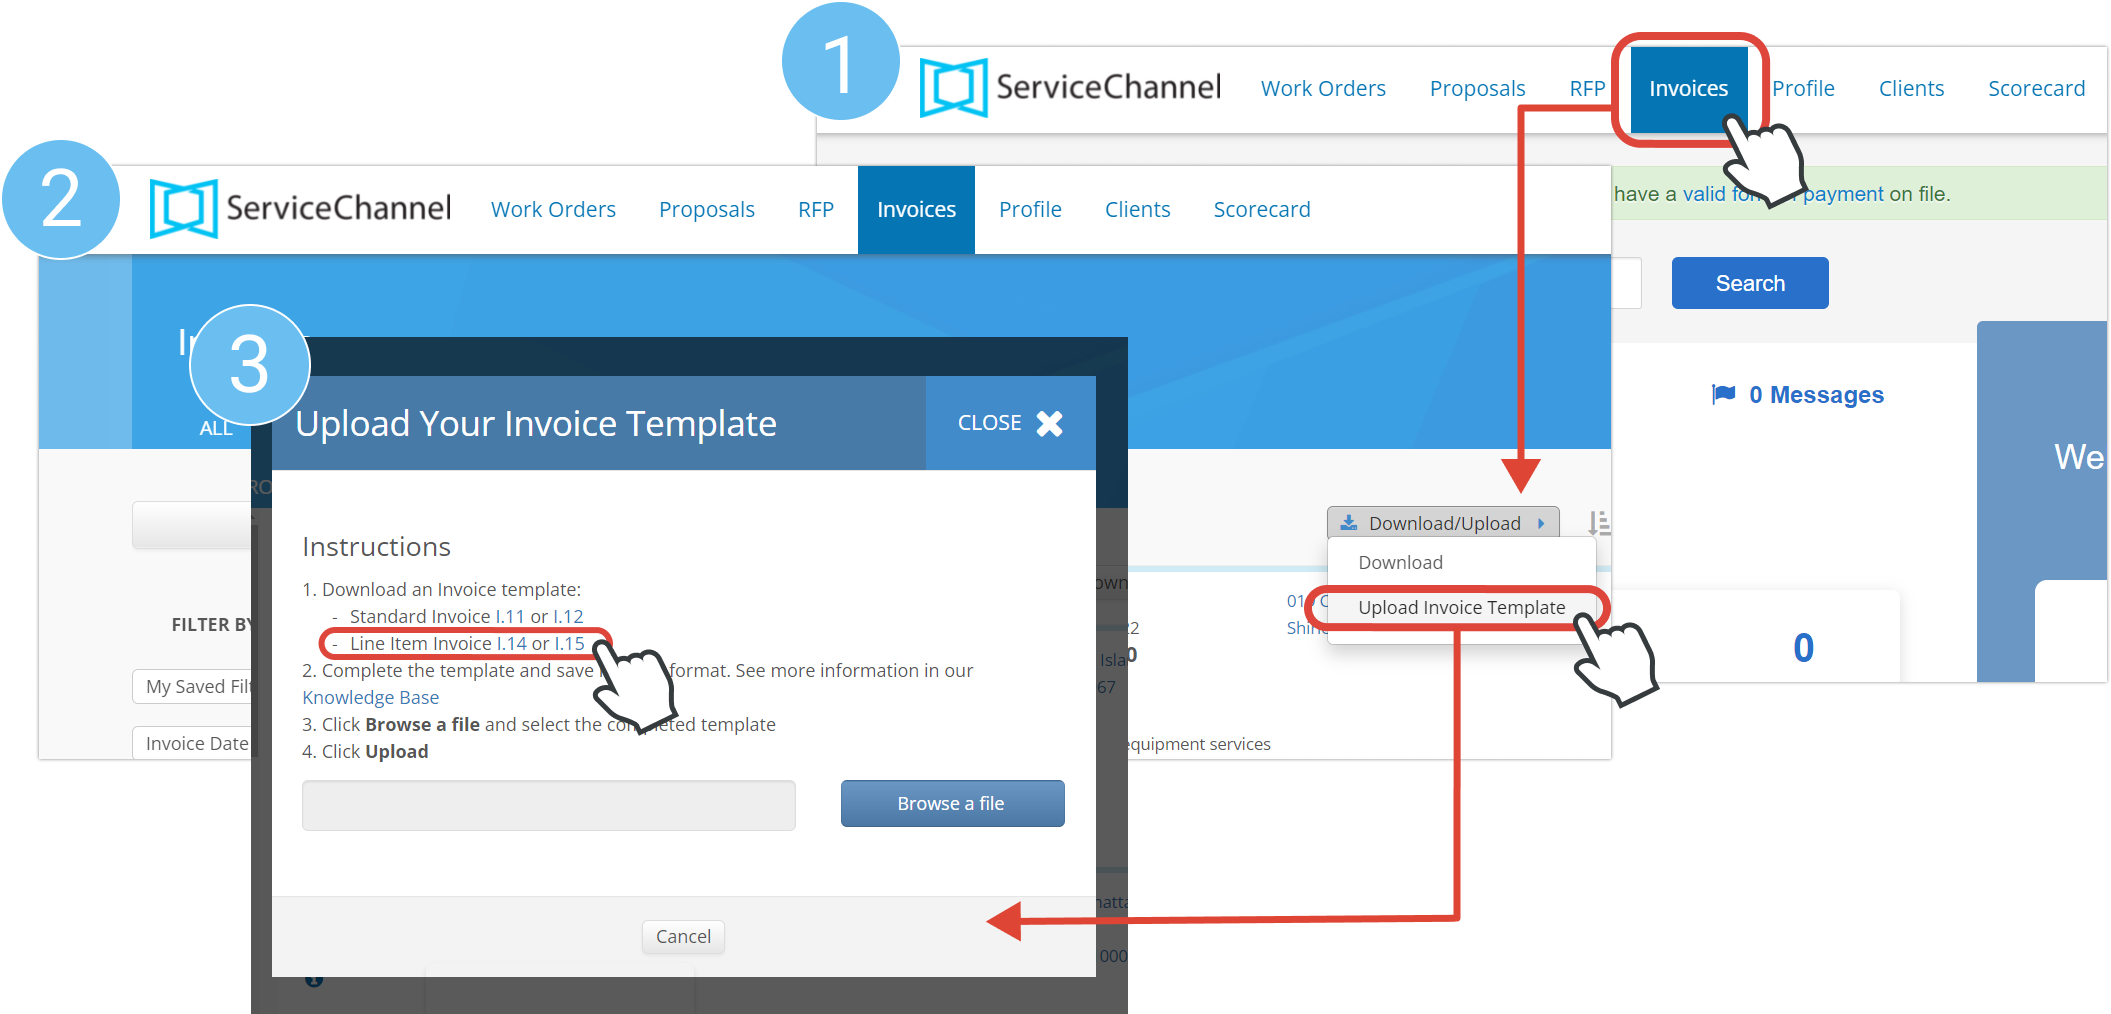
Getting Started with Completing the Line Item Invoice Template
Getting Started with Completing the Line Item Invoice Template
, multiple selections available,
Related content
Completing the Line Item Invoice Template
Completing the Line Item Invoice Template
More like this
Charges in the Line Item Invoice Template
Charges in the Line Item Invoice Template
More like this
Labor, Travel, and Material Charges in the Line Item Invoice Template
Labor, Travel, and Material Charges in the Line Item Invoice Template
More like this
Creating an Invoice in Provider Automation
Creating an Invoice in Provider Automation
Read with this
Completing the Standard Invoice Template
Completing the Standard Invoice Template
More like this
Other Charges in the Line Item Invoice Template
Other Charges in the Line Item Invoice Template
Read with this
.png?version=1&modificationDate=1644837837932&cacheVersion=1&api=v2&width=600&height=194)

.png?version=1&modificationDate=1644838053073&cacheVersion=1&api=v2&width=600&height=263)
.png?version=1&modificationDate=1644838110002&cacheVersion=1&api=v2&width=600&height=204)
