Completing the Standard Invoice Template
- Anastasia Medovkina (Deactivated)
The Standard Invoice Template is a simple template that allows you to list one invoice per row in the MS Excel sheet.
There are two versions: I.12 is for locations in the US. and Canada, and I.11 is for locations in international regions.
Should you need the template to have international currencies, date formats, and metrics, contact your ServiceChannel representative.
You can complete the required information in MS Excel and submit one or multiple invoices at a time.
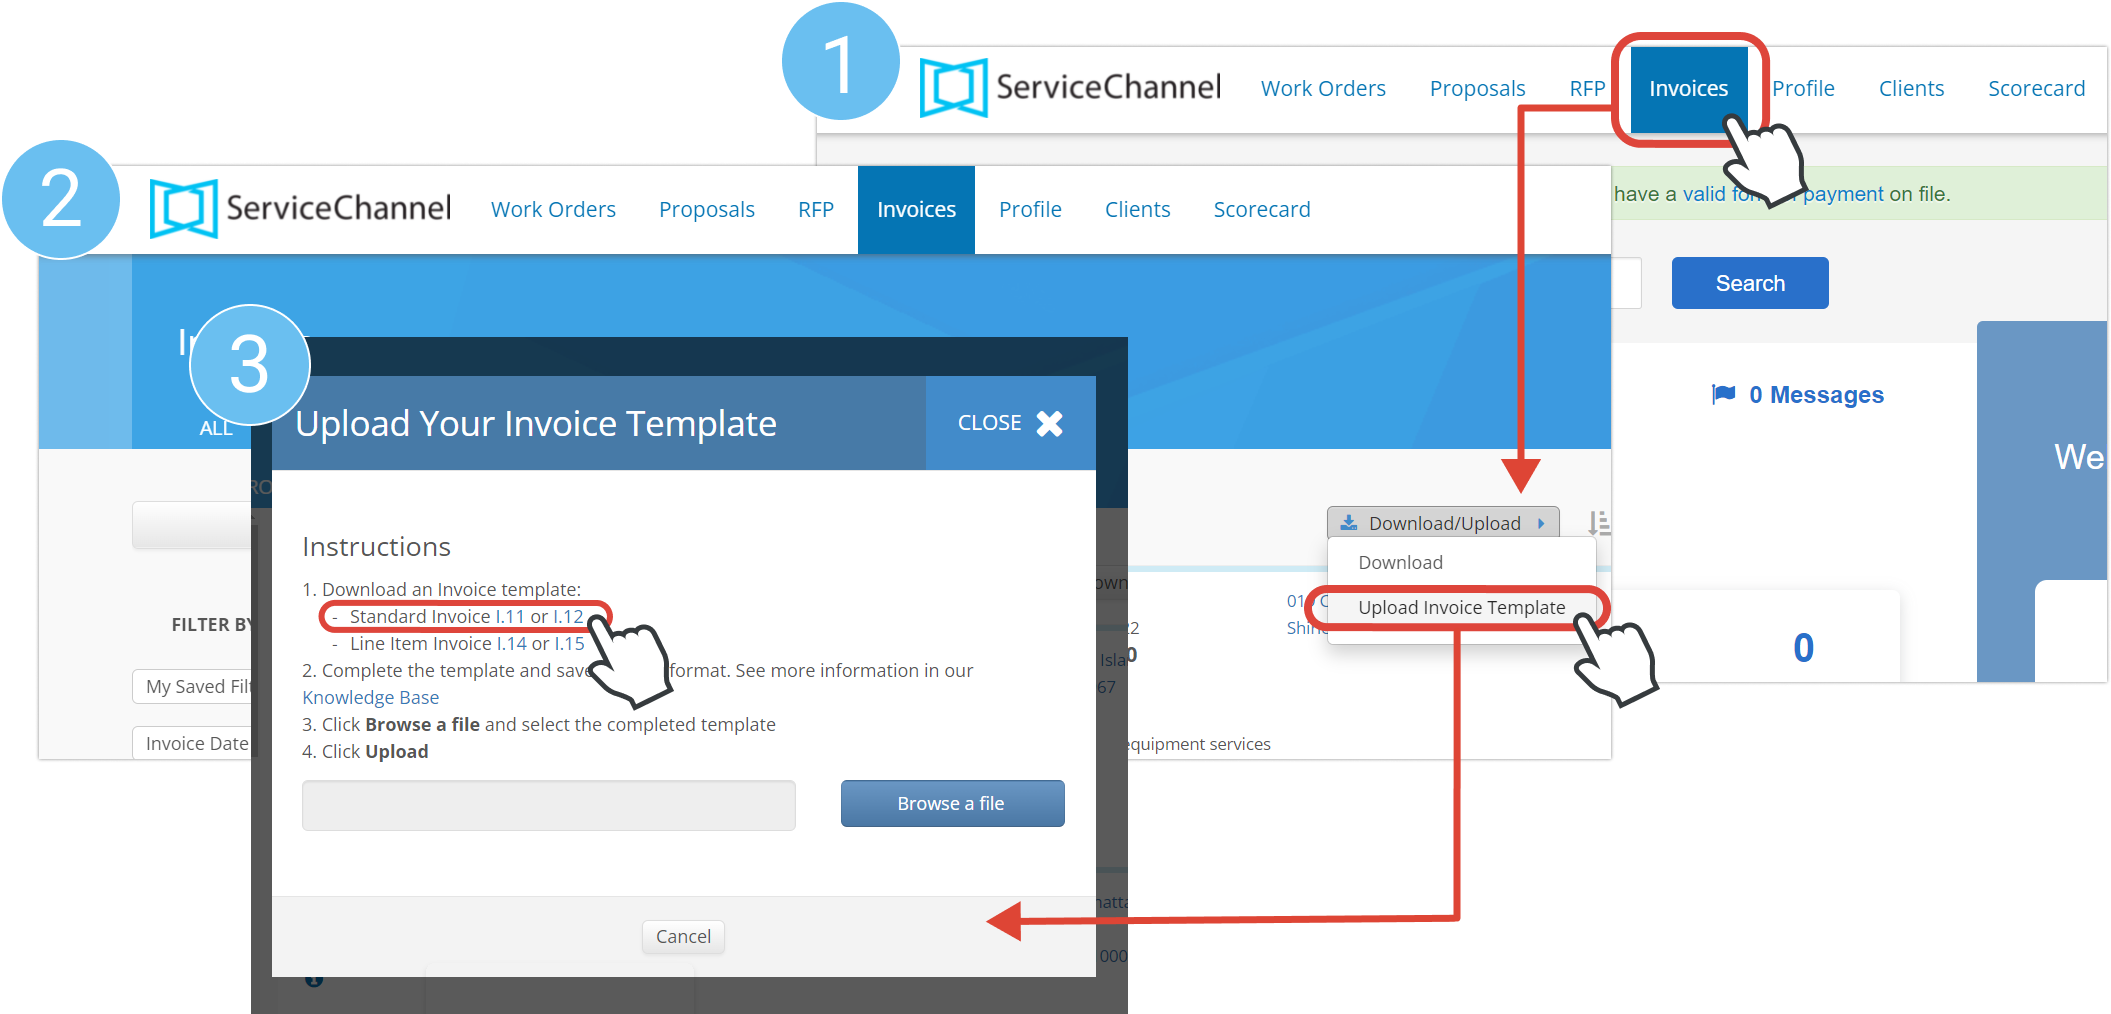
- Open the Invoices tab.
- Click the Download/Upload button.
- Select Upload Invoice Template from the drop-down menu. The Upload Your Invoice Template overlay appears.
- Download the I.12 template if the work order is to be completed in the US or Canada, or download the I.11 if the work order is outside the US or Canada.
- Open the downloaded MS Excel file.
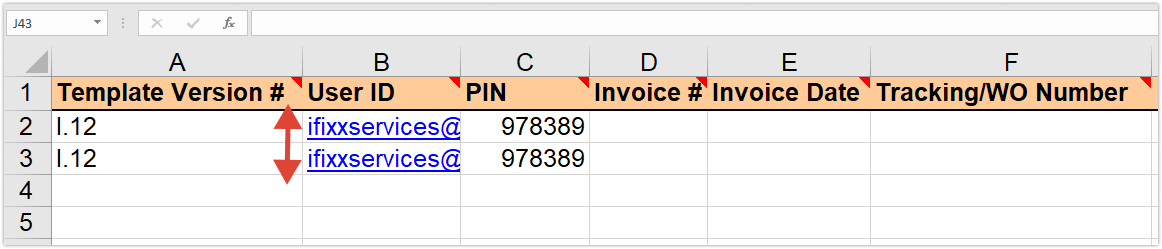
- Enter the Template Version #. It is l.12 for the US and Canada and I.11 for outside the US or Canada (“I” is a letter, not a number).
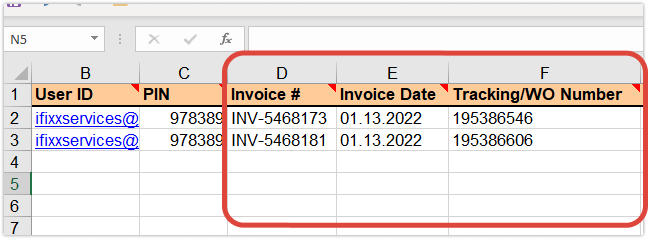
Enter Invoice #. You can only use an invoice number once.
The Template Version #, User ID, and PIN columns are required and should always be the same in the invoice you are completing. This information must be copied down to each row containing the invoice information. There should be no blank rows between the invoices.
- Enter Invoice Date in the format of MM/DD/YYYY.
- Enter either a Work Order Number or Tracking Number. This is a required field.
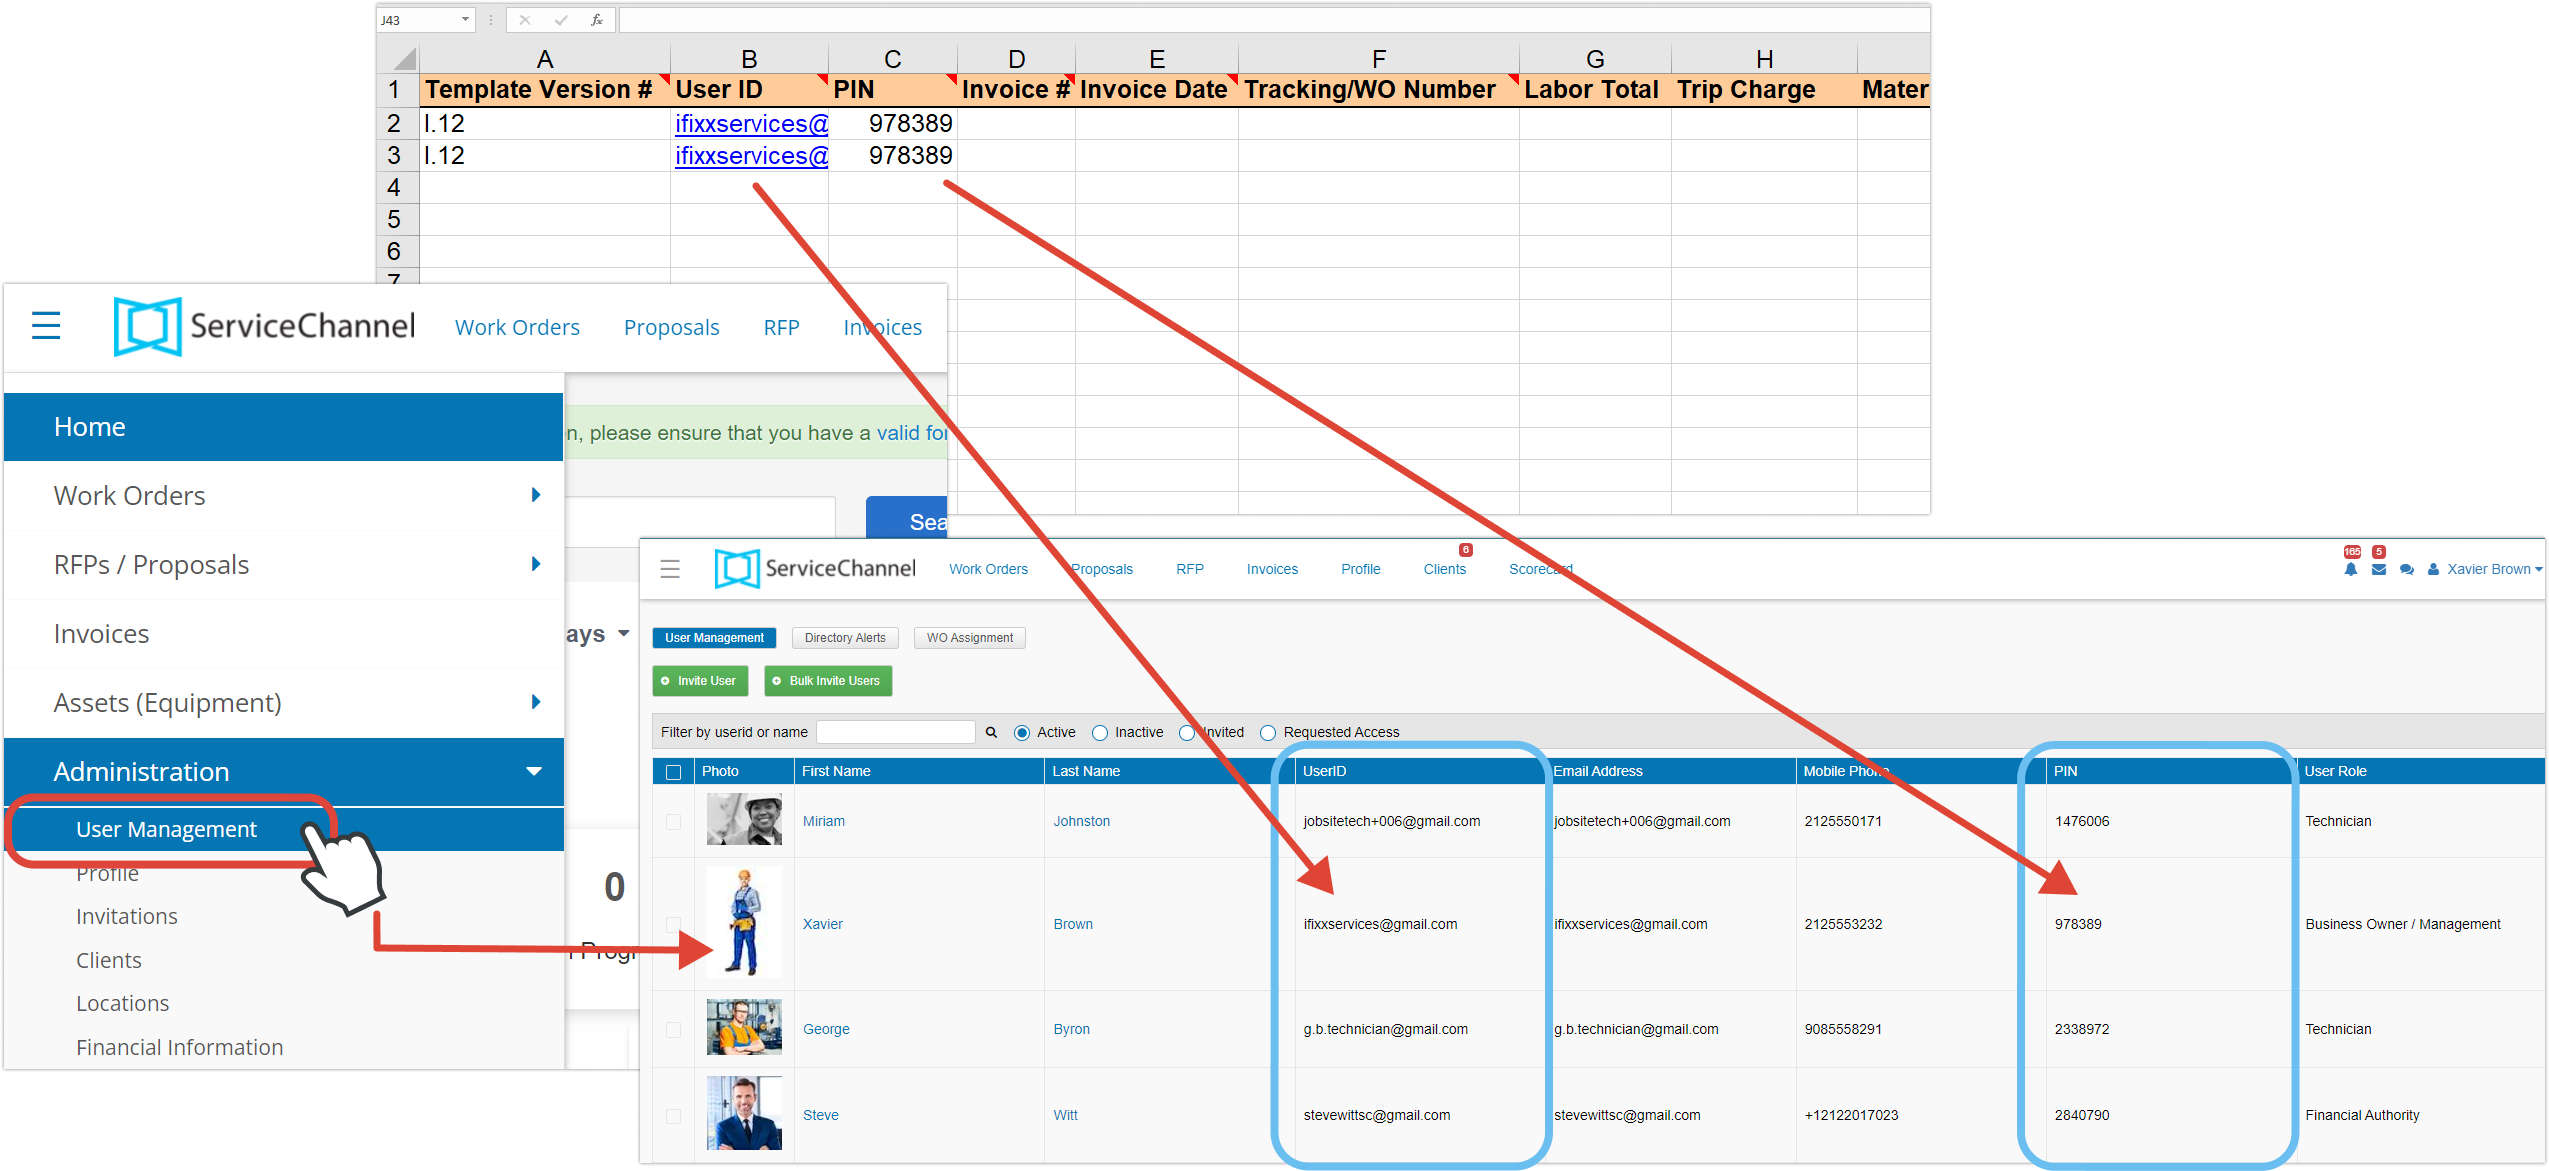
- Enter the User ID and PIN of the person who creates an invoice. You can find this information in Menu > Admin > User Management.
- Enter labor total, travel charge, material, freight, other charge description, other charge amounts, invoice tax (in numbers), and invoice total. Note that the invoice total should be the sum of all of the amounts from the other columns within a row.
Fill in Invoice Text. This is a detailed description of the work completed.

You can enter negative amounts “-N”, where the work is performed on credit. Read more about Creating Invoices on Credit.

- Save your file as Compatible 97-2003 XLS format.
- In the Invoices tab, click the Download/Upload button.
- Click the Upload Invoice Template button from the drop-down menu. The Upload Your Invoice Template overlay appears.
- In the Upload Invoice Template overlay, click the Browse a file button.
.png?version=1&modificationDate=1644837238885&cacheVersion=1&api=v2&width=600&height=288)
- Choose the invoice template you have created.
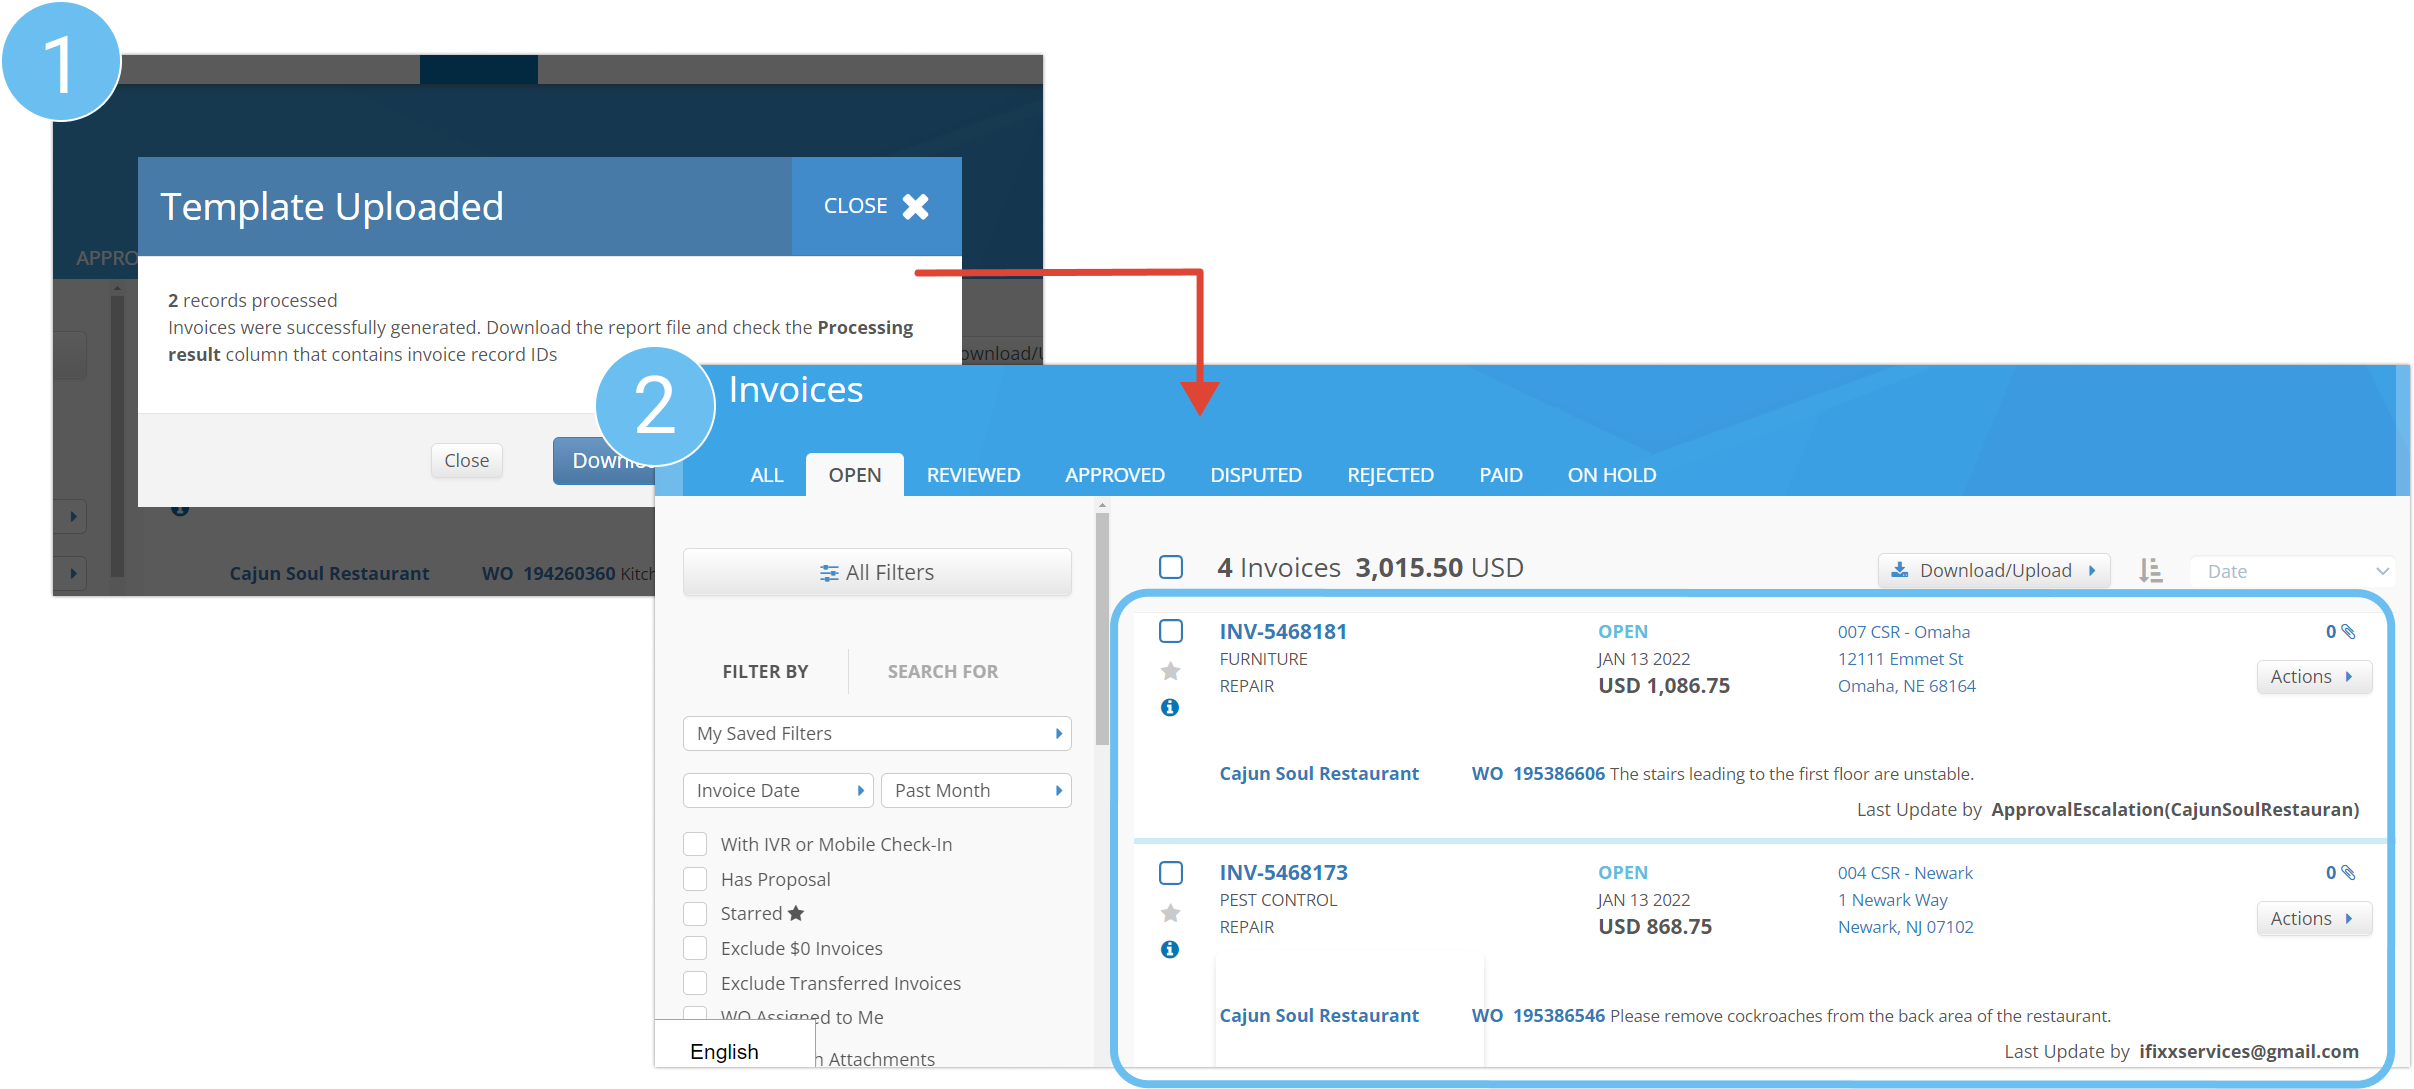
- Click the Upload button. The invoices will appear in the Invoices list.