Filtering and Searching for Invoices

On the Invoices List, you may filter invoices by specific criteria or search for invoices using various invoice details.

Filtering Invoices

Using the left panel on the Invoices List, you can filter invoices by as many parameters as required for your business needs. You may also save selected filters for later use and clear all filters once you are finished.

You can filter invoices by date, amount, location, trade, subscriber, and other criteria.

 Click this link to view all available filtering criteria
  • My Saved Filters. In this dropdown, you can select one of your saved filters.

  • Date. You may filter invoices by the following date types for the past month, past 3 months, past year, or custom date range.

    • Invoice date

    • Action date

    • Posted date

    • Paid date

    • Call date

    • Audit date

    • Approval date

    • Transferred date

  • With IVR or Mobile Check-In. Use this checkbox to filter invoices where technicians checked into a work order using either Interactive Voice Response (IVR) or the ServiceChannel Provider mobile app.

  • Has Proposal. Select this option to display invoices that have a proposal.

  • Starred. Use this checkbox to show invoices that were marked with a star.

  • Exclude $0 Invoices. Check this box to exclude invoices with a zero total amount from your search results.

  • WO Assigned to Me. Select this checkbox to show the invoices submitted for work orders assigned to you.
  • With Attachments Only and Without Attachments Only. Use one of these checkboxes to get invoices with or without attachments.
  • With Provider’s Invoice Attached filter is available if you need to attach a digital copy of original invoices to the invoice. Set this toggle to Yes to view invoices with attached digital copies and hit the toggle to No to see invoices without digital copies attached. If you do not need to apply the filter, leave the toggle neutral.

    Keep in mind that if the With Attachment filter is off, you will not be able to act on the With Provider’s Invoice Attached filter. 


  • With Rates Mismatched filter is available if you use client rates. Set this toggle to Yes to show invoices with a mismatch between the previously agreed rates and those invoiced.  
    Hit the toggle to No to see invoices without a mismatch. If you do not need to apply the filter, leave the toggle neutral. 
    When you select Yes, the second toggle appears with the option to show only invoices where the Invoice Rateis greater or lesser than theAgreed Rate. Select the option you want to be displayed or leave the toggle neutral. 
  • With Agreed Price Mismatch filter is available if you use a negotiated price list with your client. Set this toggle to Yes if you want to view invoices where there is a mismatch between the agreed prices from the price list and those you invoiced. Hit the toggle to No to see invoices without a mismatch. If you do not need to apply the filter, leave the toggle neutral. 
    When you select Yes, the second toggle appears with the option to show only invoices where the Invoice Price is greater or lesser than the Agreed Price. Select the option you want to be displayed or leave the toggle neutral. 
  • With Time Spent On-Site Mismatch.Switch the toggle to No to see invoices without a time mismatch. If you do not need to apply the filter, leave the toggle neutral. 
    When you select Yes, the second toggle appears with the option to show invoices only where the Invoice Time is either greater or lesser than the Time On-Site. Select the option you want to be displayed or leave the toggle neutral. 
     
  • With Material Markup Mismatch filter is available if you use the material markup validation. Hit the toggle to Yes to view invoices with a markup % mismatch between the agreed actual values. Switch the toggle to No to see invoices without markup % mismatch. If you do not need to apply the filter, leave the toggle neutral. 
  • Exclude Transferred Invoices. Use this checkbox to exclude transferred invoices — approved invoices that have already been sent to the subscriber for payment.

  • Amount. This filter gives you an option to view invoices within a certain currency amount range.

  • Location. You may list invoices by any of the following location details:

    • Location ID

    • Location Name

    • Region

    • District

    • City

    • State/Province

    • Country

      You can filter invoices by multiple location IDs, location names, regions, districts, and states/provinces. When it comes to filtering by country or city, however, only one city or country can be specified.

  • Trade. Use this dropdown to select trades one by one.
    Alternatively, click the list icon to the right of the dropdown to view all trades in a pop-up. Select or deselect as many trades as required, and then click OK. The trades that you’ve selected appear below the Trade dropdown.

  • Category. Use this dropdown to select categories one by one.

  • Subscriber. Use this filter to list invoices submitted to a particular subscriber. You can select only one subscriber at a time.

  • Status. Apply this filter to view invoices in multiple statuses. When you need to get invoices only in one particular status, click the required tab at the top of the Invoices List. See Invoice Statuses for more details.

  • Priority. You may list invoices specific to a certain work order priority, as determined by your subscribers.


Depending on your needs, use one of the following options to filter invoices:

  • The Filter By tab where you apply filters one by one — every time you select a filter, the Invoices List refreshes and gives you results on the fly. Use this option when the number of invoices to filter is not large, and the number of filters to apply is small.

  • The All Filters pop-up where you select multiple filters and apply them all at once. The Invoices List refreshes to display invoices matching all selected criteria. Use this option when you need to filter a host of invoices by multiple parameters.

⦿ How to Filter Invoices Using the Filter By Tab
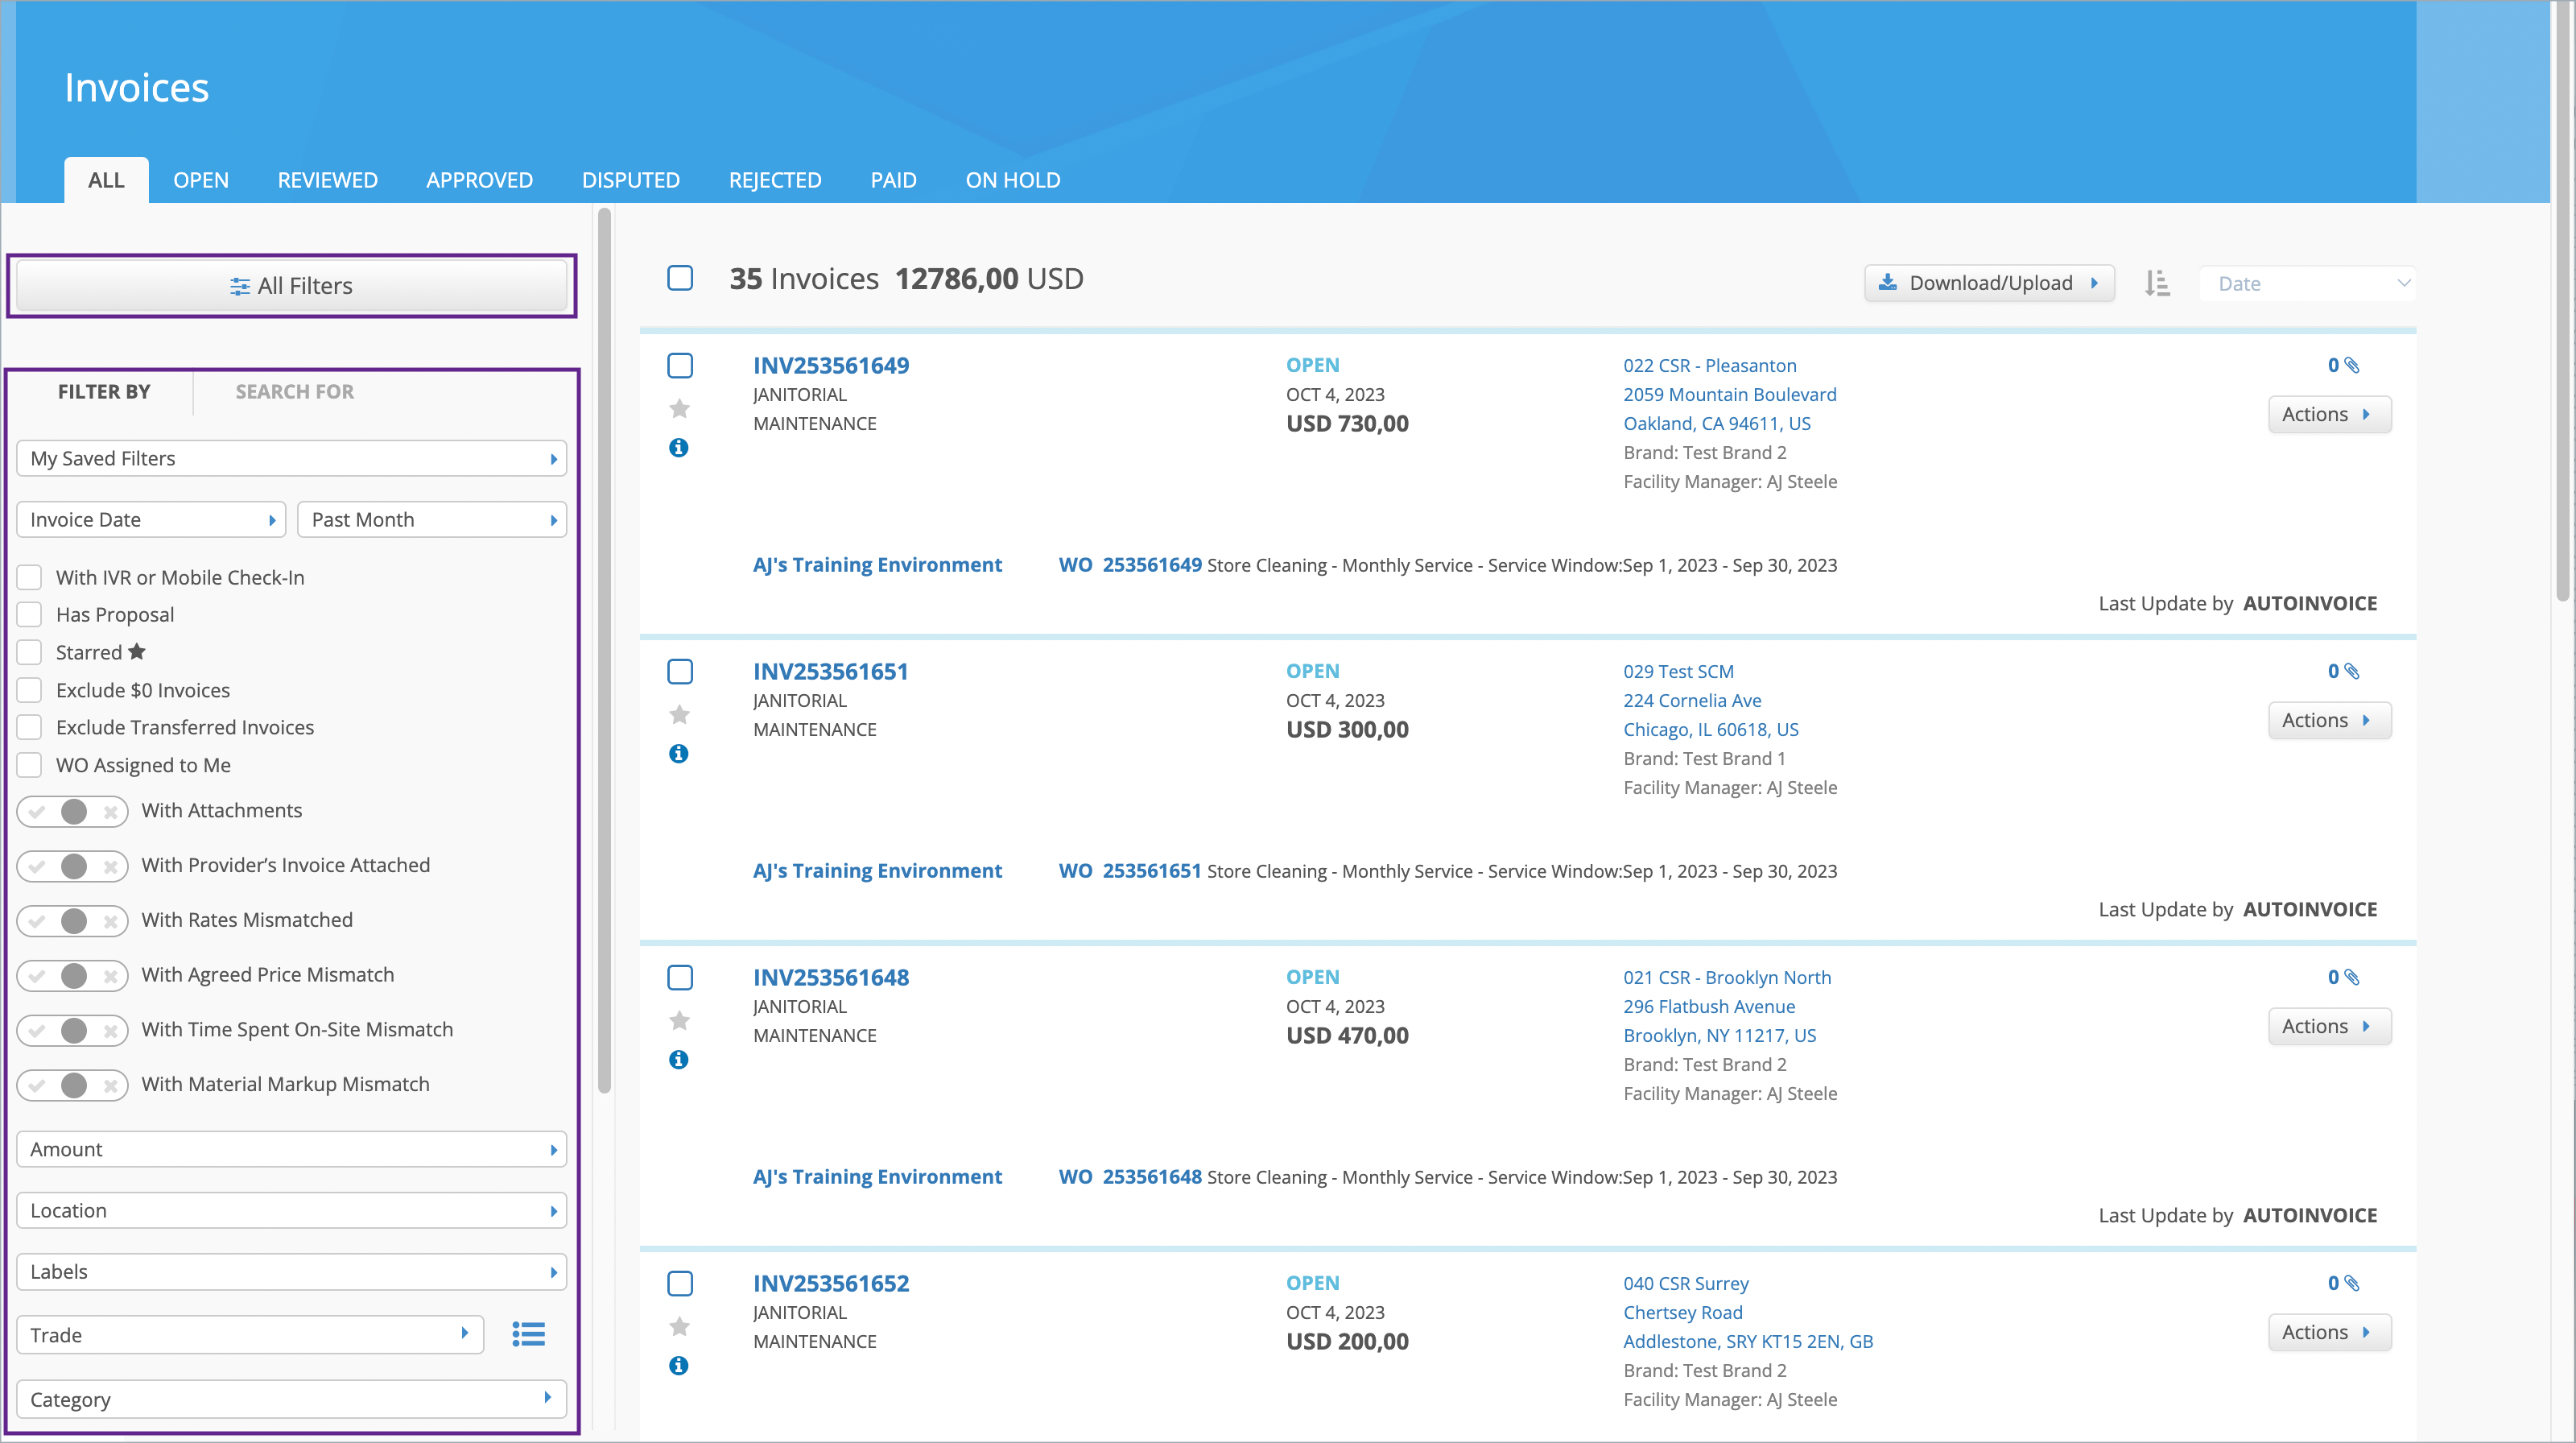
  1. On the Invoices List, click the Filter By tab on the left panel.
    The Filter By tab on the Invoices List

  2. Apply the required filters. The list of invoices refreshes every time you select a filter.

To apply some filters, for example, Amount, Status, or Priority, you should click Filter after selecting or entering the desired options.

 Click to view an example

The Amount filter


⦿ How to Filter Invoices Using the All Filters Pop-Up
  1. On the Invoices List, click All Filters located at the top of the left panel. The Filter & Search Invoices pop-up appears.
    Use the All Filters button to open the pop-up for filtering invoices
  2. Set all the filters you need, and click Apply. The Invoices List refreshes showing invoices that match the selected criteria.

The most common reason invoice filtering comes up empty is because you’ve entered the filtering criteria too specifically. Should initial filtering come up empty, perform broader filtering and narrow it from there.

At any time, you may clear filters selected on the Invoices List.

⦿ How to Clear Filters
  1. To clear all filters, click Clear All Filters at the bottom of the left panel. This resets the Invoices List back to the default settings.
  2. To clear a particular filter, click X next to the filter.
    Clearing filters on the left panel on the Invoices List

Managing Saved Filters

In your everyday work, you may need to apply the same set of filters over and over again. For this purpose, once you select the filters you need, you may save them as a set and use this set later on.

You can also edit or even delete saved filters when you don’t need them anymore. You can perform all these actions either on the Filter By tab of the left panel or in the All Filters pop-up.

⦿ How to Save a Filter Set
  1. On the Filter By tab, select the required filters.
  2. At the bottom of the left panel, click Save Current Filter.
  3. Enter the filter set name.
    Saving filters on the Invoices List
  4. Click Save Filter. The filter is saved, and its name is displayed in the My Saved Filters drop-down menu at the top of the left panel.

After you save a filter set, you may need to edit some of its parameters.

⦿ How to Edit a Filter Set
  1. In the My Saved Filters dropdown, select the filter you want to edit. The Invoices List refreshes applying the selected filter set.
  2. Add or delete any filtering criteria as needed.
  3. At the bottom of the left panel, click Save Current Filter.
    Updating filters on the Invoices List
  4. Click Update Existing Filter. The filter set is updated.

To update a saved filter, you can also start with clicking Edit Filters at the bottom of the left panel.

When you don’t need a saved filter anymore, you can delete it.

⦿ How to Delete a Filter Set
  1. Click Edit Filters at the bottom of the left panel. The pop-up appears with a list of saved filters.
    Deleting filters on the pop-up for editing filters
  2. Click the trash icon next to the desired filter, and click Save. The filter is deleted.

Searching for Invoices

On the Invoices List, you may also search for specific invoices by the following criteria:

  • Invoice number
  • Tracking number
  • Work order (WO) number
  • Batch number
  • Payment/Check number
  • Purchase order number
⦿ How to Search for Invoices
  1. On the Invoices List, click the Search For tab on the left panel.
  2. Enter the search parameter to one of the text fields.
  3. Press Enter or click the search icon. The Invoices List refreshes showing invoices that match your search.
    You can search for invoices on the Search For tab