Checking In and Out with a Company PIN

Recording check-ins and check-outs is vital for both providers and their clients. It allows them to keep track of the time that technicians spend on getting the work done, is helpful when preparing invoices, or can be used for analytical purposes.

Please, contact your ServiceChannel representative should you need to change the decimal point (.) to decimal comma (,) on non-monetary amounts, such as: 

  • Hours and Duration 
  • Quantity Amounts 
  • Weight. 

Checking In

After you’ve found the required work order, you can check in and out of this work order to report your working activity.

⦿ How to Check In
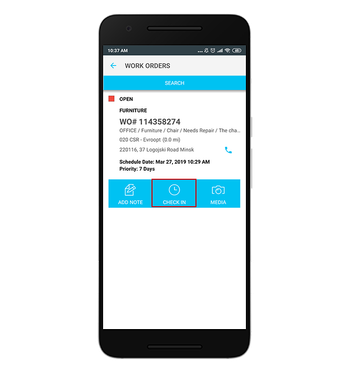
  1. Find the work order you want to check into.
  2. Tap Check In.
    Checking in

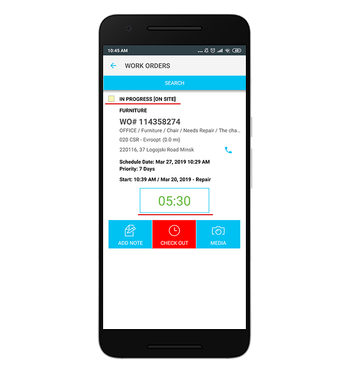
The WO status updates to In Progress / On Site and a work time counter appears below the WO details.

The WO after you've checked in

If you do not see the Check In button, you cannot report the work activity. That can happen due to the following reasons:

  • The work order is in the Completed or Completed / Confirmed status.
  • The work order has been invoiced.
  • You’re outside of the mile range. Move closer to the work order location.
  • The WO location is not participating in the GPS check-in process.
  • Your client is not participating in the GPS check-in process.

Checking Out

After the job is done, you need to check out of the work order.

⦿ How to Check Out
  1. Locate the work order for which you need to stop the work activity.
  2. Tap Check Out. The screen for choosing a WO status appears.

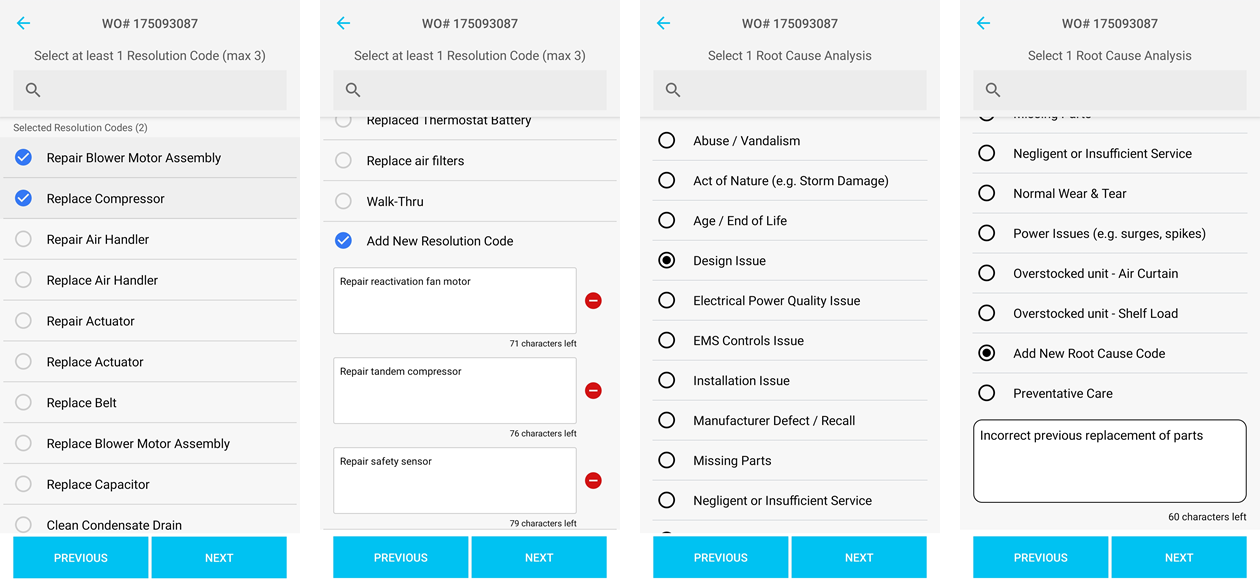
    If you check out with the Completed status, and the work order belongs to the trade where resolution and root cause codes are used, you need to pick the codes right after selecting the Completed status for the work order. If no appropriate resolution code or root cause is listed, you can select Add New Resolution Code / Add New Root Cause Code at the bottom of the screen and enter your understanding of the resolution or root cause in the text field that appears. You can specify up to three resolution codes and one root cause — either standard or custom. If you add an erroneous code, you can edit it in Provider Automation at a later time.

     Click here to see how to add resolution and root cause codes.

    Checking out with resolution and root cause codes

  3. Select the appropriate WO status and tap Done. The screen for providing additional info appears.
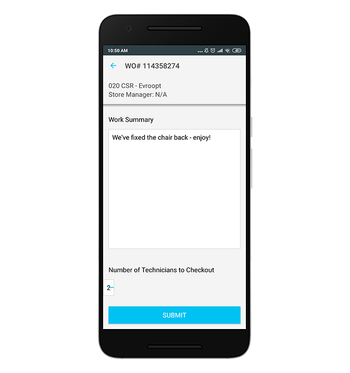
  4. Enter the description of what has been done at the location, specify the number of techs that have worked with you, and tap Submit. The related assets screen opens.
    Providing the additional info when checking out
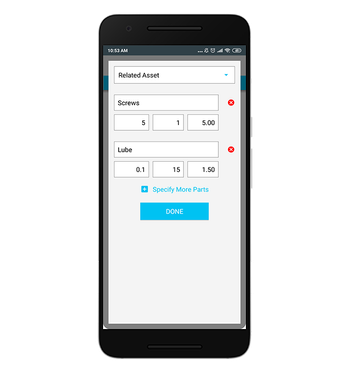
  5. (Optional) If you’ve used any assets for this WO, tap Specify More Parts and enter the asset description, quantity, and price per item. The total is calculated automatically.
    Providing the info on related assets when checking out
  6. Tap Done.

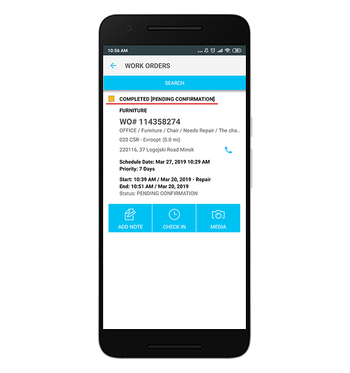
You’ve checked out of the work order. Note that the WO status is updated to the status that you’ve selected when checking out.

The WO after you've checked out