Adding and Managing Technicians
Maria Tarnopolskaya (Unlicensed)
Lamont Eddins
Anastasia Medovkina (Deactivated)
Adding technicians to your Provider Automation account is beneficial because:
You can assign work orders in Provider Automation and drill down to see which technicians are dispatched to which work orders without the need for external software.
Your clients are aware of not only when your technicians are scheduled to arrive onsite, but also who is expected to arrive.

Adding Technicians
In the top-left corner of the page, click the menu icon and then Administration > User Management.
Click the Invite User button.

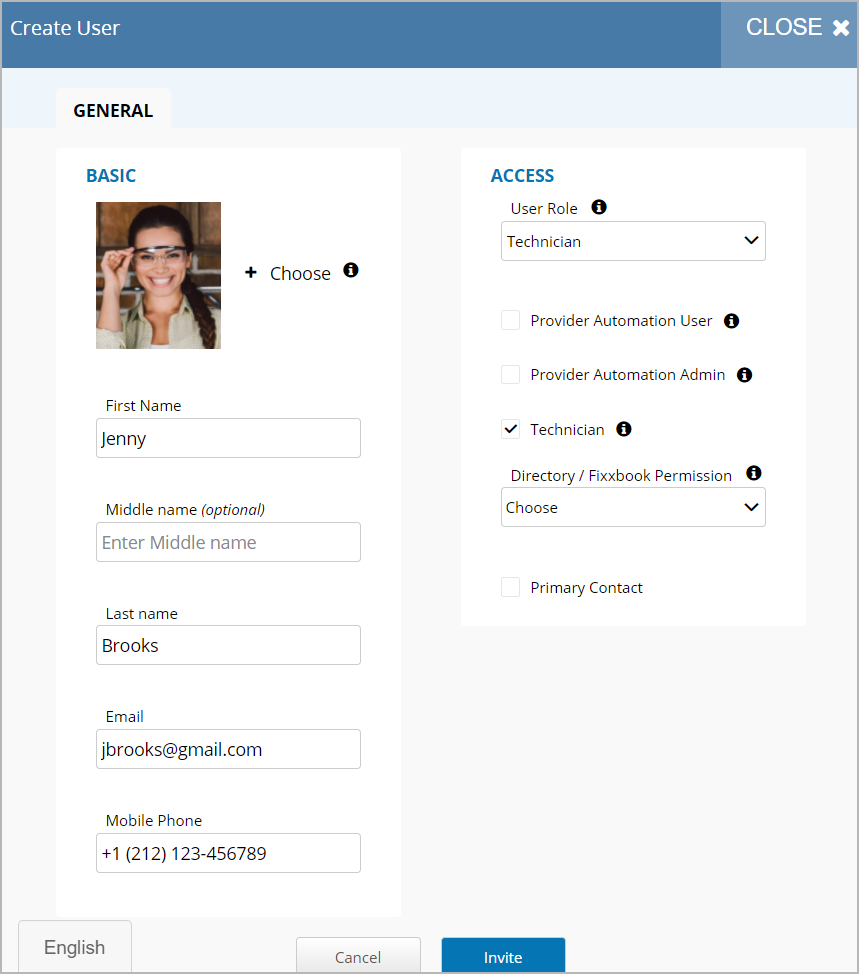
The Create User page appears.
In the Basic column, enter the user’s First Name, Last Name, Email address, and Mobile Phone number.
Each technician must have a valid email to be added to your company.
(Optional) Click Choose next to the image placeholder to add the technician’s photo.
Technicians can also add their own photo in the ServiceChannel Provider mobile app.
In the Access column, select Technician in the User Role dropdown.
(Optional) Specify additional permissions for the user.
Provider Automation User: allows users to log in to Provider automation and manage day-to-day service operation activities.
Provider Automation Admin: allows users to access and manage other users via User Management.
Technician: allows users to be assigned work orders via Work Order Assignment, and log in to the ServiceChannel Provider mobile app.
When you select Technician as a User Role, the Technician checkbox gets selected automatically.
(Optional) Select Directory / Fixxbook permissions from the drop-down list.
(Optional) Select the Primary Contact checkbox if you want this user to be the primary contact.
Click Invite.
On the pop-up box that appears, click Confirm.
Your technician is invited and is automatically sent an email to complete the profile in the ServiceChannel Provider Mobile app.Repeat steps 2–10 to invite more technicians.
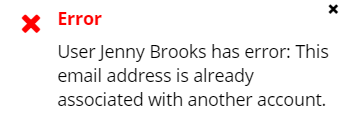
Should you mistakenly re-invite the same user or attempt to assign the same email address to more than one user, you will see an error message, informing you of the duplication.
To view the list of invited technicians, see Managing Invited Technicians.
Adding Certifications and/or Licenses for Technicians
When creating a new user and/or updating a current user’s profile, there is the ability to upload certifications and licenses for both HVAC and refrigeration. When doing so, this confirms specific technicians are certified and can be assigned to service on these types of work orders.
Licensing Description
During the process of uploading certification and licenses, they are 4 types that are accepted. The following types are:
- Type I: Small appliances; including residential refrigerators, small commercial ice makers, or small window air conditioners
- Type II: High-pressure appliances; residential and commercial split air conditioning systems, or rooftop commercial package units
- Type III: Low-pressure appliances; including but not limited to chillers.
- Universal: Includes Types I, II, and III
- Click the menu icon to expand its list
- Click Administration to expand its list
- Click User Management to enter its homepage

- Select a user from the list to enter their profile

- Click the Certificate link to upload the certification or license
- Input all the information

- Click the Add link submit the certification or license
- Click the Save button to confirm the addition
- Optional: Repeat the process if there is more than one
Managing Invited Technicians
On the User Management page, click the Invited radio button to view all users invited to your company.
From here you can:
Update the user information
Reinvite a technician who did not receive or accidentally deleted the email invitation
Deactivate a user
Email a technician
Managing Technicians Individually
In User Management, click the Invited radio button.
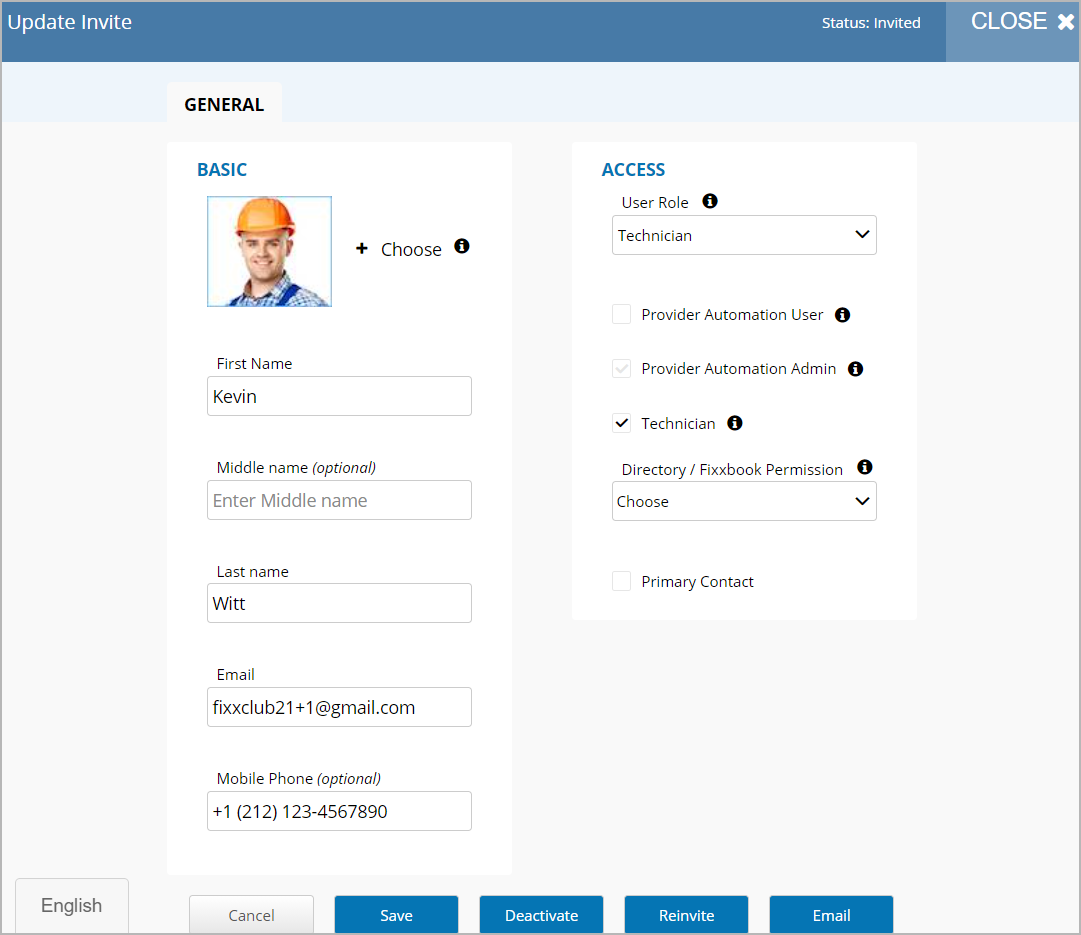
Click the user’s First or Last Name. The Update Invite page opens.
Take the required action:
Update the user information. Click Save. A quick notification in the upper-right corner of your screen will inform you that the user information is successfully updated.
Deactivate to lock the user out of using the ServiceChannel Provider mobile app.
Reinvite to resend an invitation.
Email to correspond with the user.
Alternatively, if you do not need to update the user information, there is another way to manage technicians, also suitable for a bulk action.
Managing Technicians in Bulk
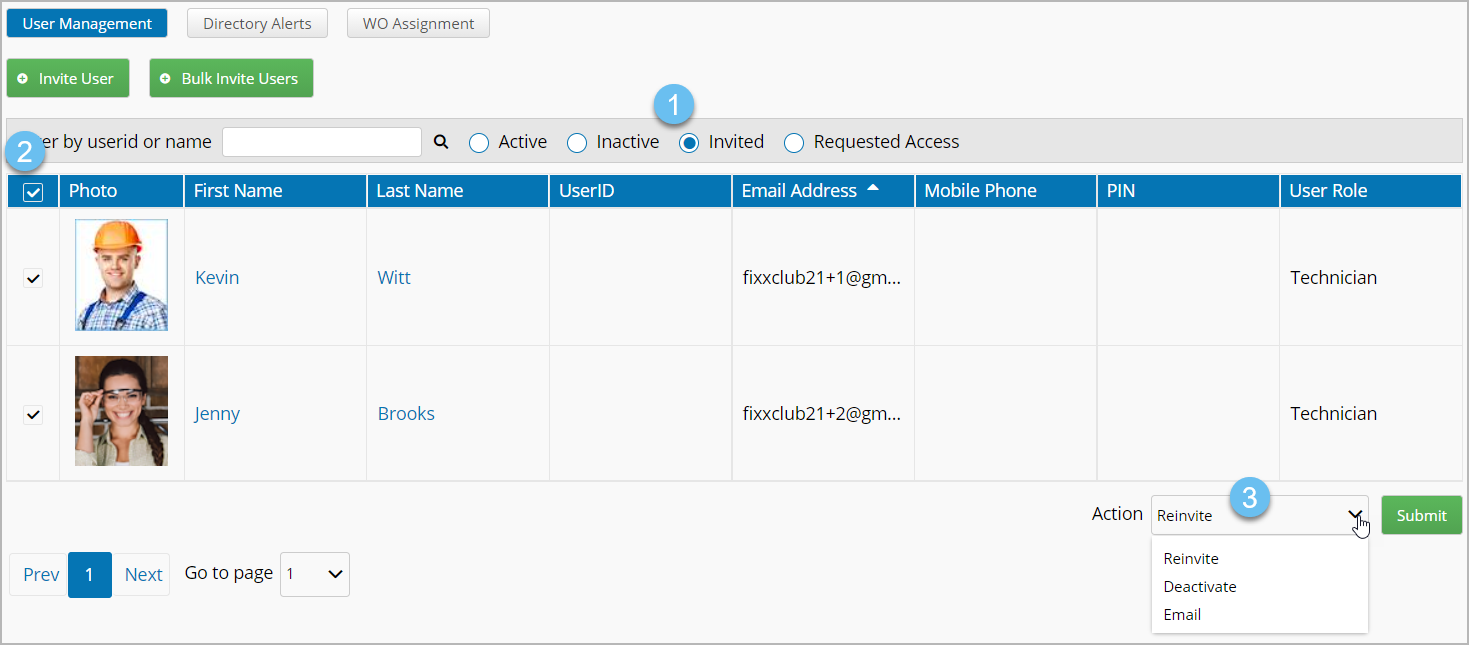
In User Management, click the Invited radio button.
Select the checkboxes next to the technicians you want to take action on, or the checkbox at the top of the column to select all.
Click the Action drop-down list to select the appropriate action:
- Reinvite to resend an invitation.
- Deactivate to lock the user out of using the ServiceChannel Provider mobile app.
- Email to correspond with the user.
- Click Submit.
- Email will send an email to the user.
- Reinvite and Deactivate will ask you to confirm. Click Confirm. The user gets a new invitation or is moved to the Inactive list depending on the action you have selected.
Adding Other Users
In User Management, you can add just about everyone in your organization: accountants and financial operators, technician managers and dispatchers, and other service operators. Please see Adding and Modifying Users for more information.
Adding Users via Template
When you need to add multiple users at once, you can invite users in bulk using a template. To invite users in bulk, you need to fill out the template with users’ names, email addresses, mobile phone numbers, and roles and upload the template.
The users will receive an email invitation to set up their accounts in User Management.
Administrators will be able to view who has responded to the invitation and who has not.
Once the users have been invited, they can use either their mobile device or desktop computer to follow the on-screen instructions received in the invitation email to complete their account registration.
Click the Bulk Invite Users button in User Management.

Click Download Template.
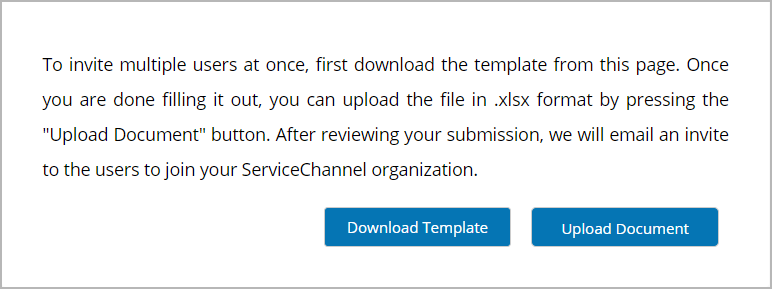
Open the downloaded MS Excel file and complete the template.

- Save the template as a .xlsx formatted file.
- Back in Provider Automation, click the Upload Document button, then locate and upload the template completed in step 3.
- Review the user information and, if correct, click Submit. If any of the information is not correct, edit it here, then click Submit.

The invitations are sent to the users.
They need to click Start Now to start the registration process.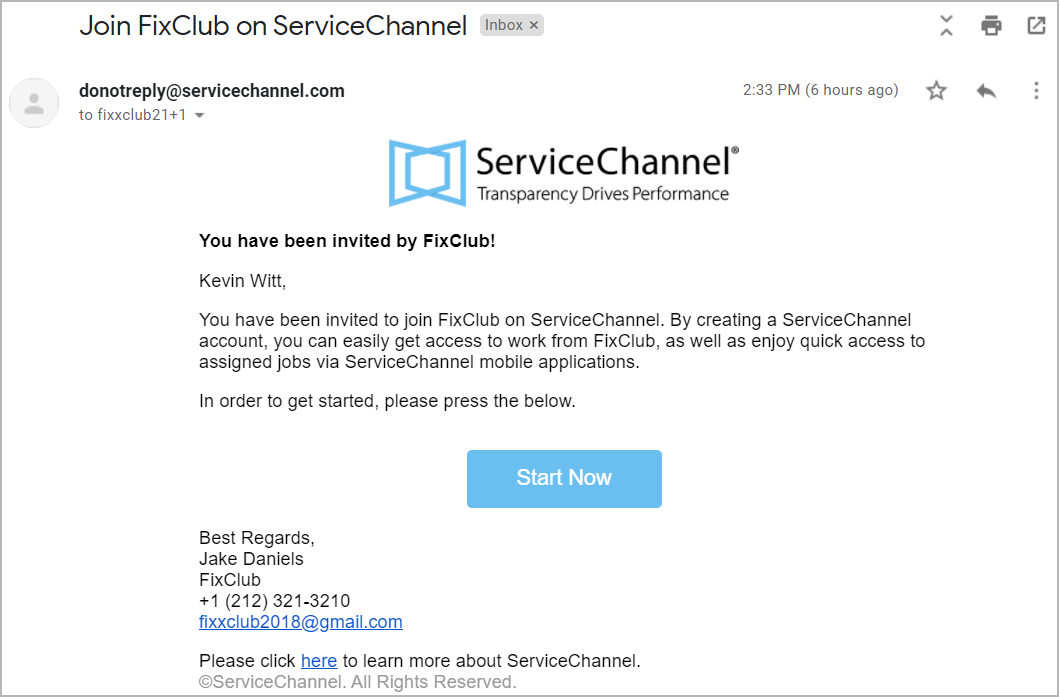
-
Page:
-
Page:
-
Page:
-
Page:
-
Page:
-
Page:
-
Page:
-
Page:

