Navigating Dashboard 2.0
- Uma Srinivasan (Unlicensed)
- Caroline Antoun
- Natalia Larina (Unlicensed)
Dashboard 2.0 has five main sections:
- Menu icon/tabs that provide access to the various pages;
- Main content display area based on your menu/tab selections;
- Messages configured by your administrator, such as Store Hours or Landlord Information;
- Drop-down menu to switch Dashboards at same location;
- Drop-down menu to switch Dashboards to other locations (for users with access to multiple dashboards); and
- Logging out of Dashboard 2.0.
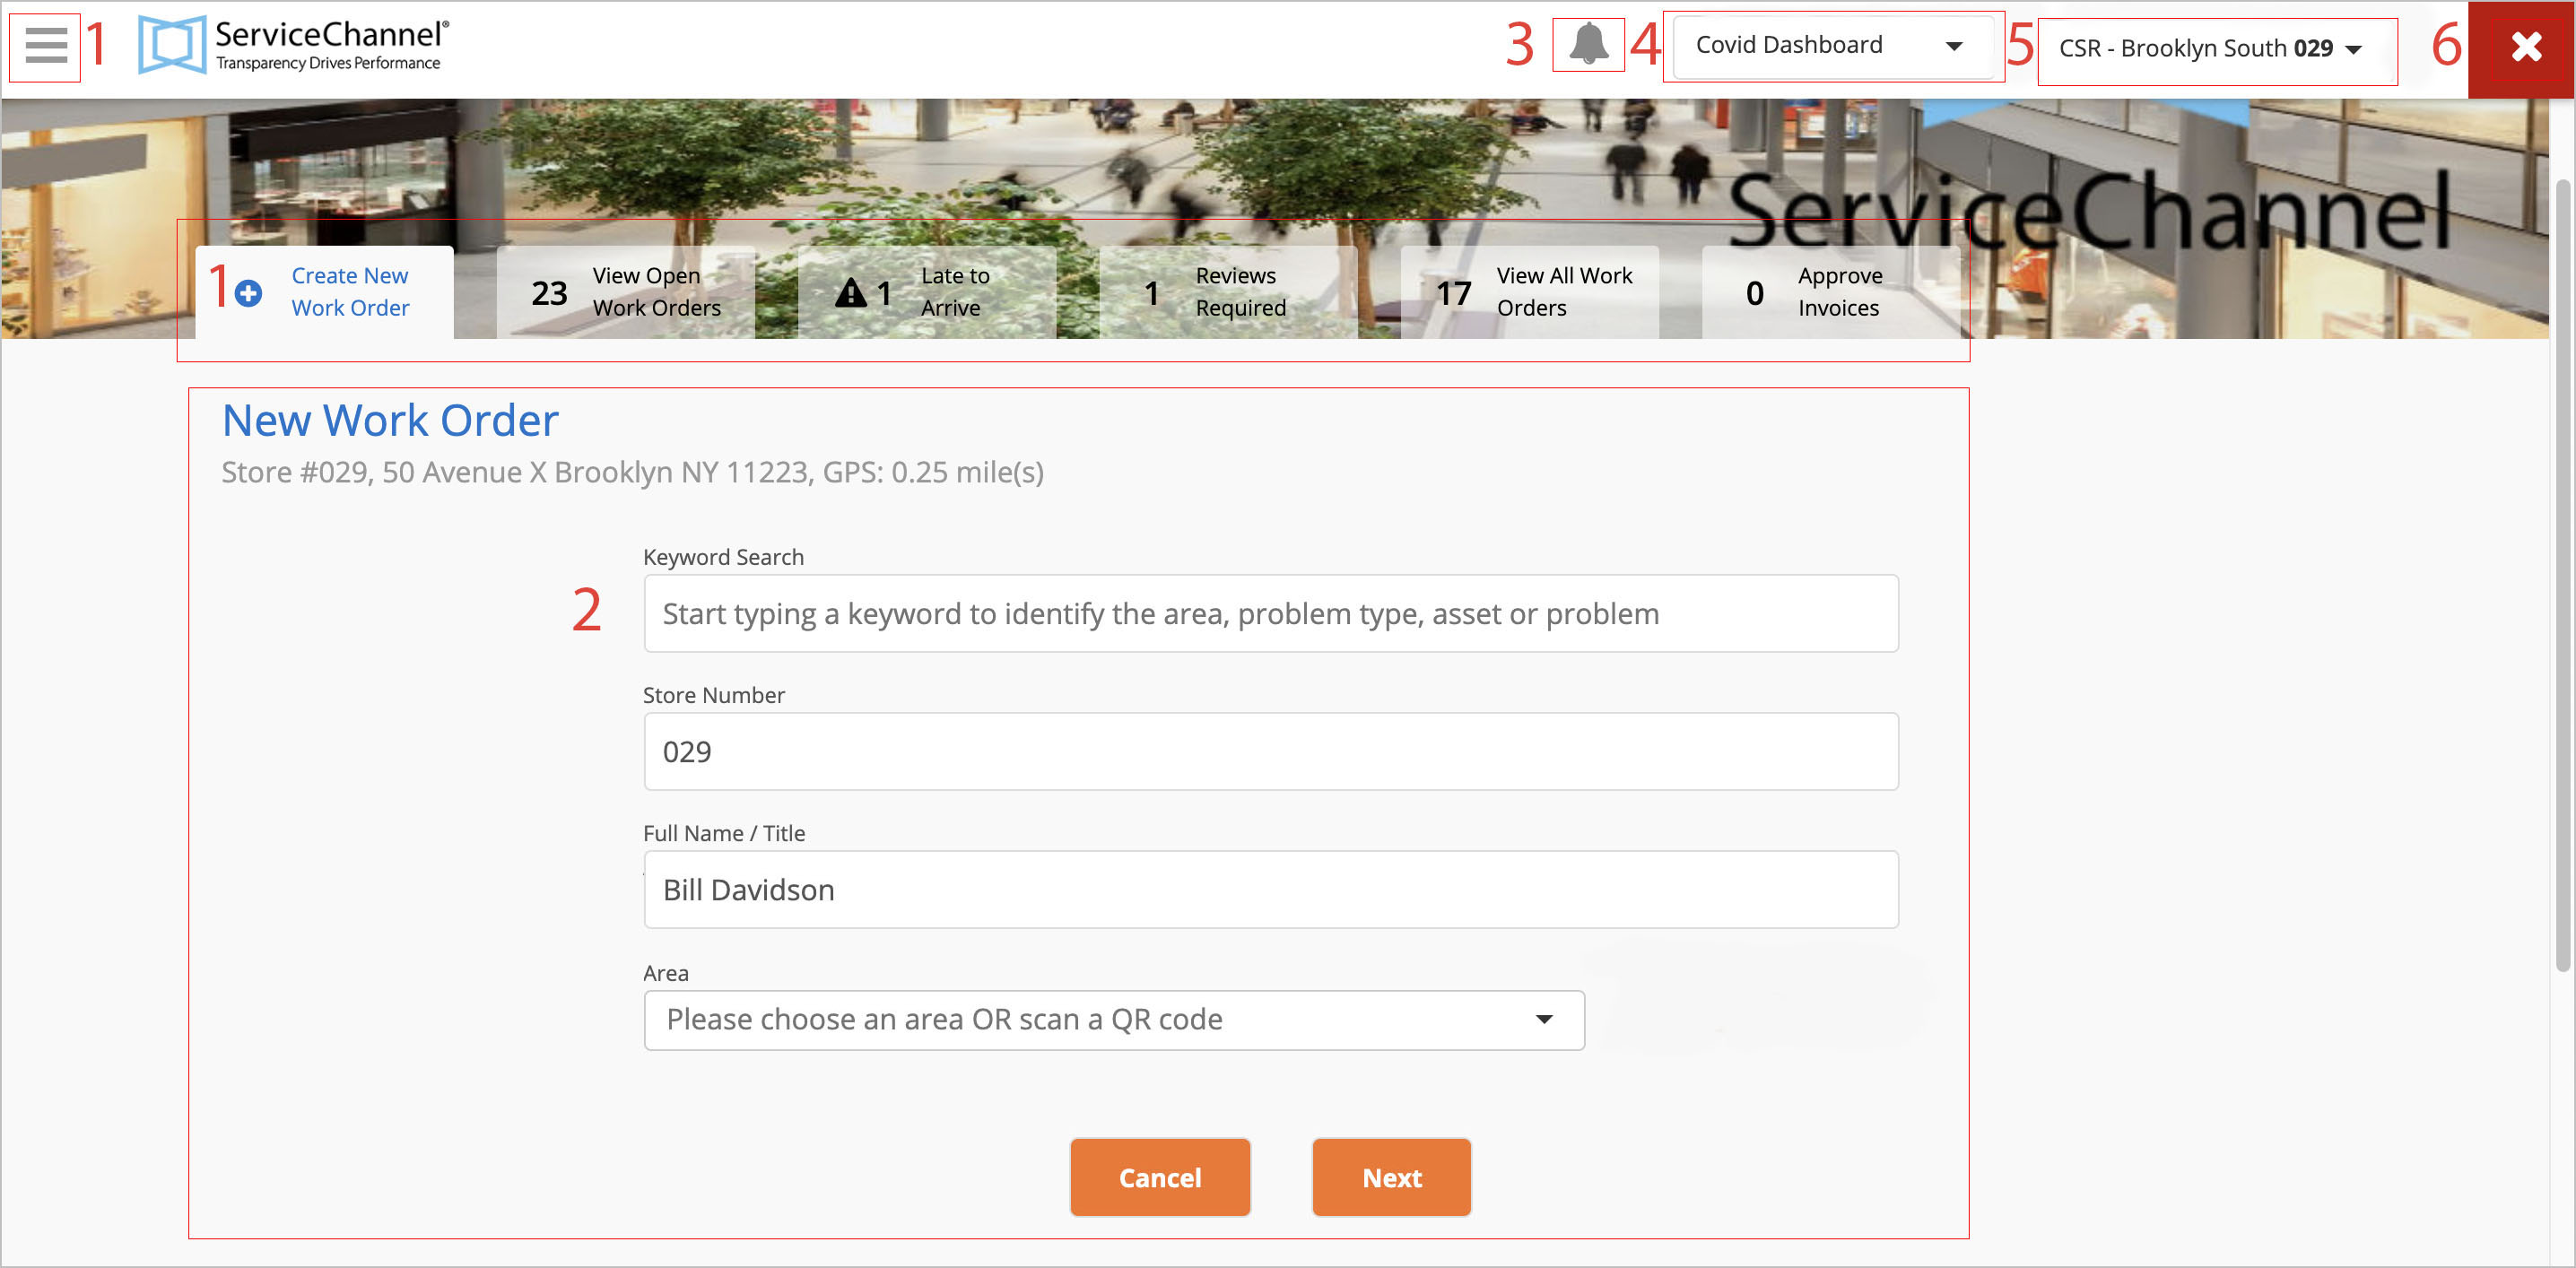
Menu icon in the top-left/Tabs: Clicking either the tabs across the top of the Dashboard or the menu icon at the top-left corner displays the appropriate pages, based on your permissions.
Menu icon/Tab
Description
Create a New Work Order
Allows a user to create and submit work orders.
View Open Work Orders
List of all work orders in the Open and In Progress statuses. Here, you may also view details and add notes to work orders.
View all Work Orders
Provides details of all work orders from the past 36 months, including open, in progress, and completed work orders.
Reviewed Required
Provide reviews on Work Orders and Service Provider Work Order performance.
Approved Invoices
Provides details of all work orders from the past 36 months, including open, in progress, and completed work orders.
Under the menu icon, clicking either View Invoice History or Approve Invoices will take you to the same Invoices tab.
Invoices
Provides details of all invoices from the past 12 months, and allows a user to review and take action on Open, On-Hold / Disputed, and Reviewed invoices.
Planned Maintenance Summary Shows all active Planned Maintenance services. Mobile Access Code (accessible through the menu icon only)
Authorizes mobile users with single-sign on (SSO) access to generate an access code for use with the SC Mobile App.
You may also see additional links in the menu icon, such as user guides, company information, classes, or dashboard administrative privileges, depending on your configuration.
Dashboard 2.0 Display Area: This area displays the content for the selected tab or menu item. For example, clicking the Open Work Orders tab will display all open work orders in this area.
- Switching Dashboards: For those with access to multiple Dashboards, use this drop-down to choose another dashboard.
- Switching Locations: For those with access to multiple locations, use this drop-down to choose another location. See Choosing Another Location, below, for more information.
Logging out: The X in the top-right corner closes the Dashboard.
Use the Menu Icon when the 5 main tabs disappear. The tabs will disappear when there are 3 or more tabs on a row and if the text expands beyond its tabs borders.
Accessing Locations through Dashboard 2.0
All work orders are managed by location. Depending on system permissions, a user may have access to one or more locations.
- Access to one location: This permission allows a user to create and manage work orders for a single location. Typically, this is a user who works at only one location.
- Access to multiple locations: This permission allows a user to interact with work orders submitted across multiple locations within a company. Usually, this is a user such as a District Manager or Regional Manager.
- Access to all locations: This permission allows a user to interact with all work orders submitted for all locations for a company. Typically, this is a user such as a Facilities Manager, or a user with administrative access.
Should you only have access to one location, Dashboard 2.0 automatically displays that location.
You must choose the desired location to see the work orders for each location. You may either select a location while you are logging in to Dashboard 2.0, or switch to another location after you have logged in.
- In the Location drop-down that appears immediately after you log in, select the location you wish to access. The Location #, Name and Address of the selection will appear below the drop-down menu.
- Click Confirm. Dashboard 2.0 appears for the selected location.
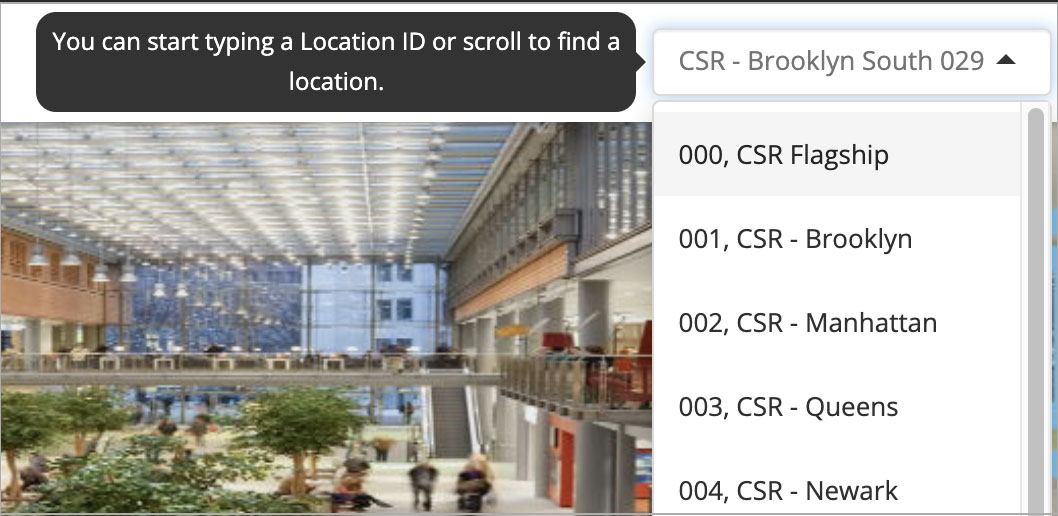
Choosing Another Location
On the top-right corner of Dashboard 2.0, click the Choose Location drop-down menu, and select the desired location.
For users with access to more than 10 locations, you can also type in the Location Number.
- Type in a partial Location Number to filter the list.
- Type the exact Location Number and then the 'Enter' key on your keyboard to quickly switch to that location.
Conditional Dashboard
Different locations in your business can have different assets, problem types, and work order issues. The conditional dashboard allows you to configure the appropriate set of questions and apply them to the corresponding location. When requesting a service request, the corresponding dashboard will be displayed based on your location selections, then you go through creating a work order steps for the specific location.
Ask your ServiceChannel representative to turn on the Conditional Dashboard for you.
