There may be times when you need to edit a work order for reasons, such as a manual note and/or systems note.
Example System Notes
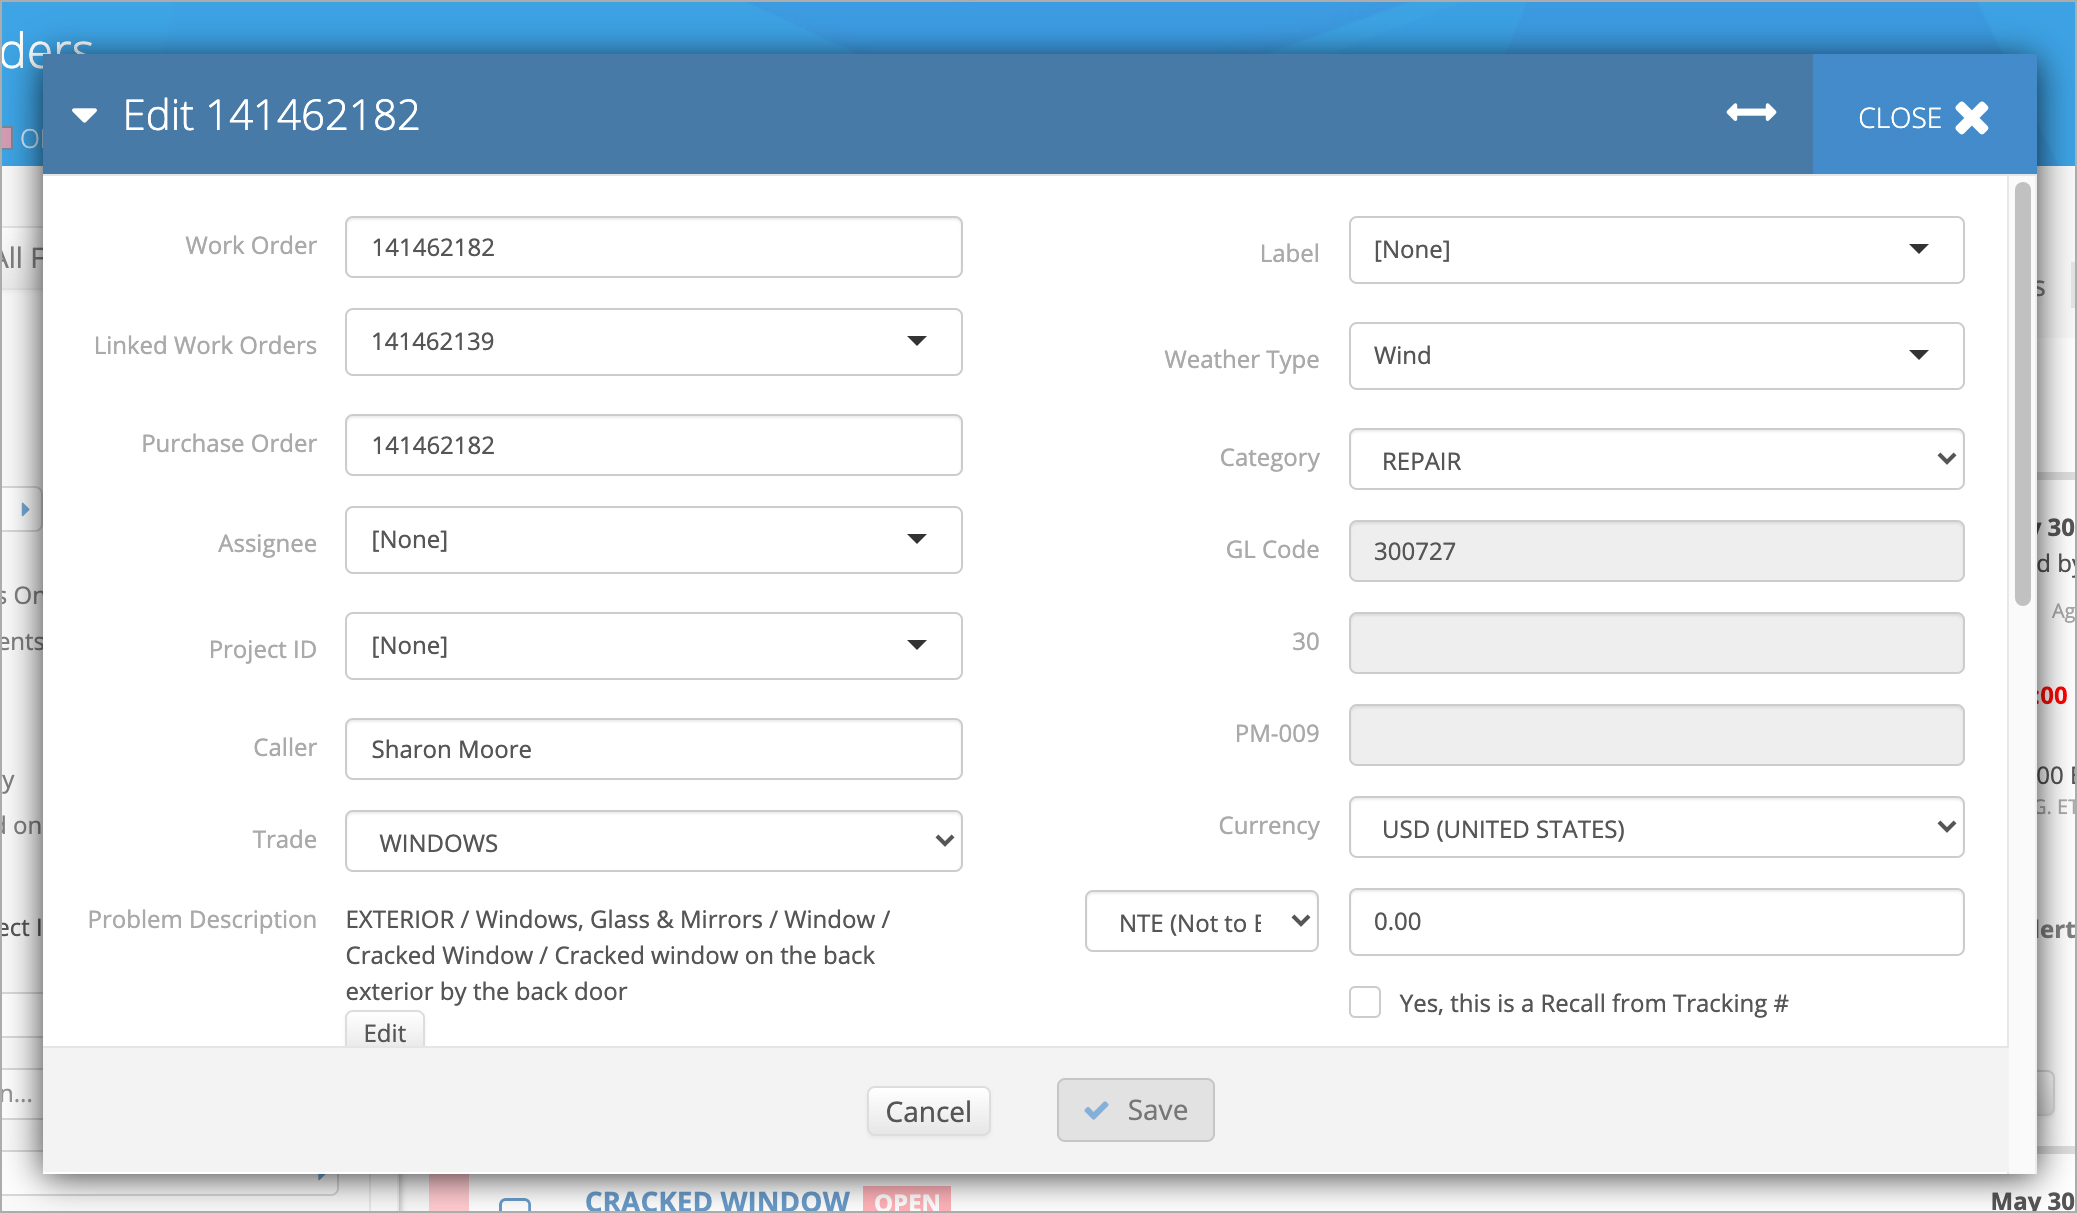
Examples of systems note are:
- Editing the work order details when, for example, the Location entered incorrect information, such as choosing the wrong Problem Code. This error may dispatch the wrong service provider.
- Adding an Assignee when you want to split the work between people on your staff, for example, across facility coordinator or across different areas of responsibility.
- Changing the NTE based on an update by the service provider about the level of work needed to resolve the problem.
- Changing the priority and scheduled date/time when you need the service provider to dispatch to the location either earlier or later than the original scheduled date and time.
- Adding an admin created Label to 'tag' a work order based on events, follow-ups, or other internal needs.
- Adding a Project ID for when a work order needs to be included into a project within the Projects Module.
- Adding a Weather Type to relate a scope of work to a weather event.
- Adding a Purchase Order number or a GL Code in order to coordinate with other financial records.
- Keeping a record of resolutions to issues, so you have a history of problems and fixes over time.
While making changes to a work order that a service provider needs to be aware of, such as scheduled date/time, make sure you notify the provider.
Note that you can even Batch Edit Work Orders to change most of this information for multiple work orders.
Invoiced work orders cannot be edited, and work orders in the Completed/Confirmed status may only be edited only by Power Users.
- On the Work Orders List page, click Edit next to the desired work order. Alternately, inside the detailed view of a work order, click the Edit Work Order button. The Edit <Work Order #> window appears.
Modify the desired information.
Check the Resend Dispatch Email box to send notification of the change to the assigned service provider.
For work order edits that do not need to be communicated to the assigned service provider, do not check this box. See Service Provider Notifications for more information.
When the work order status is moved from Completed/Cancelled (or Canceled) to Open, the Resend Dispatch Email box is automatically selected.
- Write a Note, briefly describing the changes to the work order.
- Click Save. A confirmation message appears at the top of the screen.
- The Work Order Details page displays the changes made.
- Notes Splitting for Systems Note occurs when a manual note and systems note is performed simultaneously and displays separately in the Attachments & Notes section.

