In the Work Orders module, you can see a list view of all work orders entered through either the Dashboard or the Planned Maintenance module.
Viewing Work Order Details
Understanding the details of a work order helps you manage the facilities issues happening at your locations more effectively.
On each work order you will see the following information, divided into 5 sections:

- Section 1 displays the problem code, status, issue, trade, priority, category, created by, and caller details.
- Section 2 displays the tracking number, location details, the assigned service provider and technician, NTE, and related issue dates such as scheduled date, rescheduled ETA date, and work date.
- Section 3 displays the problem description, resolution (including resolution and root cause codes if applicable), and the last added note. If a work order has an associated RFP or asset, they also appear here.
- Section 4 displays the options to view/edit the work order and create a proposal, an invoice, and a linked work order.
- Section 5 displays icons indicating recalls, linked work orders, starred work orders, the total time spent by a technician on-site as well as a checkbox to select the work order for bulk actions.
Section 1: Issue and Status
This section displays information in three rows. On the left are:

Problem Code and Status highlighted with the color matching the status of the work order. (SeeAbout Work Order Life Cycle and Statusesfor more information.) In case the work order has an extended status, it appears here, providing you information on the exact progress of the work order. Clicking the status/problem code area opens the detailed view of the work order.
- Area, Problem Type, and Asset; or simply the Problem Description when other information is not available.
- Trade, Priority, and Category of the work order.
- The date/time the work order was created.
On the right, the following information is available:
- Caller, which is either
- the name of the person who called in the work order; or
- "Automatically Generated" when generated from the Planned Maintenance module
- Created by, the User Name/User ID of the person who entered the work order into ServiceChannel
- Age of the work order, which is how long the work order has been open. Once the work order is in the Complete status, the aging stops.
Section 2: Work Details
Information is arranged in 4 columns here:

Column 1: Work Order identification details, including the tracking number, work order number, purchase order number, work order label, and weather event (where applicable).
- Clicking on work order numbers open a detailed view of the work order. It's important to note that:
- Tracking numbers are automatically applied to all work orders and cannot be edited. Work Order numbers and Purchase Order (PO) numbers are automatically assigned the same number as the Tracking Number, and will not appear on the work order unless edited.
- PO numbers can have a maximum of 50 alphanumeric characters. On the Work Order List, PO numbers are truncated to less than 20 characters. To see the full number, either mouse over the number or edit the work order.
- Tracking numbers, Work Order numbers, and PO numbers carry over throughout Service Automation, namely to Invoices, Proposals, and downloaded reports.
- Clicking on a Label or Weather event updates the filters on the left. Click Apply to see all work orders with that label or weather event. Click Clear to remove all filters.

Column 2: Location details, Service Provider details, and Leaving Reviews for Providers.
Column 3: NTE/Subtotal and tax amounts, and links to related Proposals, RFPs, and/or Invoices. Clicking these links take you to the details of the proposal, RFP, or invoice selected.
Column 4: Work Order Dates and Work Order Assignee. The last updated scheduled date for the work order, the original ETA or expiration date/time for maintenance work orders, and the last date/time work was performed on the work order.
| Tip |
|---|
When a service provider does not check in by the scheduled date, the date will turn red, as an indicator that (s)he is late to check in. |
The Work Order Assignee is the person who was given this work order to manage. This is helpful when you want to split the work between people on your staff, for example, across facility coordinator or across different areas of responsibility. You can edit the work order to add an assignee, as well as filter work orders by the assignee. You will see the Assignee throughout the lifecycle of this work order, including on Proposals and Invoices.

Section 3: Problem Description, Assets, RFPs, and Notes

On the left are the problem description and resolution (if available). If the work order resolution appears cut off, hover over the resolution to view it in full in a tooltip.
| Tip |
|---|
For specific trades, the Resolution field for Completed work orders may include resolution and root cause codes. For details, refer to Resolution and Root Cause Codes. |
On the right, the last added note details including the note number, the date and time it was added, and the actual note appear.
- Here, you can see an RFP linked to a work order (if any).
- If an asset is associated with a work order, the asset tag and tag ID also appear here.
Planned Maintenance work orders may have multiple assets attached. To see information on the assets associated with the work order, click the Assets button on the work order in the list view. You are navigated to the Asset Manager module with the list of assets linked to the work order.
| Note |
|---|
To be able to attach multiple assets to Planned Maintenance work orders, please contact your Customer Success Manager. |

Note that the assets list is filtered by the work order tracking number. By clicking the asset tag ID, you can navigate to the asset details page.

Section 4: Work Order Actions
Here, actionable buttons are available, allowing you to view/modify the work order, as below:

- Add Note: Opens theNotepop-up, from where you may add a note to the work order (Note that in this pop-up, you may also perform other actions such as adding an attachment and rescheduling the work order).
- View Details: Opens the detailed view of the work order.
- Edit Work Order: Opens the Edit Work Order window, where you may edit the properties of the work order, such as problem details, status, and invoice approval codes. SeeEditing a Work Orderfor more information.
- Attachments: Displays the number of attachments; clicking the button opens the Attachments & Notes tab in the detailed view of the work order, where you may view or add/delete attachments and templates.
- Reassign: (Open or In Progress only) Work Orders in these statuses can be reassigned to another Service Provider by permissioned users, as illustrated below.

More: Based on your permissions to access modules, you may see the following:
| Section |
|---|
| Column |
|---|
| (Open and In Progress Work Order statuses) Contains links to create Proposals/RFPs and linked work orders.
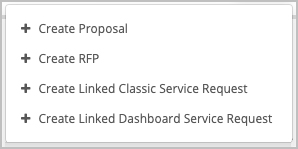 |
| Column |
|---|
| (Completed and Completed/Confirmed Work Order statuses) Contains links to create an Invoice and linked work orders.
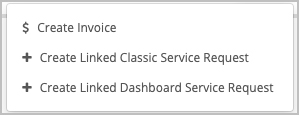 |
|
| Info |
|---|
Once a work order is invoiced, you can only use More to link service requests. |
See Taking Actions on Work Orders from the List View for more information on using these features.
Section 5: Work Order Icons and Color Status
Bordering each work order is the status color to help you quickly identify each work order's status.
Alongside the status, you will see the following icons:
| Section |
|---|
| Column |
|---|
| 
|
|
Additional Work Order Views
From the Work Orders List you also can:


