- Created by Jing Tong (Unlicensed) , last modified by Anastasia Troichuk (Unlicensed) on Oct 06, 2022
You are viewing an old version of this content. View the current version.
Compare with Current View Version History
« Previous Version 35 Next »
You may add users to Service Automation and provide permissions from the Users page. The number of users you may add is unlimited.
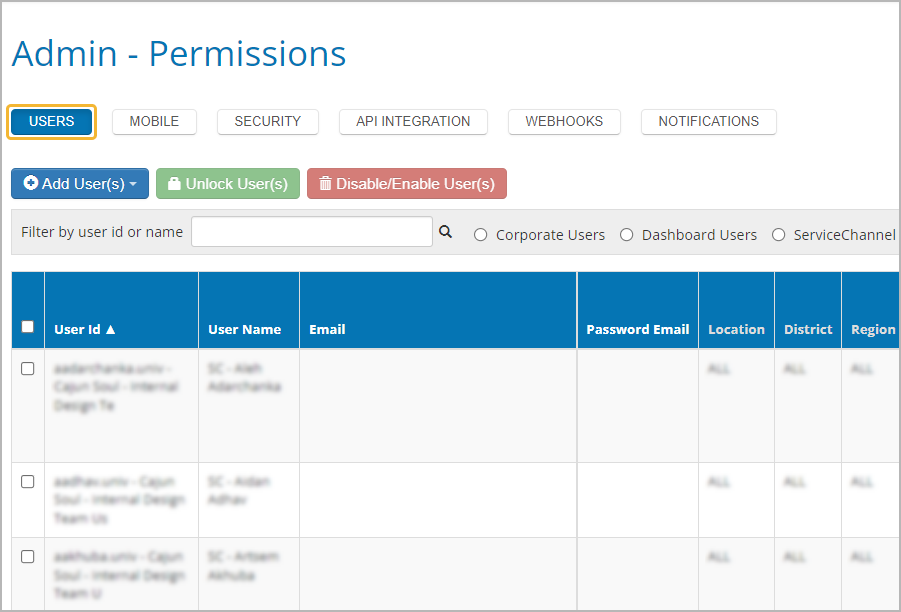
Use either of the following two ways to set up new users, depending on the scope of work:
Adding Users One by One
While adding a new user, you can set the desired password management option and add notification email for receiving work order notes, invoice escalation alerts as well as proposal and work order assignment notifications.
- From the hamburger menu, select Admin > Permissions > Users. The list of users appears.
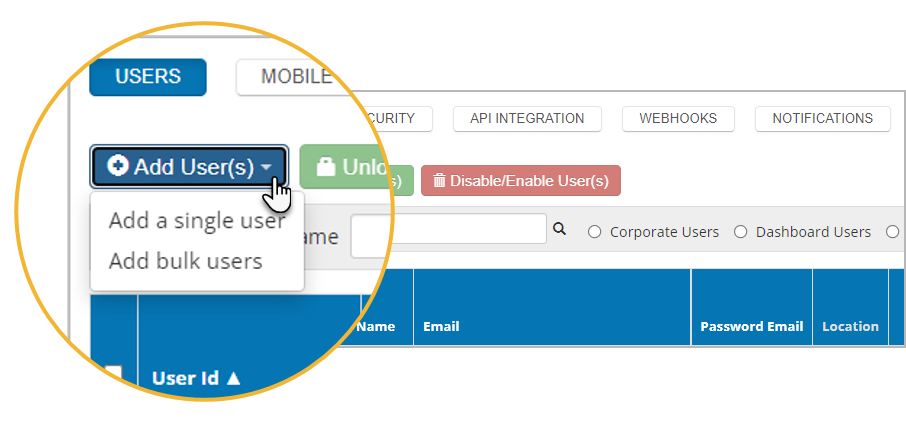
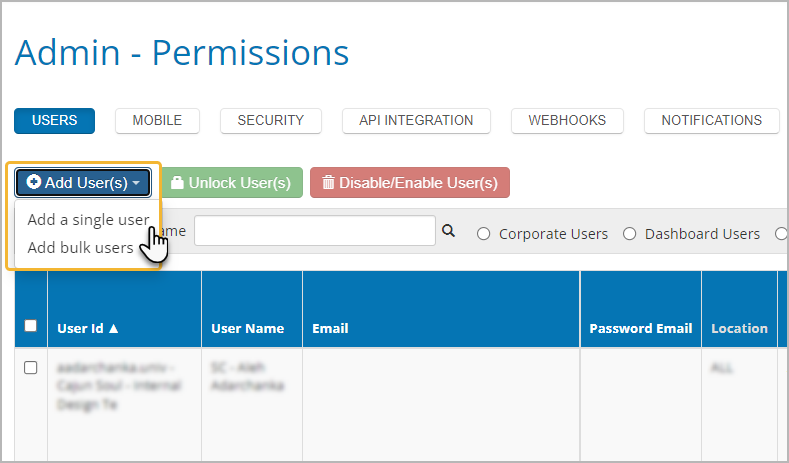
- Click Add User(s), and select Add a Single User.
 You land on the General Info tab of the user page.
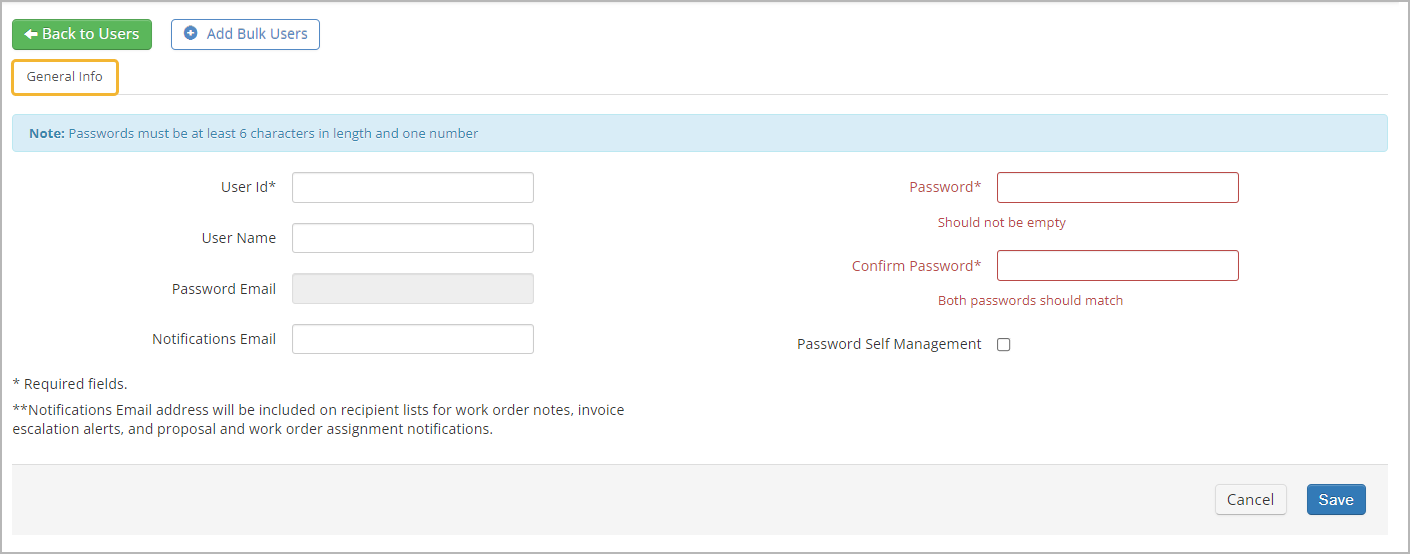
Provide a login name for the user in the User Id field.
(Optional) Enter the name of the user in the User Name field.
(Optional) In the Notifications Email field, specify the email to which all notifications will be sent.
- Choose the desired password settings by either enabling or disabling the Password Self-Management option:
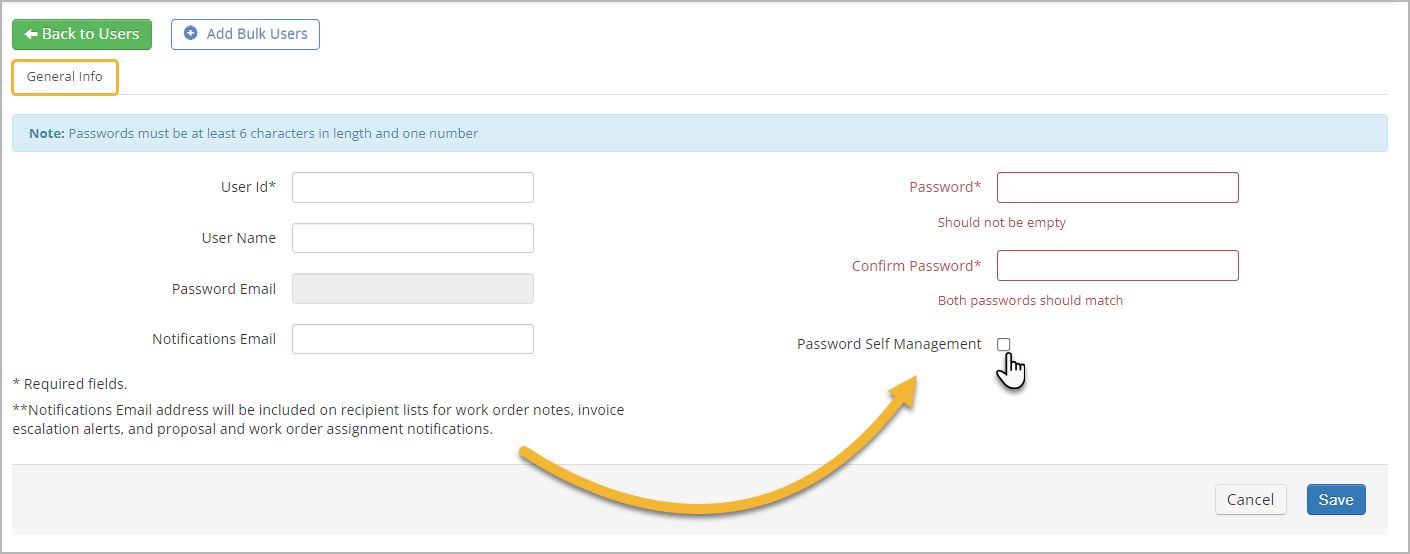
- To enable password self-management:
- Select the Password Self-Management checkbox. The Password Email field is enabled, and the Password and Confirm Password fields are disabled.
- Enter the Password Email.
- To disable password self-management:
- Clear the Password Self-Management checkbox.
- Enter the Password.
Re-enter the password in the Confirm Password field.
The password should be in line with the password complexity requirements displayed in the blue bar at the top of the page. See Configuring Password Complexity for more information.
- Click Save. Additional tabs and checkboxes appear on the page where you can continue to customize permissions, locations, limits, notifications, and other options for the new user.
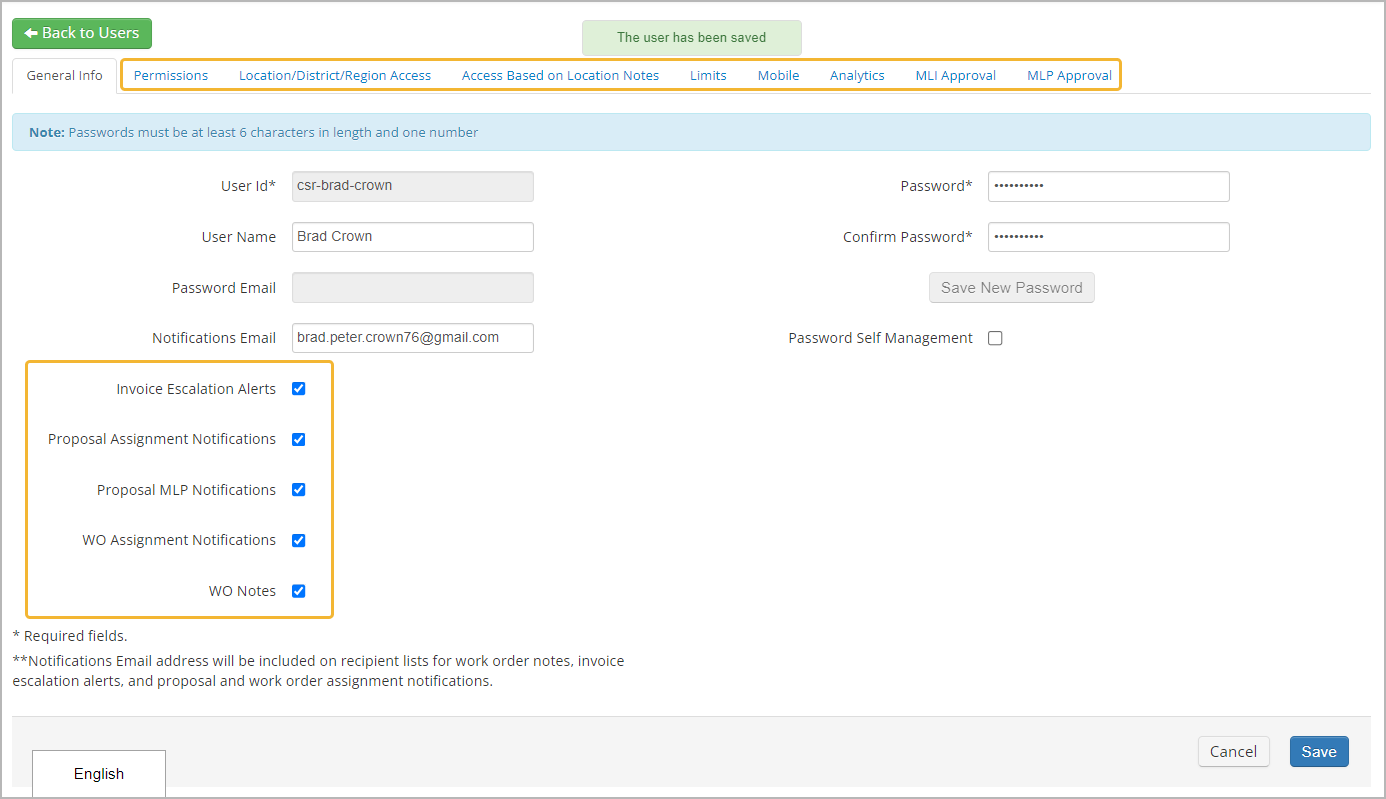
Once you add a user, you can do the following:
- Customize permissions for access
- Assign Service Automation roles and permissions
- Give access based on Locations or Location Notes
- Assign limits to NTEs, Proposals, and Invoices
- Review mobile access information for users authorized for the ServiceChannel Mobile App
- Assign dashboards
Adding Multiple Users in Bulk
To set up multiple users, we recommend that you use the template to upload all the required information on new employees in one go.
Before you get down to completing the below steps, ensure you have uploaded primary roles. Without primary roles in place, no new users can be created via the Bulk User Template.
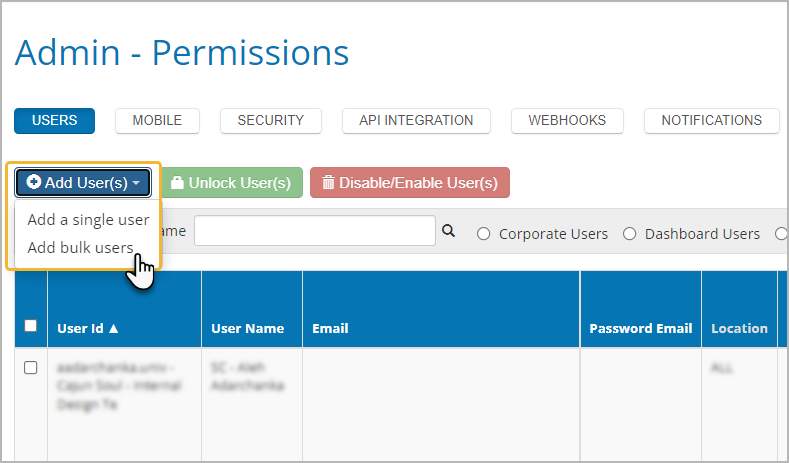
- From the hamburger menu, select Admin > Permissions > Users. The list of users appears.
- Click Add User(s), and select Add Bulk Users.
- Download the Bulk User Template.
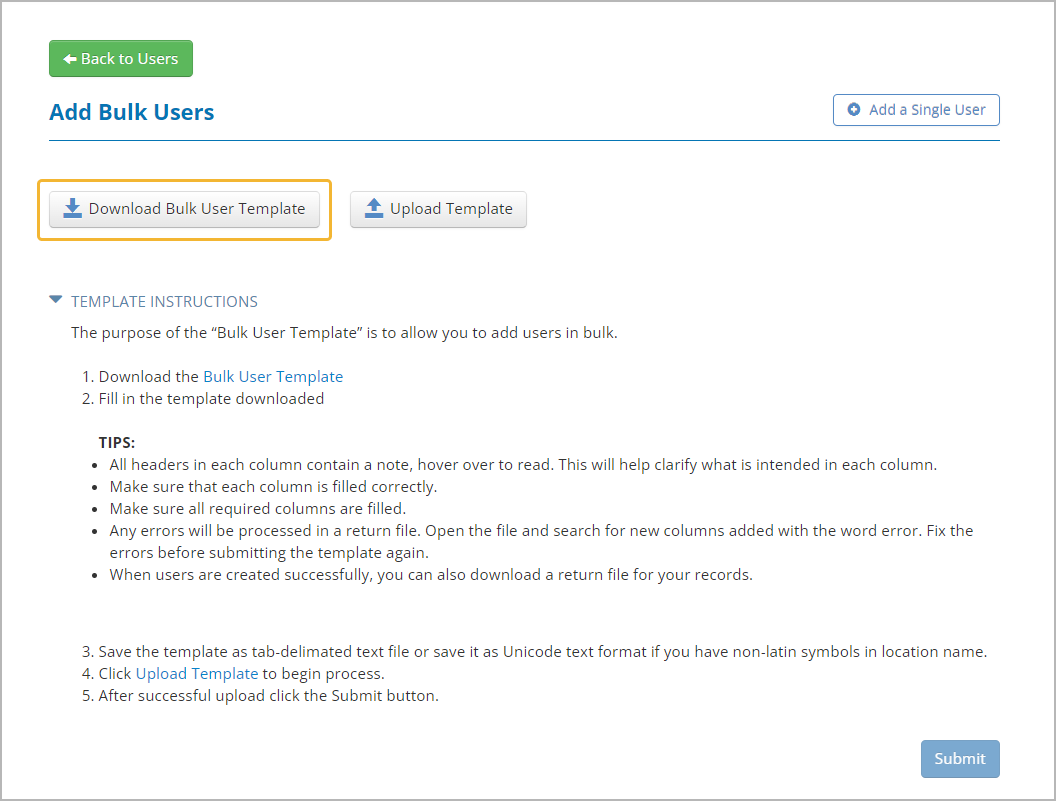
Fill out the MS Excel template. Refer to the tips on the Add Bulk Users page.
Expand this section to read information on the template.
There are two types of the Bulk User Template based on whether or not your organization uses the Password Self-Management feature.
- When the feature is turned on and the Password Self-Management column is set to Yes for a user, the Password column should be left blank.
- When the feature is turned off, the Password field should be filled out.
Hover over a column name to view a hint on how the column should be filled out.

The password should be in line with the password complexity requirements displayed in the blue bar at the top of the page. See Configuring Password Complexity for more information.
The Role Title column should be filled out with one of the primary roles. If you do not have primary roles uploaded into your system yet, you will not be able to proceed with creating users in bulk. Learn how you can create primary roles.

- Once you have completed the template, save it as a tab-delimited text file.
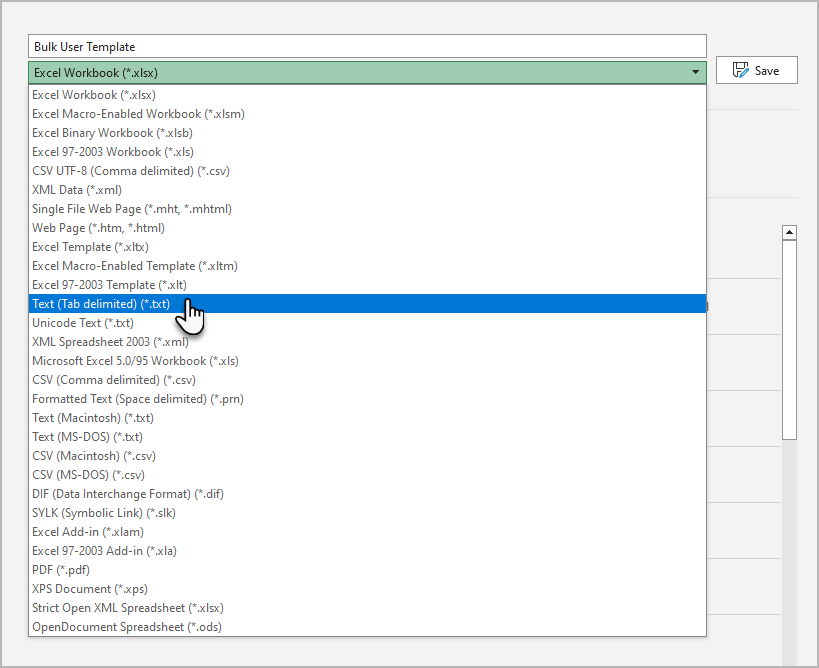
When non-Latin characters are used in the file, please save it as a Unicode text file.
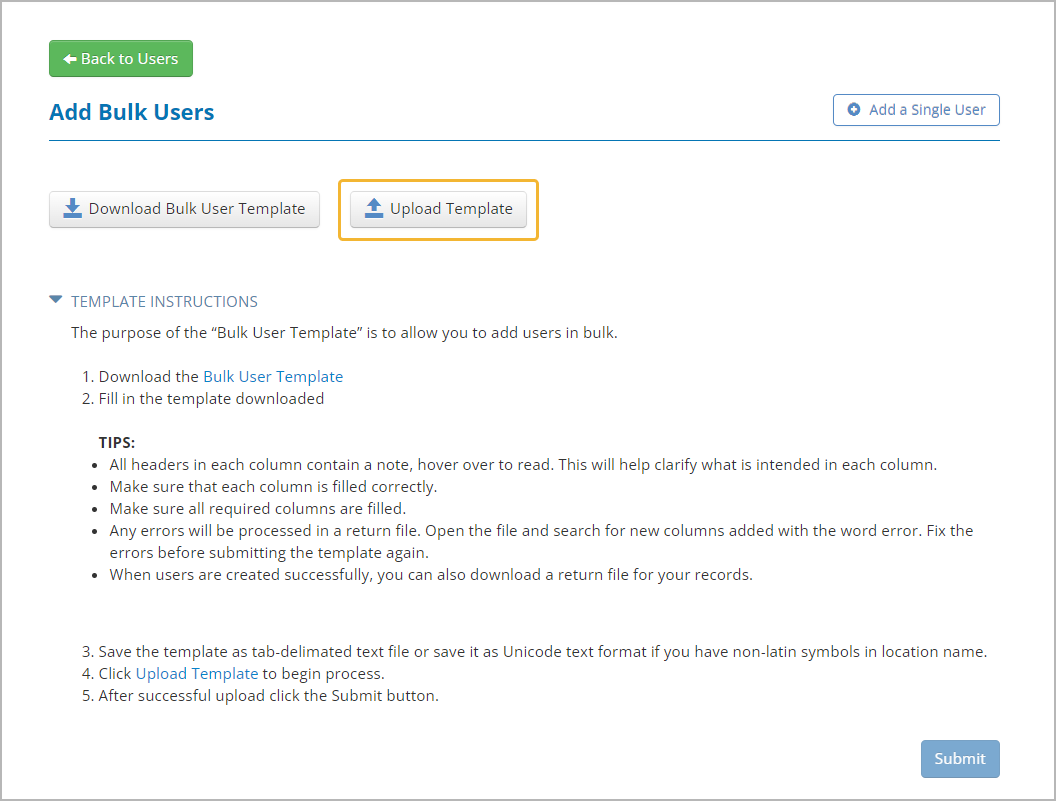
- Click Upload Template.
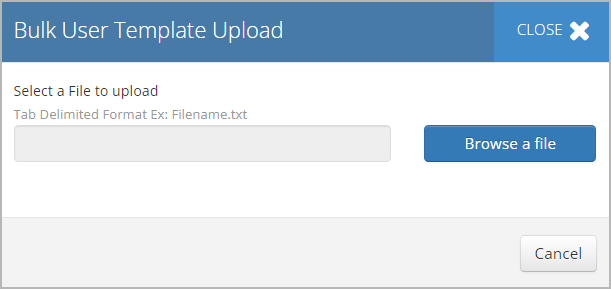
Click Browse a File, and then open the saved template from your device.
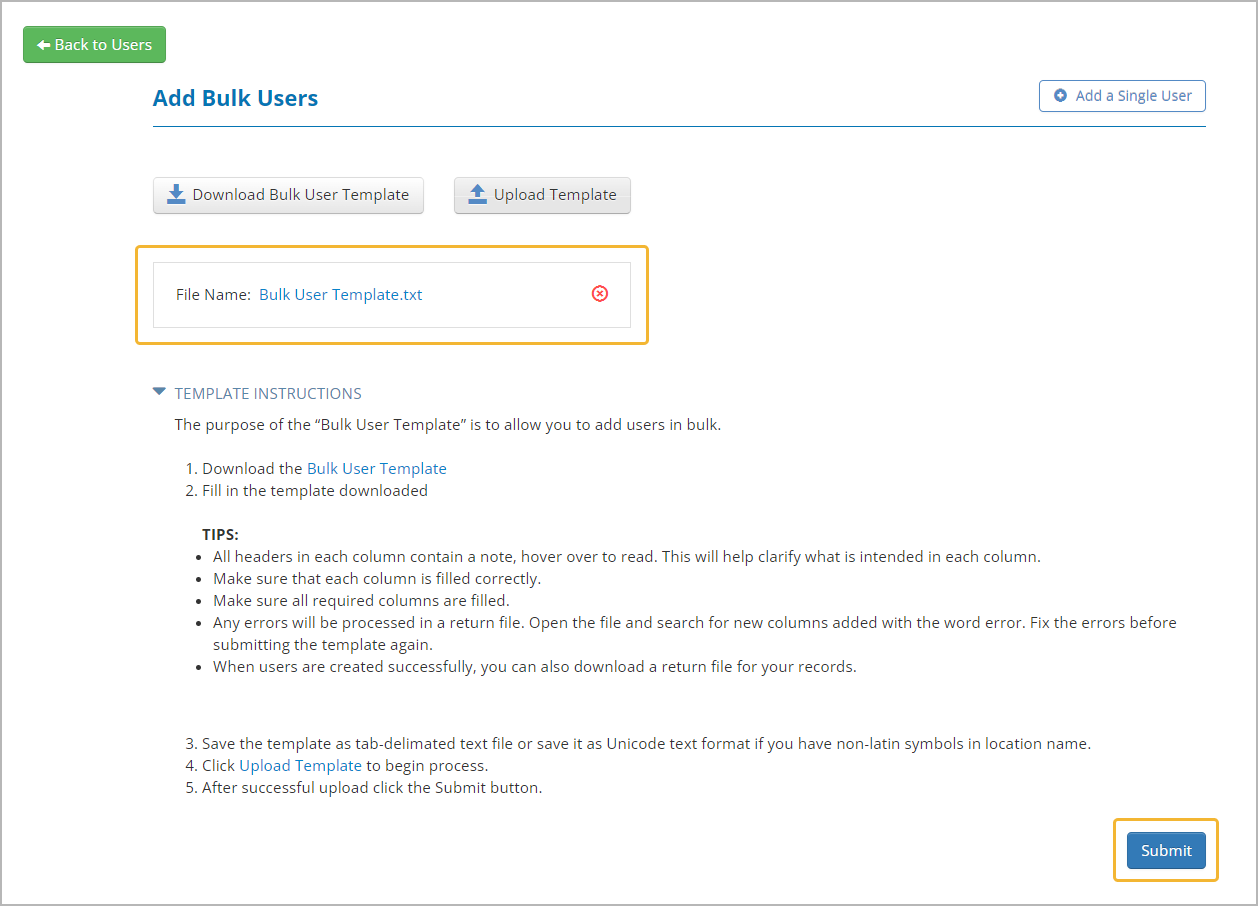
To remove the file that was added in error, click the red cross next to the file name, and then re-upload the required file.
- Click Submit in the lower-right corner to start file processing.
- A green checkmark will appear next to the uploaded file once the latter is processed with no errors found.

When errors are detected, you will be prompted to download the results file to fix the errors and re-upload the corrected file.
Even a single error in the uploaded template will lead to the whole upload process failure, meaning that no new users will be created.
- A green checkmark will appear next to the uploaded file once the latter is processed with no errors found.
Password Self-Management
The Password Self-Management feature lets you allow users to reset their own passwords securely through their emails. You may enable this feature by contacting ServiceChannel.
Once the feature is enabled, you may easily turn the feature on for individual users in your company by checking the box next to Password Self Management in the General Info tab.
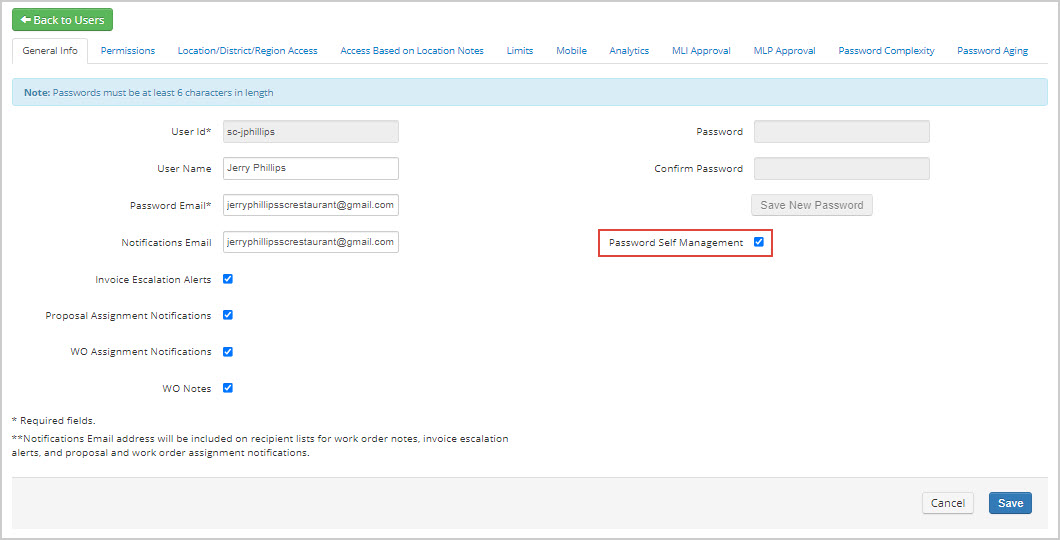
In other instances where multiple users, such as location users, may share a single account, you can add and manage passwords for those accounts by disabling the Password Self-Management option. While users associated with such an account cannot reset the account password, they can contact an Admin user and retrieve the password.
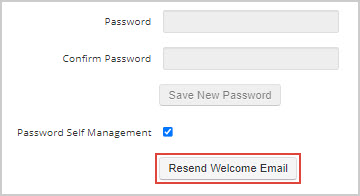
If a newly added user has the Password Self Management option enabled, but they haven’t created their password yet, you can resend a welcome email to them. To do this, click Resend Welcome Email on the General Info tab of the user details page. The welcome email contains a link to create a password that is valid within 14 days. Once the user submits their password, the Resend Welcome Email button disappears from the page.
-
Page:
-
Page:
-
Page:
-
Page:
-
Page:
-
Page:
-
Page:
-
Page:
- No labels
