- Created by Joseph Yarborough (Unlicensed) , last modified by Anastasia Troichuk (Unlicensed) on Jan 21, 2021
You are viewing an old version of this content. View the current version.
Compare with Current View Version History
« Previous Version 34 Next »
Adding your company’s assets is one of the most crucial tasks you will have to complete early on in your company’s use of Service Automation. Many of the assets that you add, during this process, will undoubtedly be the same assets that will need servicing therefore prompting you to create a service request. Any asset not added will not show when creating a service request.
An additional benefit of having your company’s assets added to your Service Automation account is that you can run Analytics reports that give you granular information in regards to an asset’s cost, repair history, warranty period, and location. Many companies have used this information to determine when it is time to replace an asset rather than repair it. Metrics gained from an asset analysis can also be used to determine which brand or model has served you best.
Creating a New Asset
Before you get down to adding assets to Asset Manager, make sure that you’ve created the appropriate asset types — since you should specify to which type your asset belongs by selecting the type from the list of available asset types.
To be able to add new assets, you need to have the AddAsset permission set to Full for your user role in Asset Manager. Learn more about roles and permissions in Asset Manager.
- Navigate to the hamburger menu in the upper-left corner, and select Manage Assets under Assets (Equipment). You land on the assets list.

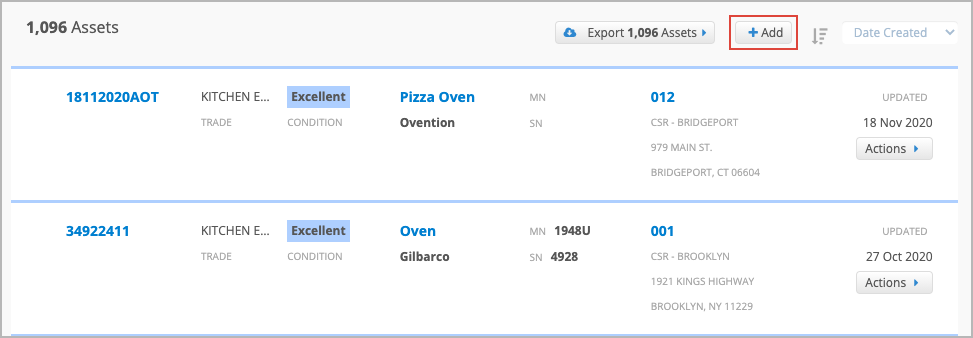
- Click the Add button located at the top of the list.
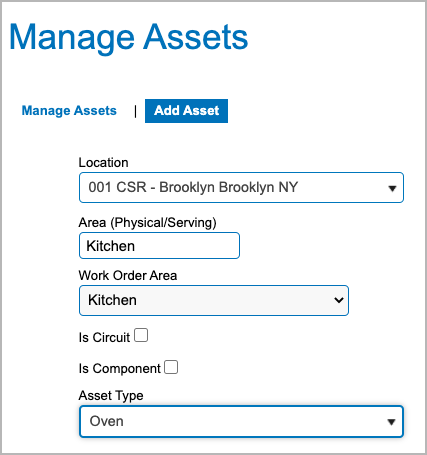
On the page that appears, provide the following information on your asset:
Select the Location where the asset is located.
(Optional) Pick the Area (Physical/Serving) where the asset is placed (e.g. Kitchen).
(Optional) Select the Work Order Area.
Select the Is Circuit checkbox if your asset is a circuit.
Select the Is Component checkbox if your asset is a component of another asset.
Opt for the Asset Type.
After you have selected the asset type, the page populates with the attribute fields associated with the asset type you picked. Fields with a red asterisk * are mandatory.
Fill out the fields that appear once you select the asset type.
Which fields are mandatory depends on the settings you configured for the asset type attributes. Attributes marked as Required must be filled out when you create assets of this type. For example, for the Oven asset type in the screenshot below, the Tag ID, Brand, and Install Date attributes are required.

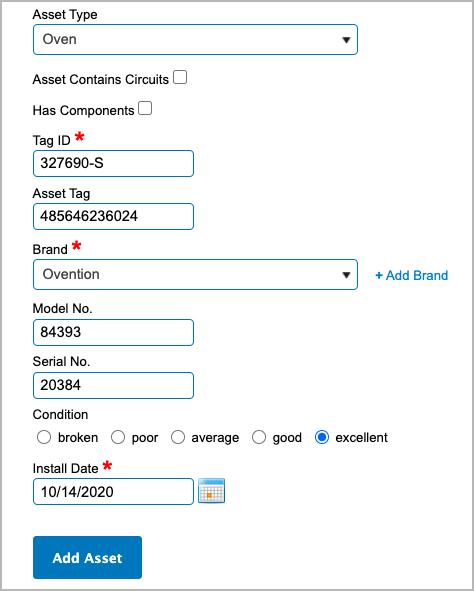
- Asset Contains Circuits: Select this checkbox if your asset has circuits.
- Has Components: Select this checkbox if your asset has components.
- Tag ID: Enter a unique ID of your asset. By default, it’s a required asset attribute.
- Asset Tag: Enter a unique asset tag which is the decoded value contained in a barcode, QR code, or NFC tag. With the asset tag added, you and your providers can scan assets via ServiceChannel Mobile and ServiceChannel Provider.
- Brand: Either select the appropriate brand from the drop-down list, or click + Add Brand to add a new brand to the list.
- Model No. and Serial No.: Enter the asset model and serial numbers.
- Condition: Specify the asset current condition.
Install Date: Pick the date when you had the asset installed at your location.
If you have decided that one or more of your asset attribute fields should be required, navigate to the Manage Asset Types page, select the asset type you want to modify. On the page that opens, select the Required checkbox next to the desired attributes.
(Optional) Fill out the additional fields. These are asset attributes that are not marked as Required for this asset type.
The more information you provide on your equipment, the better understanding of this unit your colleagues and providers will have when using or servicing it.

When ready, click the Add Asset button.
Your asset has been created and appears on the assets list. You can click the asset tag ID to view the asset details.

Adding a Similar Asset
When you need to create an asset similar to one of your existing assets, you can click the Actions button on the asset and select Add Similar Asset in the drop-down menu.

The page that opens will contain the location, physical area, work order area, and asset type information from the original asset.
Updating Assets
Nothing stays the same and this is especially true for assets that your company relies on and uses daily. Therefore, it is expected that at some point you will need to update an asset condition.
- Navigate to Assets (Equipment).
- Select Manage Assets. You land on the assets list.
- If you have a large list of assets, you can use filters on the left to quickly find the desired asset.
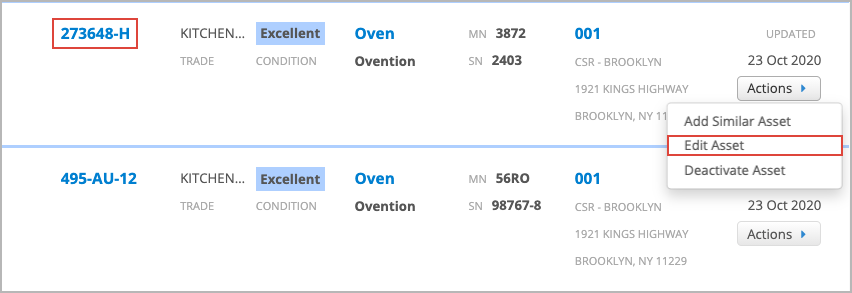
- Select the asset that you want to modify by clicking the asset tag ID or by selecting Edit Asset from the Actions drop-down list.

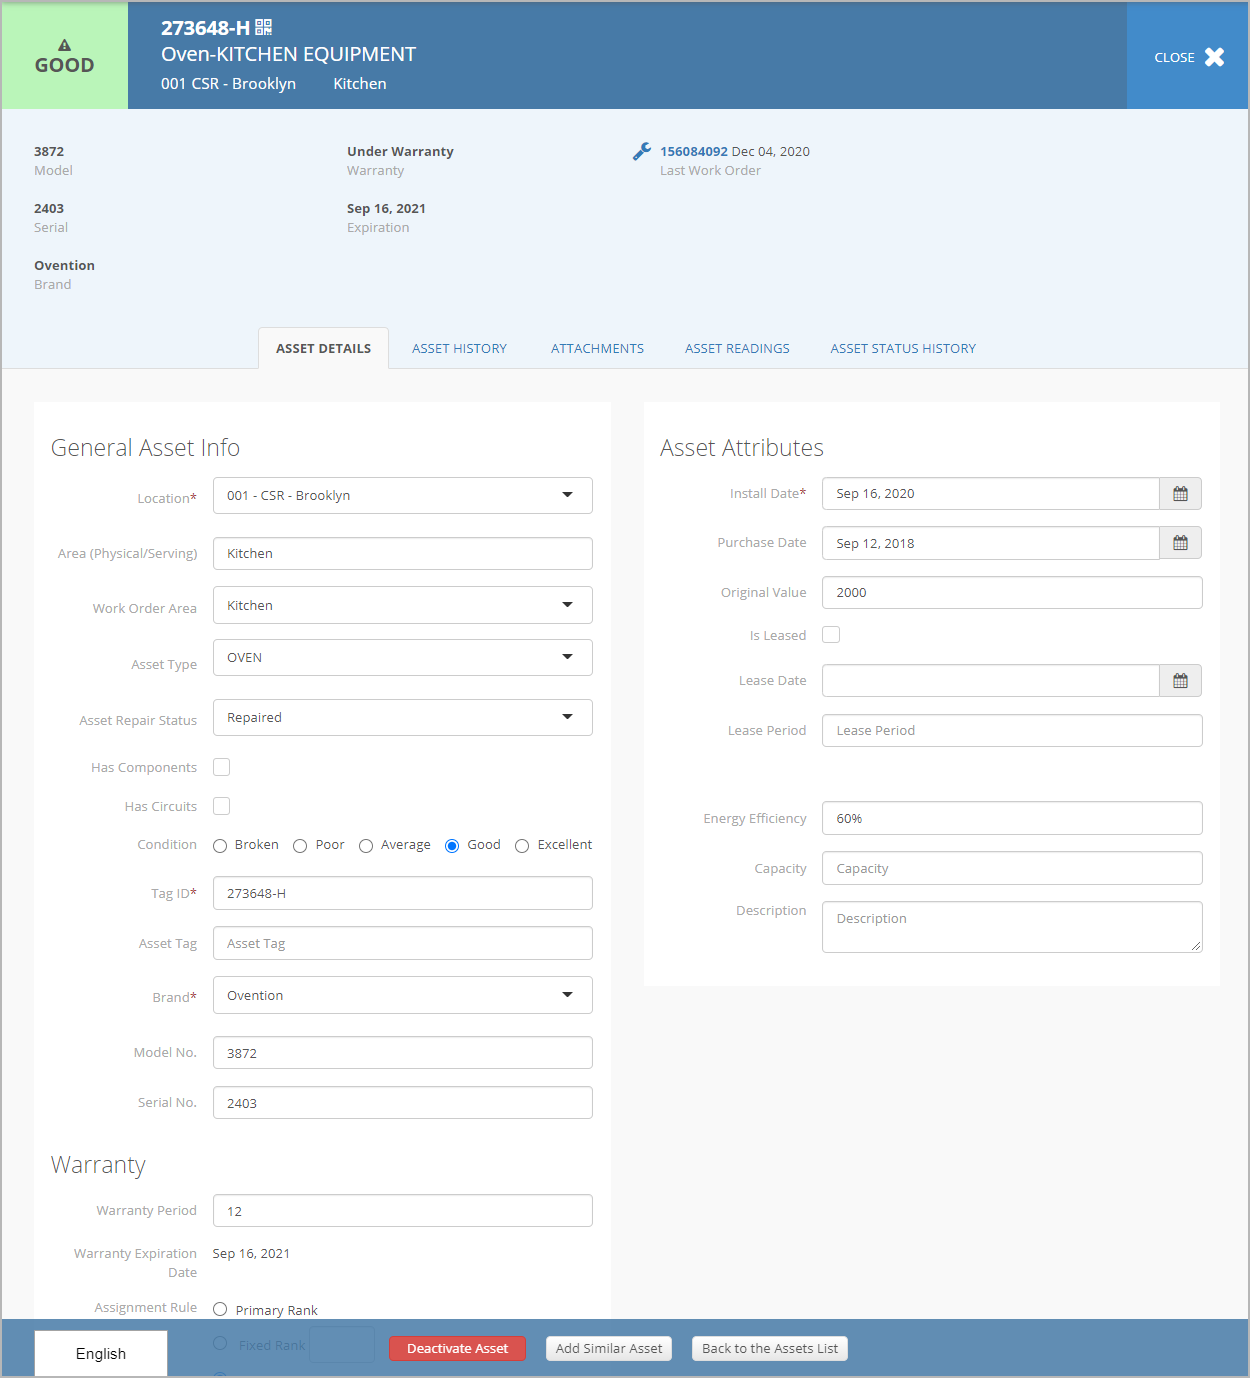
- On the Asset Details page, you can update the following asset details:
- General asset info
- Asset attributes
Warranty information
If you have permission to manage assets, you can also deactivate an asset or add a similar asset from the asset details page.
- (Optional) Switch to the Attachments tab to add files or images.
- When finished updating the asset, click Save Changes at the bottom of the page.
Changing the Preferred Service Provider on an Asset
At the time an asset is loaded to Service Automation, it is assigned to a trade and service providers who are selected to service that trade. You can change the service provider(s) for a given asset from the one selected when the asset was added to Service Automation.
- Navigate to the assets list, and find the asset you want to change the service provider for.
- Click the asset tag ID or select Edit Asset from the Actions drop-down list. The asset details page opens.
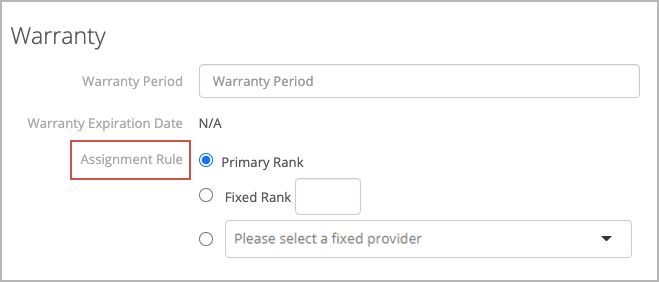
- In the Assignment Rule section, select the radio button next to the desired option:
- Primary Rank
- Fixed Rank. In the text box, specify the required rank.
- Specific Provider. From the drop-down list, select the provider who is going to be a warranty provider for this asset.
- Hit Save Changes at the bottom of the details page.
-
Page:
-
Page:
-
Page:
-
Page:
-
Page:
-
Page:
-
Page:
-
Page:
- No labels