- Created by Maria Tarnopolskaya (Unlicensed), last modified by Anastasia Medovkina on Nov 02, 2022
You are viewing an old version of this page. View the current version.
Compare with Current View Page History
« Previous Version 5 Next »

There were errors rendering macro:
- An unknown error occurred.
Reviewing Client Invitations
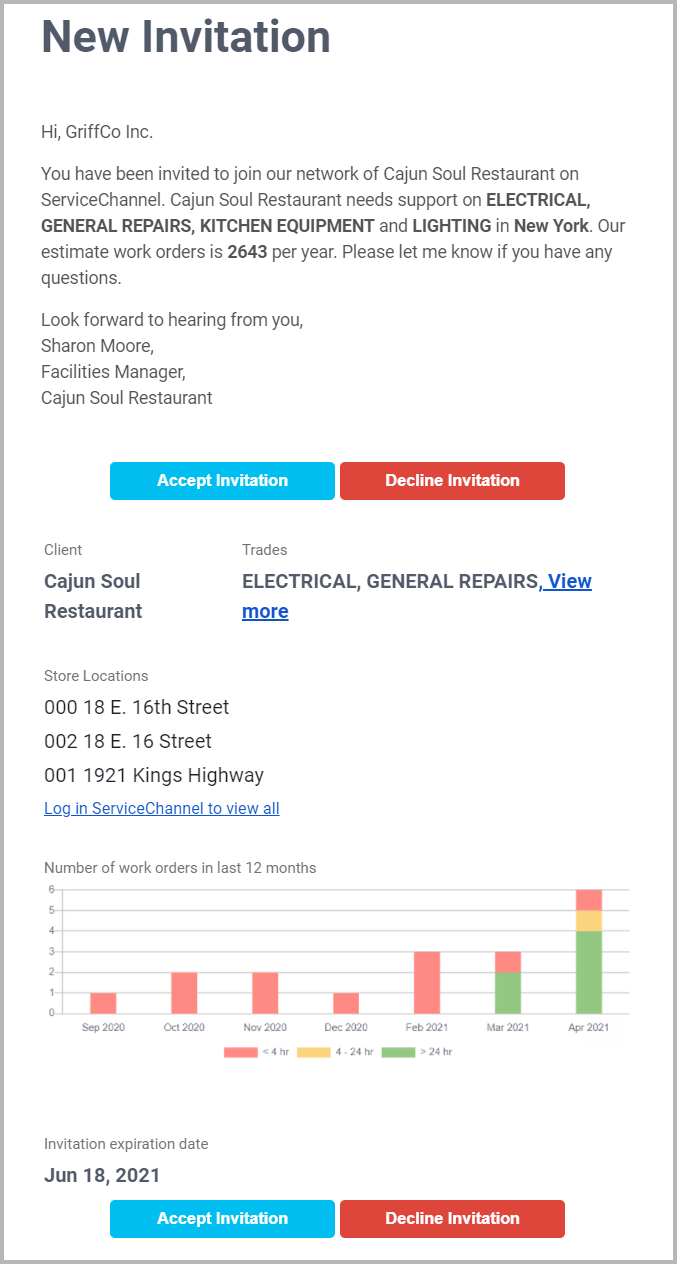
You will receive the New Invitation email to the email address you provided in your company profile. An invitation will also be displayed on your home page or ALP (Actionable Landing Page) in the New Invitation section.
After you get an invitation to join a Client Network, you can accept it to establish a business relationship with this client and be able to receive work orders from them. In case you do not wish to work with this client and get service requests from them, you can decline the invitation.
Accepting an Invitation
As you have already completed the registration process, you do not need to do it again. However, you will have to fulfill the Client Requirements for each newly accepted client invitation.
There are two ways to accept a new invitation: from the email and from the ALP.
I. To accept an invitation from the New Invitation email, you need to take some additional steps.
- Open the email invitation you received from the client.
- Click the Accept Invitation button.
- If you are logged out of your account, you get to the log-in page and then to the Clients > Invitations section.
- If you are logged in, you get to the Clients > Invitations section.
- Follow the ALP flow starting from step 2.
II. To accept an invitation from the ALP
- Click New Invitation. You get to the Clients > Invitations section.
- Click View Detail.

- In the overlay that appears, review the invitation summary, and click Accept.
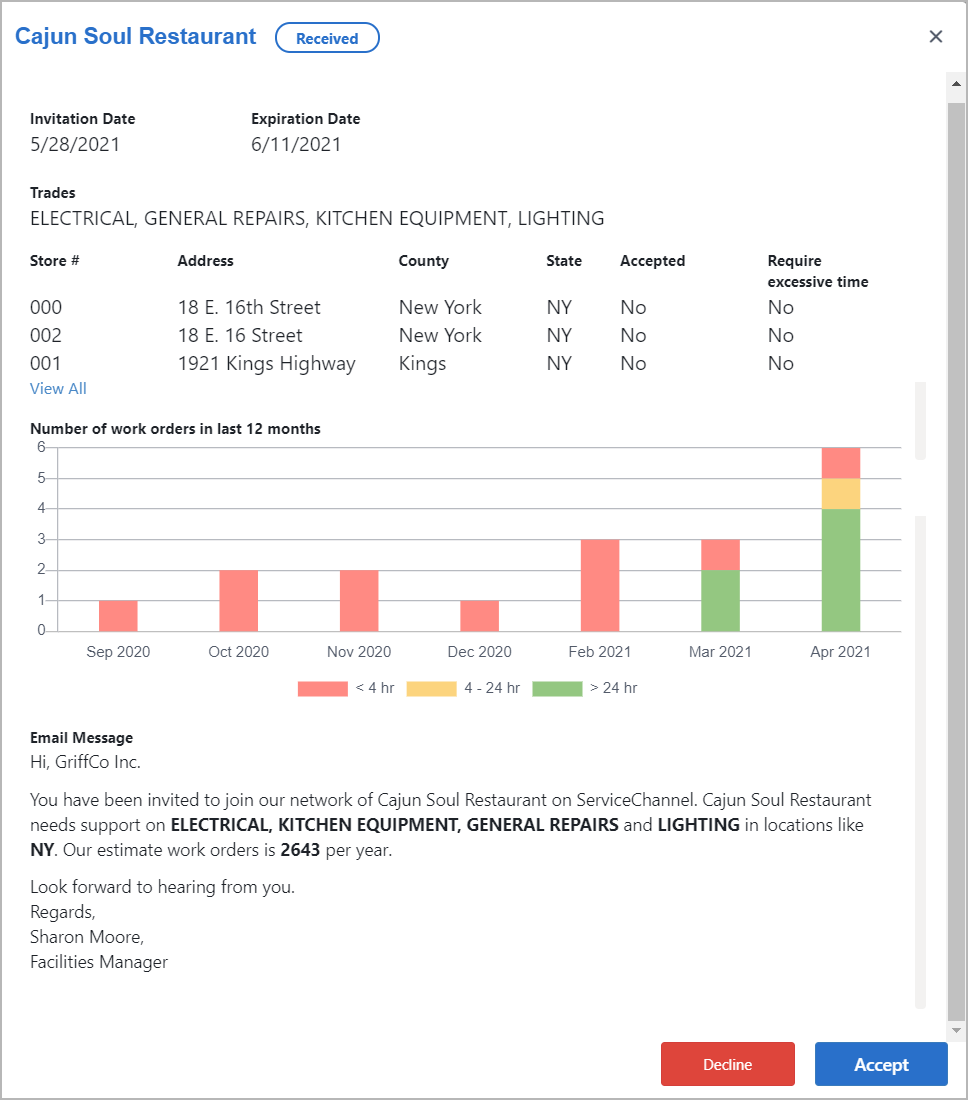
- In the next overlay that opens, confirm the locations where you provide services. All the locations specified by the client are selected by default. If some of them are out of your coverage, clear the checkbox next to those locations.
- If it requires excessive time that would exceed 4 hours to get to the selected locations, specify this by selecting the corresponding checkboxes next to those locations.
- When the client needs services in multiple states, you can filter locations by state.
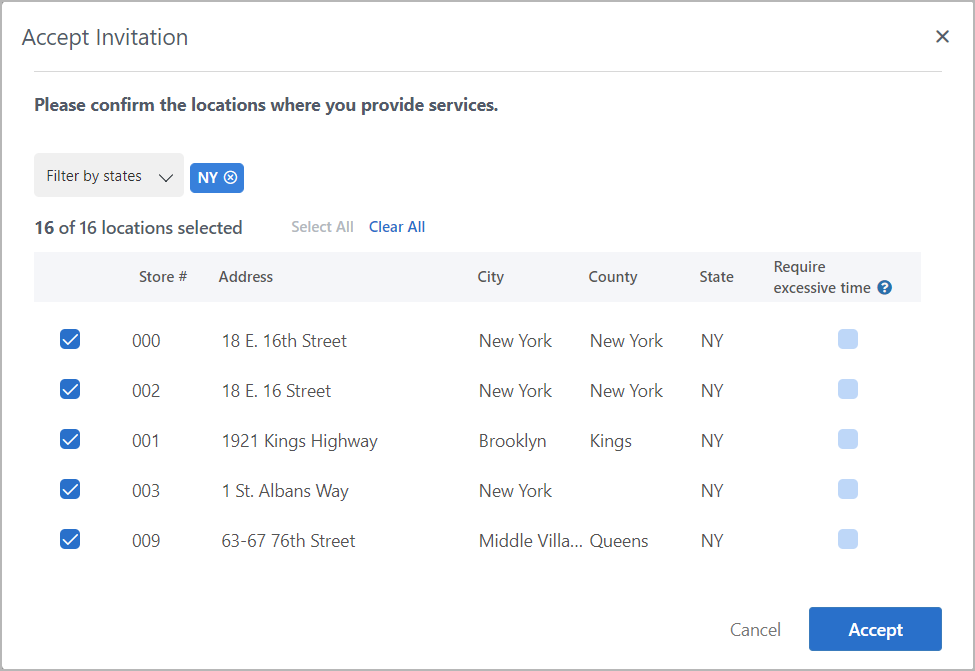
- Click Accept.
- In the overlay that appears, make sure that you are acquainted with the ServiceChannel Terms & Conditions and agree to them.
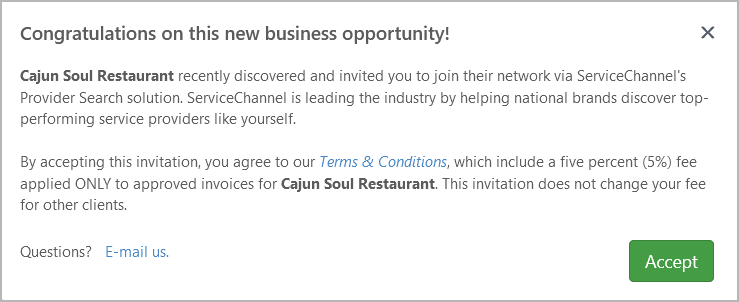
- (Optional) If you have any additional questions, click E-mail us to direct them to the ServiceChannel team.
- Click Accept.
The next step is to complete the Client Requirements.
Completing the Client Requirements
When you have accepted the client’s invitation, the invitation gets marked as Pending, and you should complete the Client Requirements.
- On the Pending Invitation, click View Full Invitation.

- In the overlay that opens, scroll down to the Documentation Progress section. All points without a checkmark ✅ lack the required information and need to be completed.

- Click View Documents to complete the missing information. The sections where the required information is missing have an exclamation mark ❗.
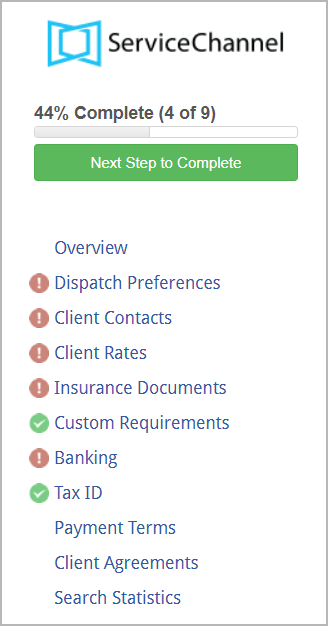
For more information about what data should be added to each section, view Managing Clients and Client Requirements. - Complete the required sections to be accepted into the Client Network.
- When the client accepts you into their Network, you get an email congratulation on a new client. The invitation changes its status from
 to
to  and moves from Active Invitations to Invitation History.
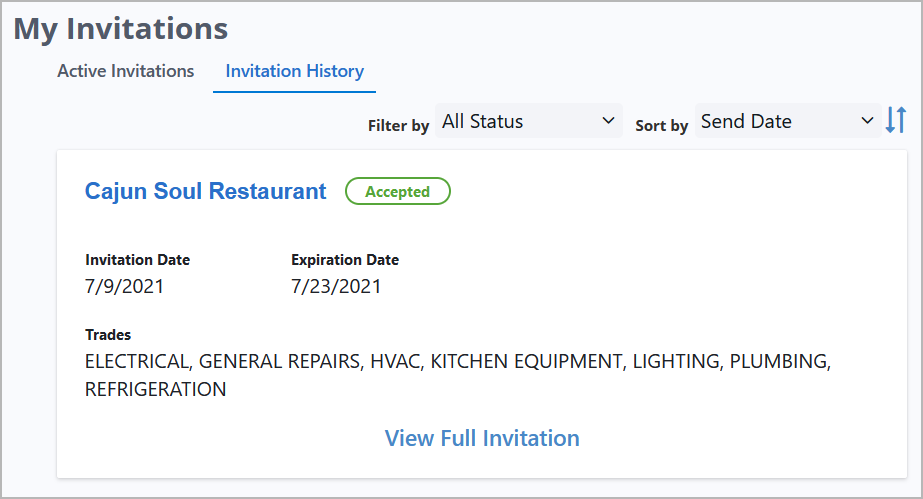
The client appears under the Clients tab in Provider Directory. Now you can receive service requests from this client.

Declining an Invitation
If, for some reason, you do not want to accept the client’s invitation, here are your steps to decline it.
There are two ways to decline a new invitation: from the email and from the ALP.
I. To decline an invitation from the New Invitation email, you need to take some additional steps.
- Open the email invitation you received from the client.
- Click the Decline Invitation button.
- If you are logged out of your account, you get to the log-in page and then to the Clients > Invitations section.
- If you are logged in, you get to the Clients > Invitations section.
- Follow the ALP flow starting from step 2.

II. To decline an invitation from the ALP
- Click New Invitation. You get to the Clients > Invitations section.
- Click View Detail to take action on the invitation. The overlay with the invitation summary opens.

- Click Decline.
- In the overlay that appears, confirm your action by pressing Decline.
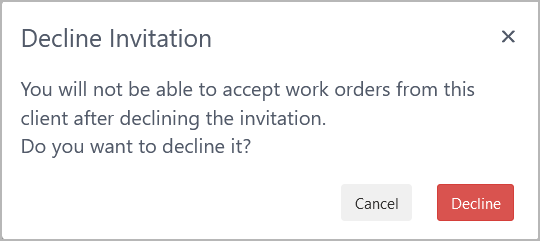
The client will receive a notification that you have declined their invitation, and you will not be able to receive service requests from this client.
-
Page:
-
Page:
-
Page:
-
Page:
-
Page:
-
Page:
-
Page:
-
Page:
- No labels
