- Created by Natalia Larina on Oct 09, 2020
You are viewing an old version of this page. View the current version.
Compare with Current View Page History
Version 1 Next »
When your company grows, or other organizational changes happen, the initial MLI configuration may require updates. It may so happen that you need to modify the existing MLI levels or add new MLI levels as well as update the current MLI rule set or create another one for invoices that should go via another MLI route.

On the MLI Configuration page, hit Apply Changes for the updates to take effect. To revert to the last saved MLI configuration, click Discard Changes.
Modifying MLI Levels
Modifying current MLI levels may be necessary in multiple cases. Let’s say you made a typo in a level name when you configured the MLI levels for the first time. Or, people who usually take action on the invoices are leaving the company, or, vice versa, new people are joining your business, and you need to arrange the MLI flows accordingly. Thus, you may need to rename an MLI level, add new users to it, assign or remove the locations they’re responsible for, delete users from an MLI level, or take other action.
If your business needs require adding new levels to the existing MLI hierarchy, you can set up additional MLI levels. Read more in Configuring MLI Levels. Use MLI templates to upload multiple levels in batch.
Renaming an MLI Level
Renaming a level may be necessary when you decide to use abbreviations for level names instead of writing them in full, or when there’s a typo in the level name.
- In the MLI Levels section of the MLI Configuration page, click the level you want to rename in the list of existing MLI levels. The MLI Level page appears.
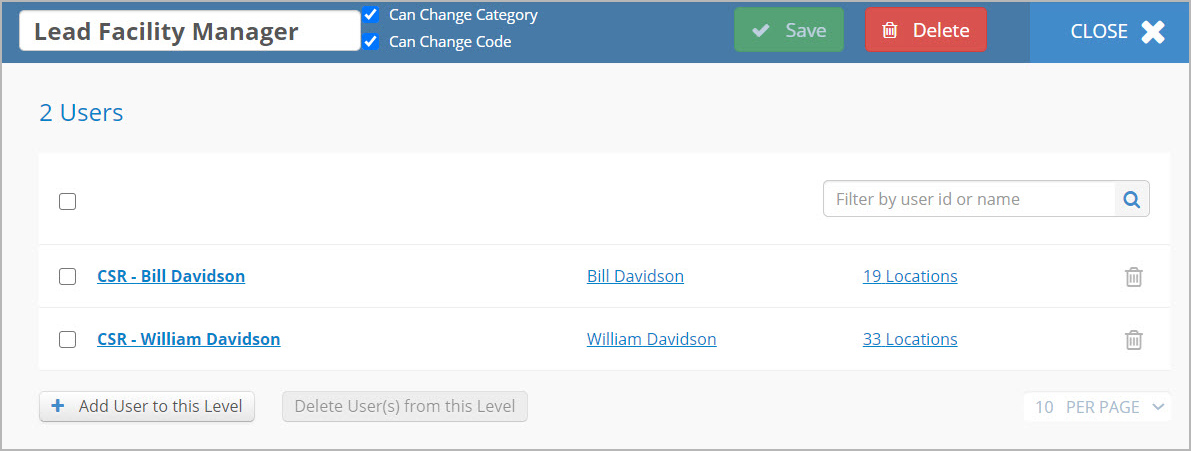
In the upper-left corner, enter a new name for the MLI level.

When renaming an MLI level, make sure each level has a unique name. Once you apply this change, the new level name is automatically updated in the associated MLI rule set.
- (Optional) Depending on your business needs, either select or clear the Can Change Category and Can Change Code checkboxes to the right of the MLI Level name. Find out more which permissions these checkboxes control.
- Click Save. The new MLI level name appears, and a message pops up asking you to apply the changes.
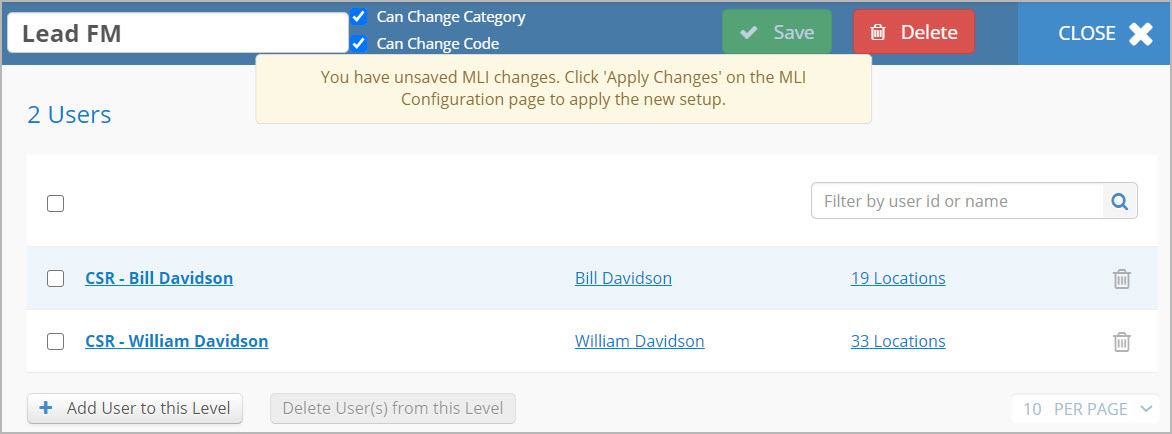
- Click Close in the upper-right corner of the screen. You get back to the MLI Configuration page where the updated MLI level name appears.
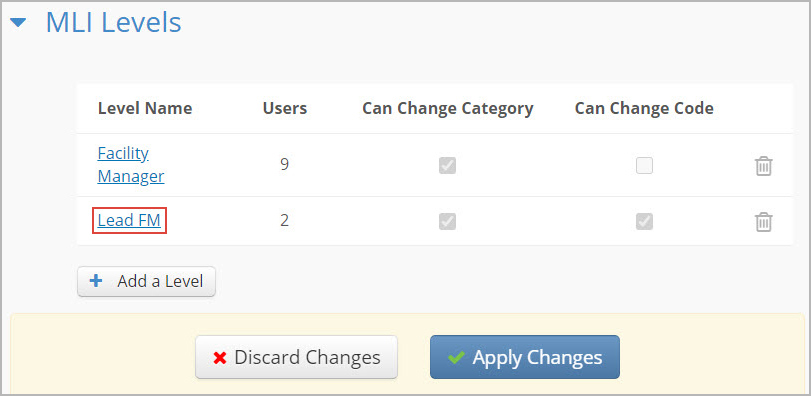
- On the MLI Configuration page, you can apply your changes immediately. Or, you may continue updating levels and rules and save the modified configuration when you are done.
With the changes applied, the MLI level name gets updated.
Adding a User to an MLI Level
Let’s take the case when a new employee joins your business and becomes a part of the MLI flow — you need to add them to the existing MLI level.
- In the MLI Levels section of the MLI Configuration page, select the level you want to change in the list of existing MLI levels. The MLI Level page appears.
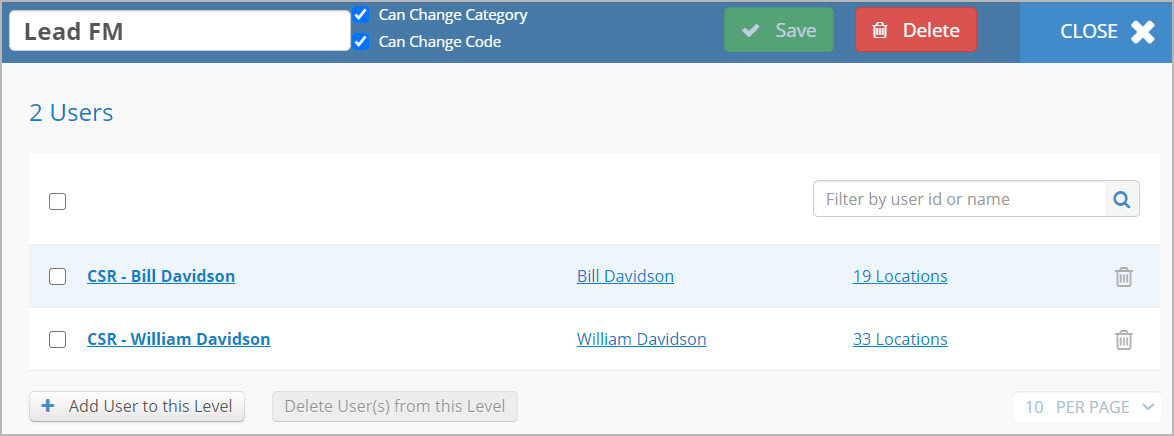
- Click Add User to This Level under the list of existing users. The overlay for adding users to the selected MLI level pops up.
Search for and select a user you want to add from the drop-down list. You may enter a username, user ID, or user email. You may also add several users at a time.
If you cannot find the required user in the overlay for the selected MLI level, it may mean that they’re already assigned to another MLI level. Make sure that each user belongs to only one MLI level.
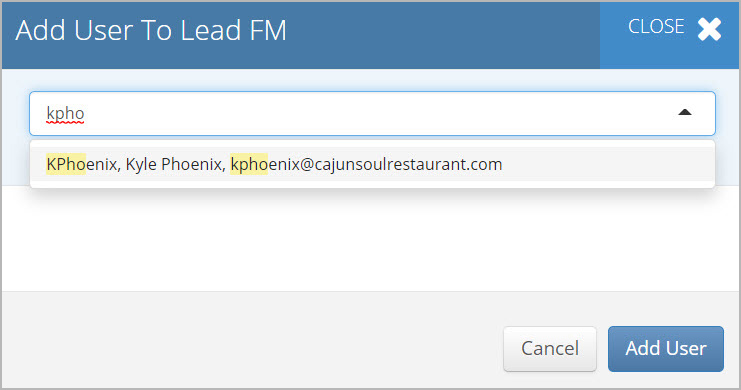
- After selecting the required user, click Add User. The user gets added to the users list on the MLI Level page, and a message appears asking you to apply the changes.
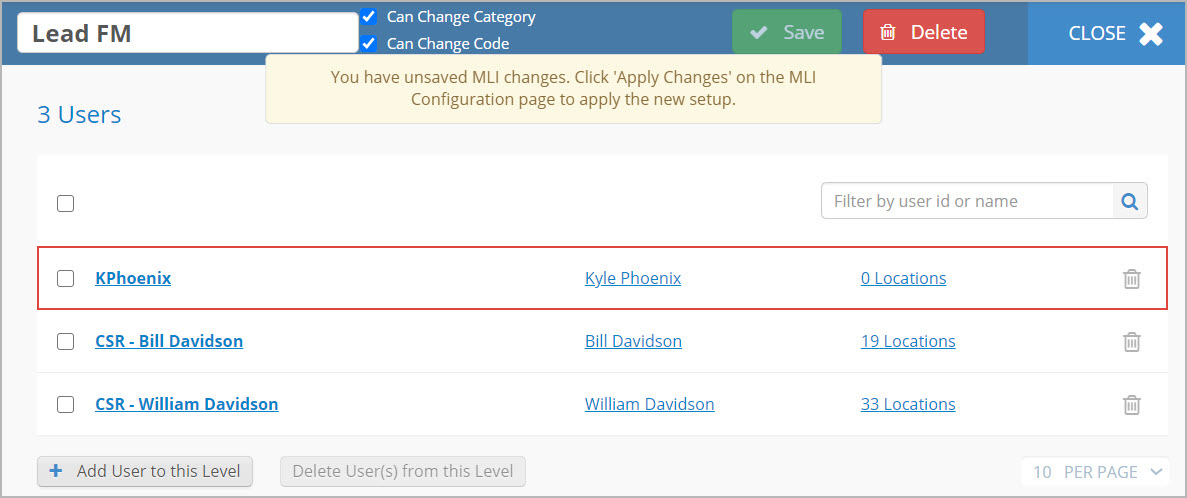
- (Optional) Click 0 Locations to the right of the username, and assign the required locations to the new user. Learn how to assign locations to an MLI level user.
- Click Close in the upper-right corner of the screen. You get back to the MLI Configuration page where the number of users for this MLI level is updated.
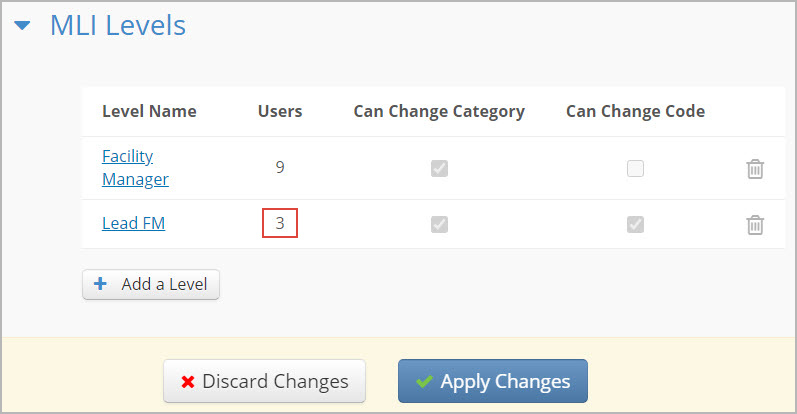
- On the MLI Configuration page, you can apply your changes immediately. Or, you may continue updating levels and rules and save the modified configuration when you are done.
With the changes applied, the new user is added to the existing MLI Level.
Managing Locations Assigned to an MLI User
Another case is when one of your employees associated with the existing MLI level becomes responsible for another region of the country, for example, Northeast instead of Southeast. It means that all invoices that are issued by your providers for the locations within Northeast should go to this employee. So, you need to remove the current Southeast locations and assign new Northeast locations to this user.
- On the related MLI Level page, find the user you want to change locations for, and click # Locations where # is the number of locations currently assigned to the user. The overlay with the Locations and Add Locations tabs appears.
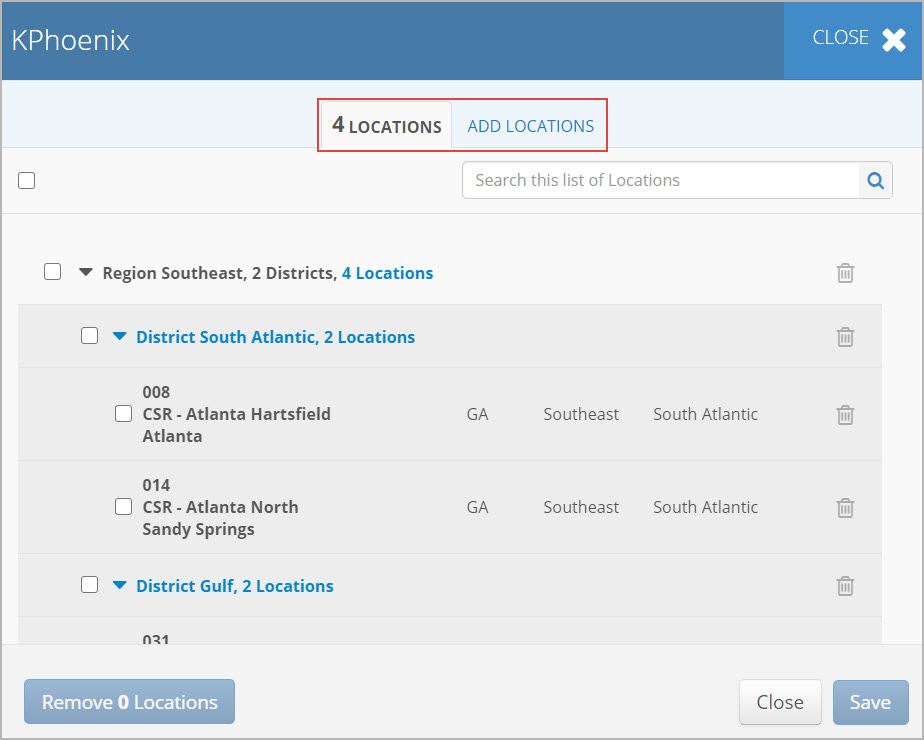
- Select the checkbox in the upper-left corner to select all locations in the list. You can also select each location individually.
- Click Remove # Locations. The locations are no longer assigned to the user.
Go to the Add Locations tab, find the locations you want to add, and click Add # Locations in the lower part of the overlay.
If any of the locations are grayed out, it means that they’re already assigned to the current user.
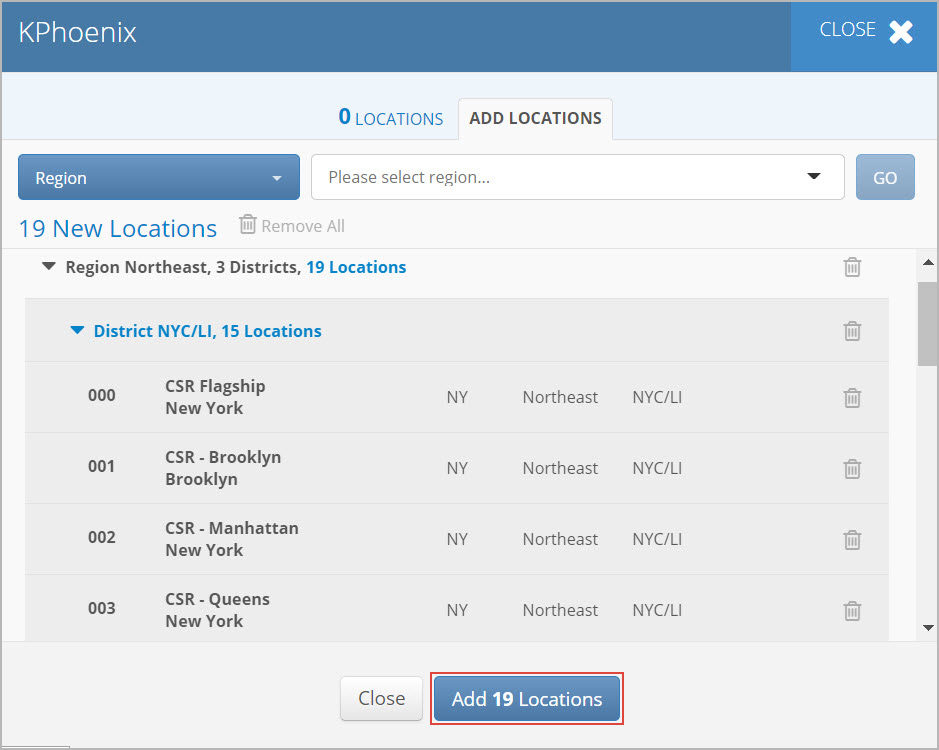
You get back to the Locations tab where all the added locations are listed.- Click Save. You return to the MLI Level page where the number of locations assigned to the user is updated, and a message appears asking you to apply the changes.
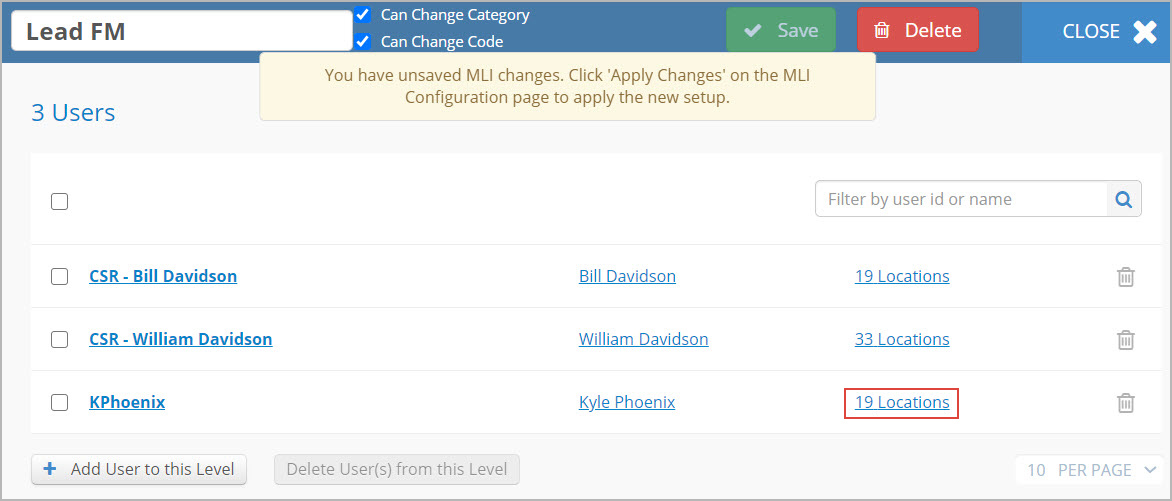
- Hit Close in the upper-right corner to close the MLI Level screen and return to the MLI Configuration page.
- On the MLI Configuration page, you can apply your changes immediately. Or, you may continue updating levels and rules and save the modified configuration when you are done.
With the changes applied, the locations list is updated for the MLI level user.
Deleting a User from an MLI Level
Whenever your employee who is part of the MLI route decides, for example, to leave your company, you need to delete them from the MLI level they currently belong to.
- In the MLI Levels section of the MLI Configuration page, select the level you want to change from the list of existing MLI levels. The MLI Level page appears.
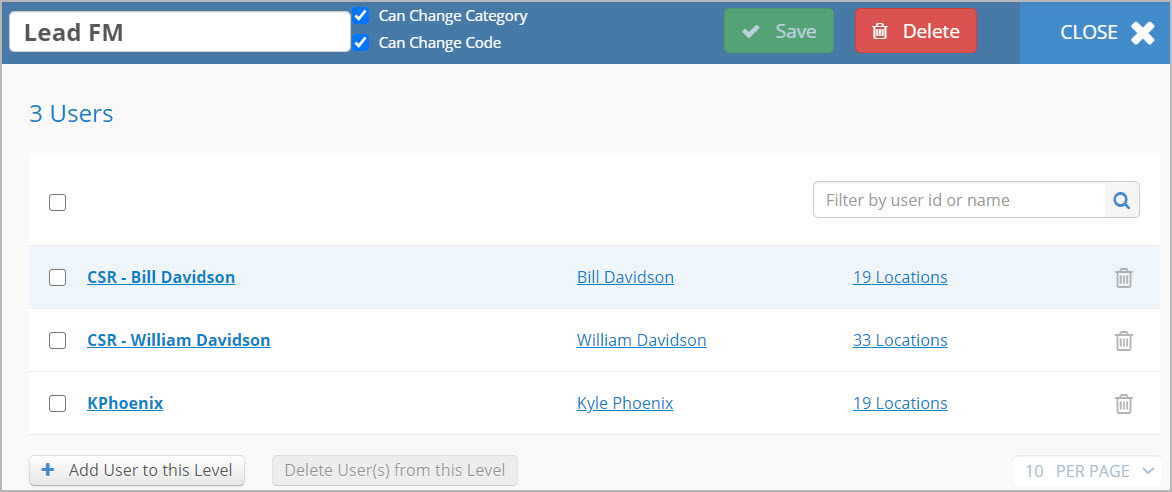
- Select the checkbox to the left of the username, and click Delete # User(s) From This Level below the users list. Alternatively, click the trash icon to the right of the username.

The Delete Users overlay appears. Click Delete to confirm your action. You get back to the list of MLI level users, and a message appears asking you to apply the changes.
When you delete a user who has invoices pending their action, you are prompted to reassign their invoices to another person. You can either reassign all invoices to only one employee or split them between multiple MLI users. Mind that the overlay for reassigning invoices appears only when a specific feature is enabled for your company.
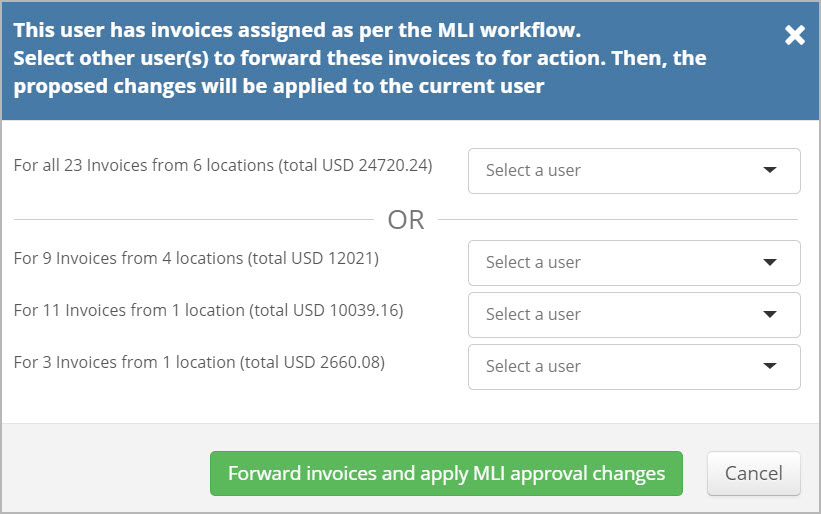
- Click Close in the upper-right corner of the screen. You get back to the MLI Configuration page where the number of users for this MLI level is updated.
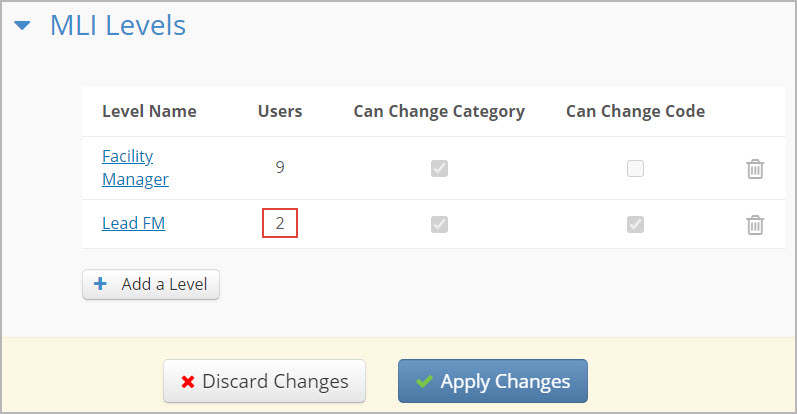
- On the MLI Configuration page, you can apply your changes immediately. Or, you may continue updating levels and rules and save the modified configuration when you are done.
With the changes applied, the user is deleted from the existing MLI level.
Modifying MLI Rules
Whenever the need appears, you can modify existing MLI rules in the same way as MLI levels. Say your business is expanding, and you need to add another MLI level to your default rule set. Or, a while ago, you opened a new location for which you created a custom rule set so that invoices for that location followed another MLI route. And now, the time has come to introduce more changes to this rule set: add more trades or remove categories, add new MLI levels or update the limits pertinent to the users of each level, reshuffle their skips and overrides, or make other required modifications.
If you have extensive MLI rules and need to quickly upload or manage that information, use MLI templates to import MLI rule sets in batch.
- In the MLI Rules section of the MLI Configuration page, select the rule set you want to modify in the list of existing rule sets.
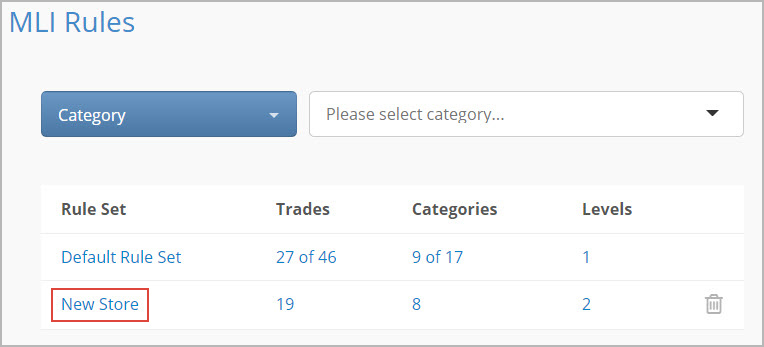
The MLI Rule Set page appears. - (Optional) Change the name of the MLI rule set.
- (Optional) Add more trades or categories to the selected MLI rule set, or remove those that are no longer needed.
- (Optional) Make other necessary changes as described in How to Configure a Custom Rule Set.
- Click Save. On the MLI Rule Set page, a message appears asking you to apply the changes.

- On the MLI Configuration page, you can apply your changes immediately. Or, you may continue updating levels and rules and save the modified configuration when you are done.
With the changes applied, the custom MLI rule set gets updated.
- No labels