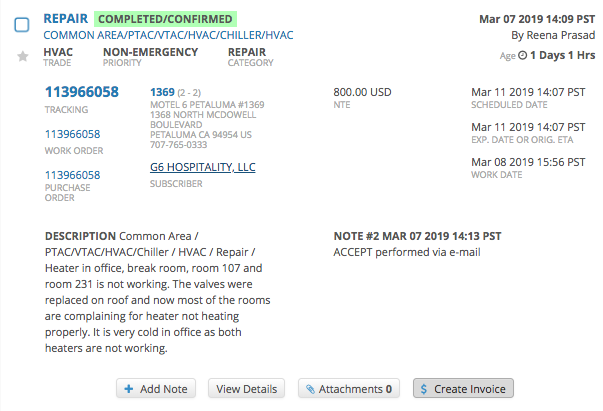
On the Work Orders List, find the desired work order, and click Create Invoice. The page for creating an invoice appears with the Create Invoice overlay opened. In the window, enter a unique invoice number, change the invoice date if required, and click Confirm. The page for providing further invoice details is displayed.
| Tip |
|---|
When creating invoices, you and your provider can reuse invoice numbersassociated with Rejected invoices. Contact your ServiceChannel manager to enable the feature. |

| Note |
|---|
You can change the invoice number and date in the top left corner of the page for creating an invoice. Keep in mind that the invoice date cannot be earlier than the completed date of the work order. |
- (Optional) Select another remit-to address under the column with your company info.
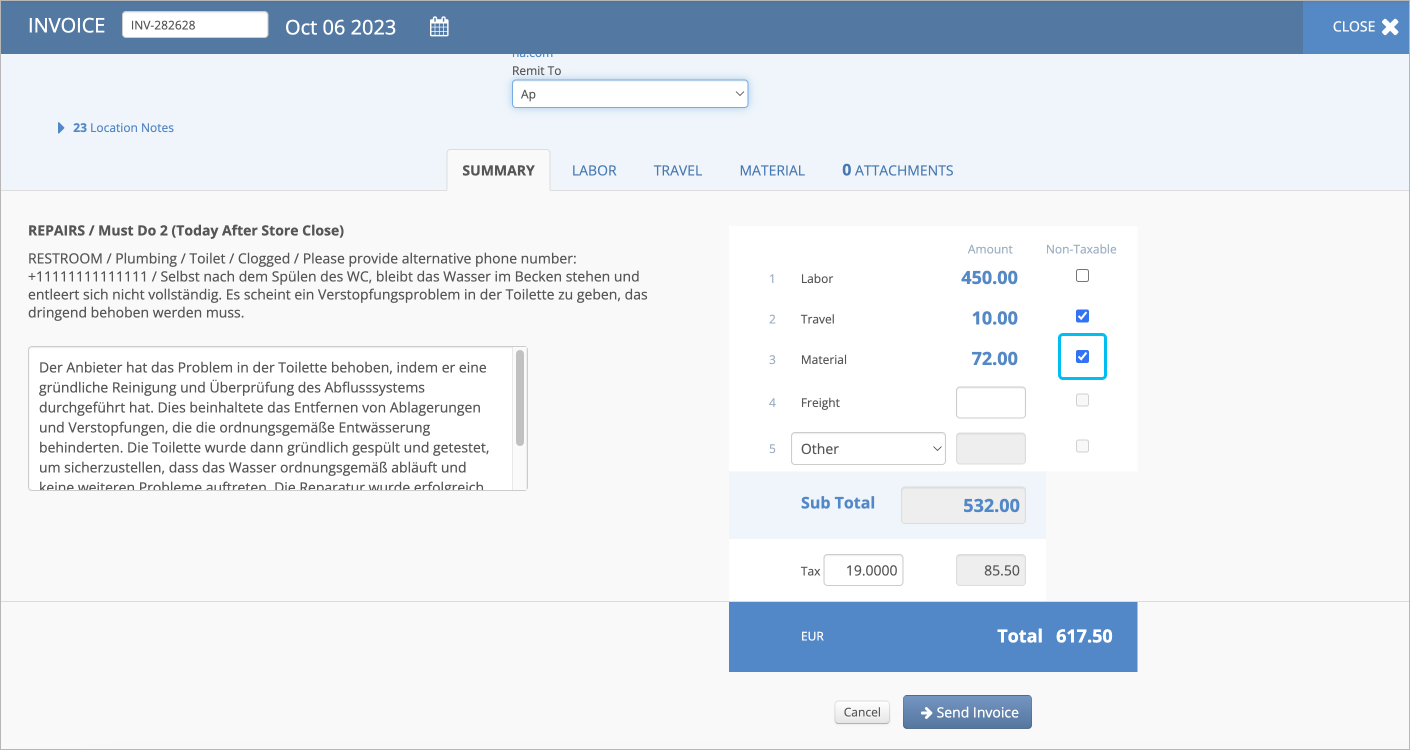
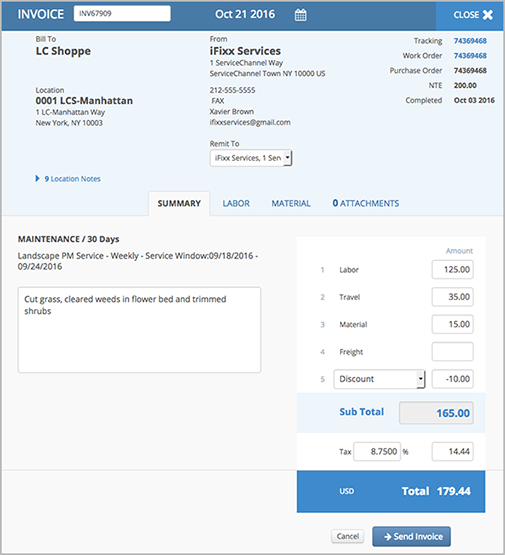
- On the Summary tab, provide the following details:
- Complete description of the performed work
- Total amount of labor, travel, material, freight, and other charges if you see a text field by their name
Depending on your configuration, itemize the labor, material, or other charges. The costs you need to break down appear as links on the Summarytab. Navigate between the tabs below to check how to break down each cost type. | Rw ui tabs macro |
|---|
To break down labor charges: | Note |
|---|
Please, contact your ServiceChannel representative should you need to change the decimal point (.) to decimal comma (,) on non-monetary amounts, such as: - Hours and Duration
- Quantity Amounts
- Weight.
 Image Added Image Added
|
- Navigate to the Labor tab.
- Enter the following information on the employees who performed the job:
- Repeat the previous step to add another line item.
 Image Modified Image Modified
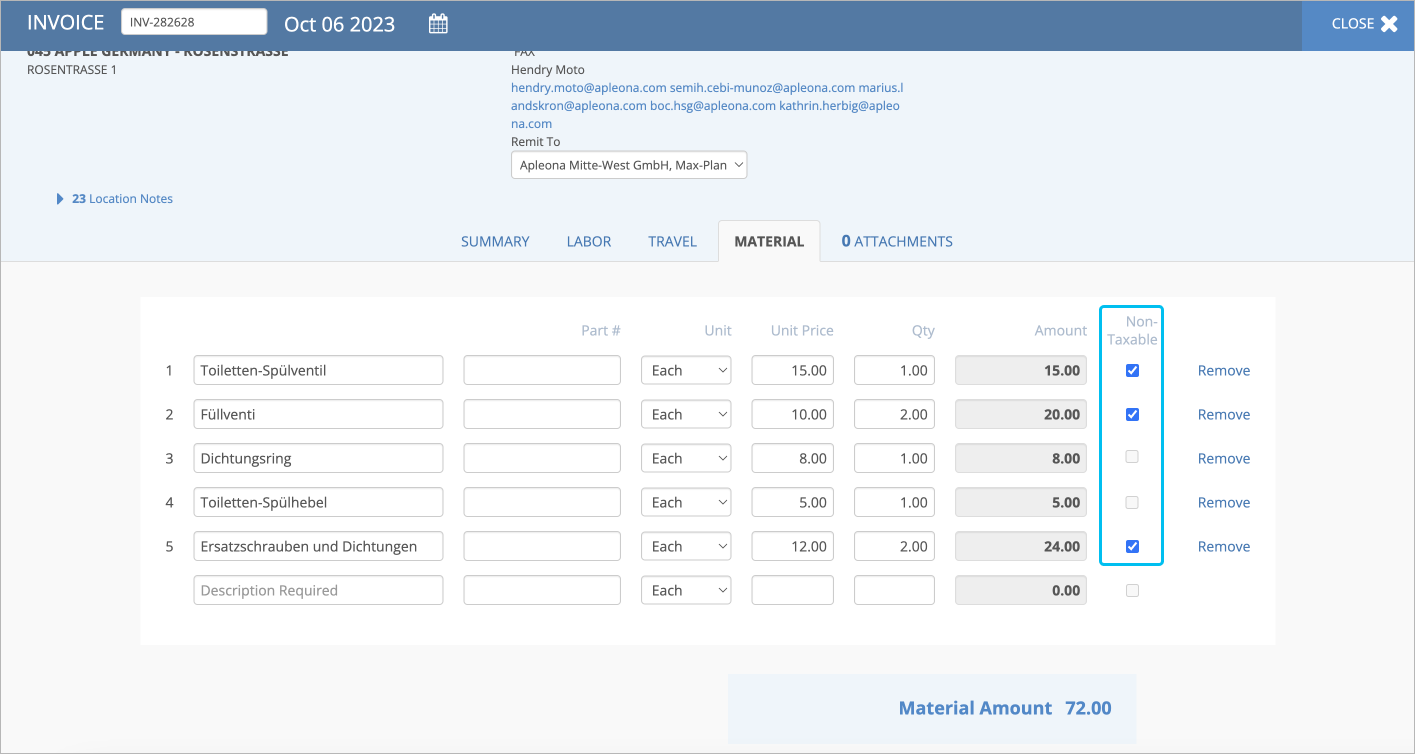
To itemize material charges: | Note |
|---|
Please, contact your ServiceChannel representative should you need to change the decimal point (.) to decimal comma (,) on non-monetary amounts, such as: - Hours and Duration
- Quantity Amounts
- Weight.
Image Added |
- Go to the Material tab.
- Provide the following details on the material used to complete the work order:
Part Name
| Tip |
|---|
If you use can select parts from the drop-down list. The negotiated price list with your provider specifies prices for material and other charges, and markup %.  Image Modified Image Modified
We recommend using price lists to save your and your provider’s time on invoice completion and price mismatch discussions. Contact your ServiceChannel manager to enable price lists. |
- Part number
- Description
Unit of Measure
| Note |
|---|
Should you need international units of measure, contact your ServiceChannel representative. |
- Unit price
Markup %
| Note |
|---|
The markup % can be verified if it matches the agreed rate from the negotiated price list or client rates. For more information, read . 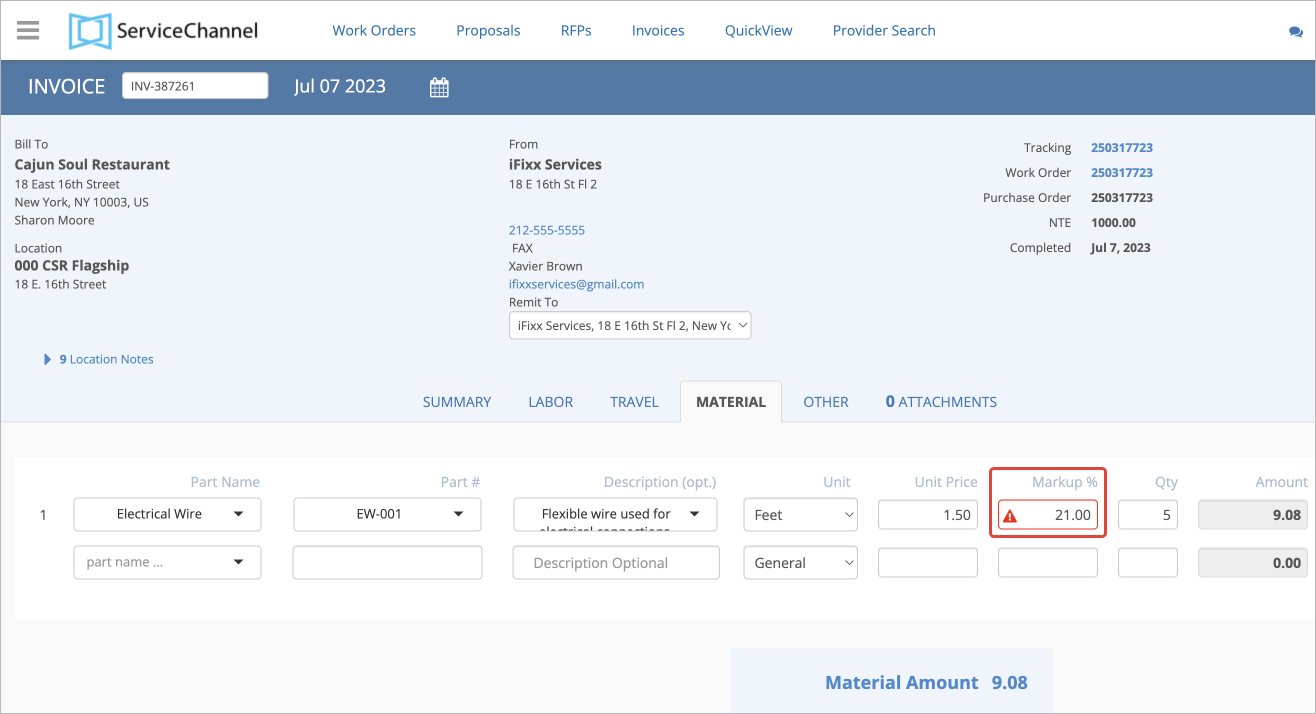
Contact your ServiceChannel manager to be able to validate the markup %. |
- Quantity
- Repeat the previous step to add another line item.
 Image Modified Image Modified
To break down other charges: - Switch to the Other tab.
- Provide the following details on the other charge:
- Comment describing the charge
- Type
- Unit
- Unit Price
Quantity
| Tip |
|---|
Type, Unit, Unit Price, and Quantityfields are availableif you use They specify the agreed prices between you and your provider for material, other charges, and markup %.
You can select types of charges from the drop-down list, for example, permit fee or after-hours surcharge.  Image Modified Image Modified
We recommend using price lists to save your and provider’s time on invoice completion and price mismatch discussions. Contact your ServiceChannel manager to enable price lists. |
- Charge amount
- To add another line item, click + Another Charge, and repeat the previous step.

| Note |
|---|
The Other tab appears on the page for creating an invoice only if your client requires you to itemize other costs and has configured necessary settings. |
|
- Switch to the Summary tab, and enter the tax amount or tax percentage under the invoice subtotal.
- Review the provided charges, tax, and invoice total. If the invoice information is correct, click Send Invoice at the bottom of the page.
Your line item invoice is submitted to your client, and you get to the Invoices List.
|