Planned Maintenance Locations
If you have more than a few Locations to add to a PM Service, it may be quicker to upload them using the PM Service Template. Remember that the system does not allow locations to be added to more than one Frequency under each PM Service to prevent duplicate work orders for the same service type. You can also add locations manually if you have a small number that need to be added.
| Insert excerpt | ||||
|---|---|---|---|---|
|
| Panel | ||||||||||||||
|---|---|---|---|---|---|---|---|---|---|---|---|---|---|---|
| ||||||||||||||
|
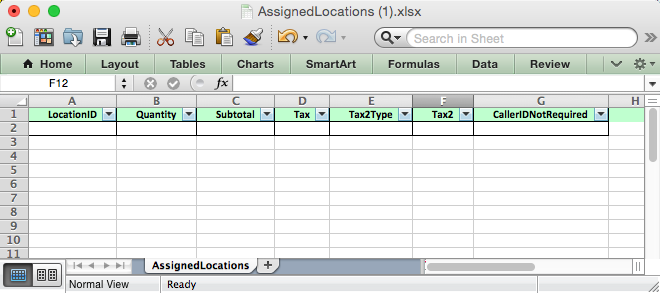
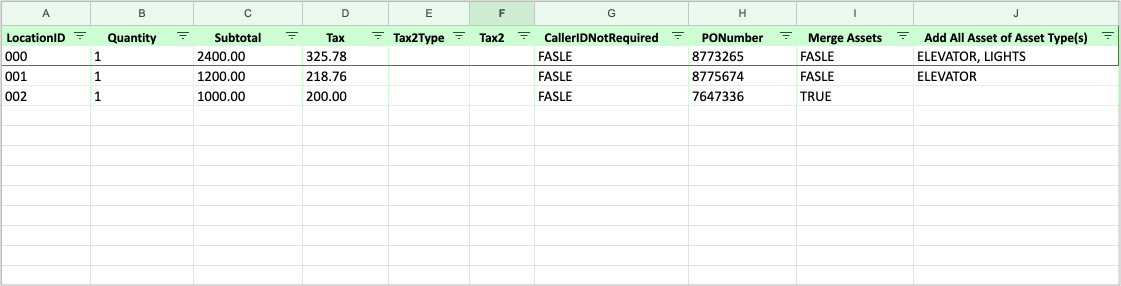
.png?version=1&modificationDate=1680859851269&cacheVersion=1&api=v2&width=600 "An example of the excel template for Canada")
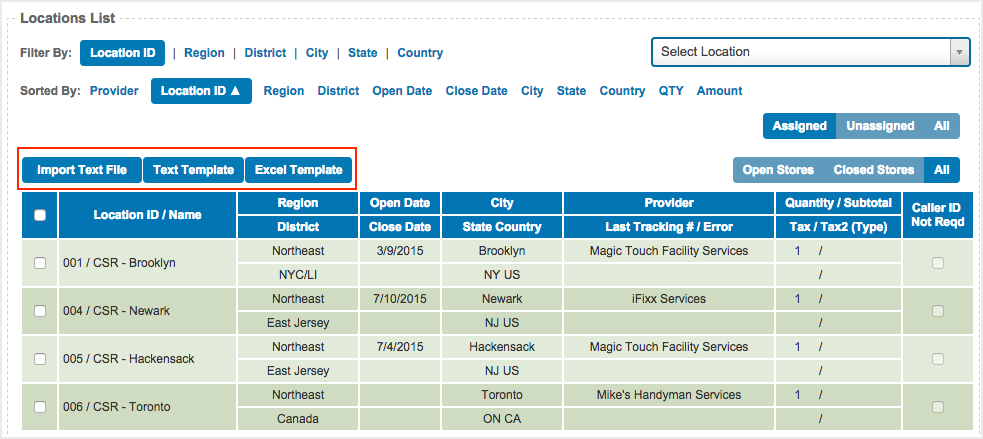
Exporting Planned Maintenance Locations for Editing
| Panel | ||||||||
|---|---|---|---|---|---|---|---|---|
| ||||||||
|

| Section | ||||||||||
|---|---|---|---|---|---|---|---|---|---|---|
|
| Panel | ||||||||
|---|---|---|---|---|---|---|---|---|
| ||||||||
|
| Panel | ||||||||||
|---|---|---|---|---|---|---|---|---|---|---|
| ||||||||||
|