Entering a CIWO Work Order in SC Provider
The SC Provider app lists all locations and services for which you are permissioned to enter work orders. Ensure that all of the locations and services you perform for your clients are listed in SC Provider when you first download the app. Should you not see the services you perform for a location, speak to your client about the configuration. You may also be able to enter work orders for services not listed in the app.
List of Services
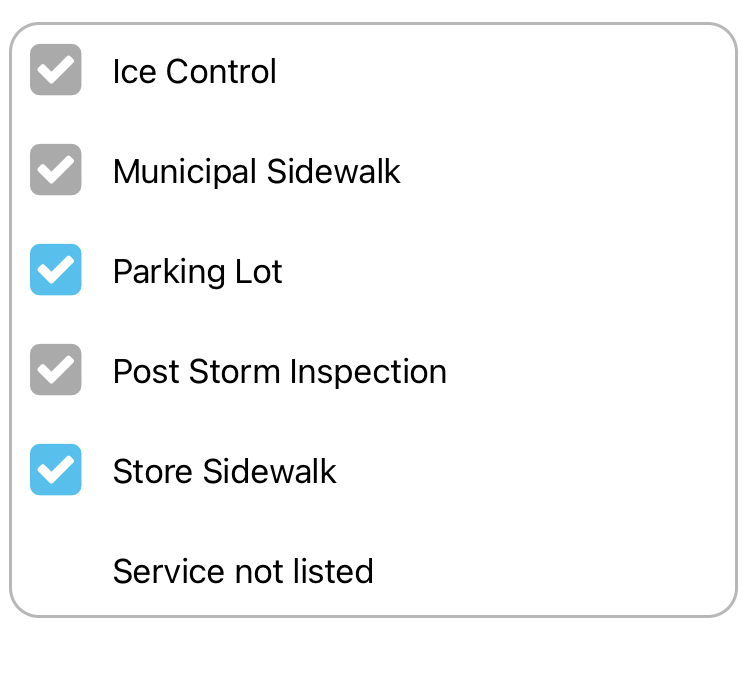
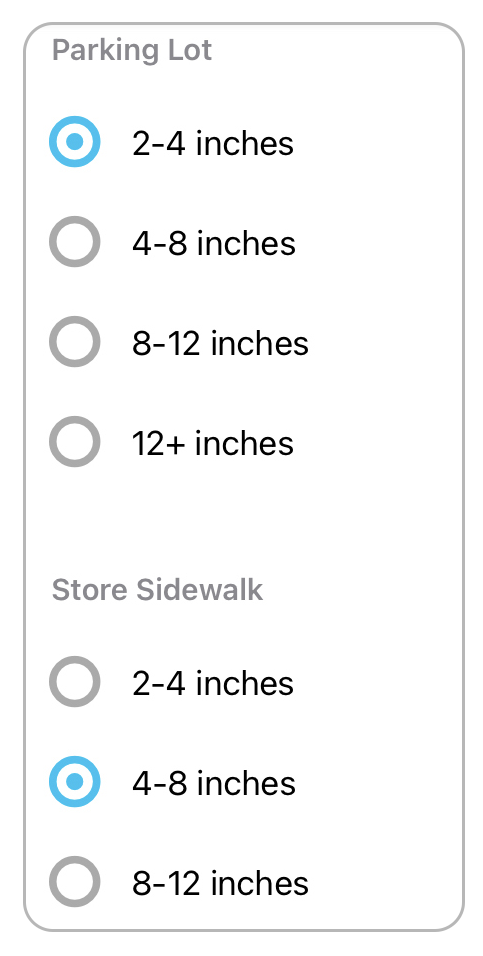
When creating a work order in SC Provider, you should select a service (issue) for which the WO is required. For example, you may see a list of services such as ice control, parking lot, sidewalk, etc. After choosing a service, you should also select the level of this service, as configured by your client.
Creating a Work Order
Depending on your permissions, you can be allowed to create work orders in ServiceChannel Provider.
To log in to SC Provider, you can use either your PIN or user ID + password combo. The app UI varies based on the login option. The user ID + password combo offers more capabilities, while the PIN flow is very limited in terms of the available actions.
- Tap Work Orders on the app home screen.
On the top blue panel, tap Create.

- Select the Location for which you need to enter a work order.
Pick the Problem Type.
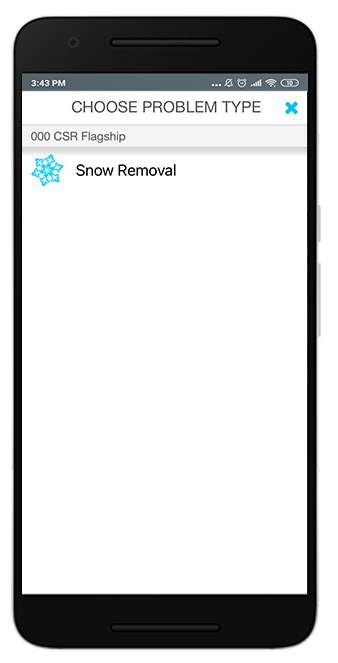
Among the Problem Types, there may be Snow Removal, Landscaping, Trash Removal, Lighting, and other trades that you are contracted to service.
On the Choose Issue screen, select the appropriate option(s), and then tap Next.
When several issues are picked, the NTE amount of each service will be added to the final NTE amount of the work order.

When the required service is not listed, opt for Service Not Listed. Learn more about Entering a Work Order for Services Not Listed.
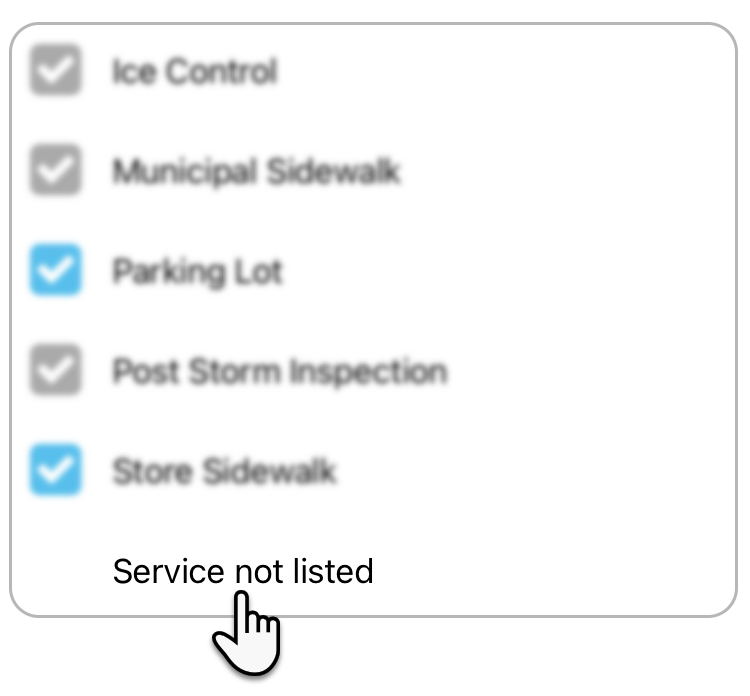 This option becomes available based on the client account configuration.
- Choose the Problem for each of the issues selected in the previous step, and then tap Next.

On the next screen, tap Add Attachment to take a photo or add any file to the work order, and then tap Next.

An attachment may be required by your client, depending on their needs and configuration.
Review the work order details on the confirmation screen to ensure that the details you've provided are correct.

No information can be edited except for the Weather Type on the confirmation screen.
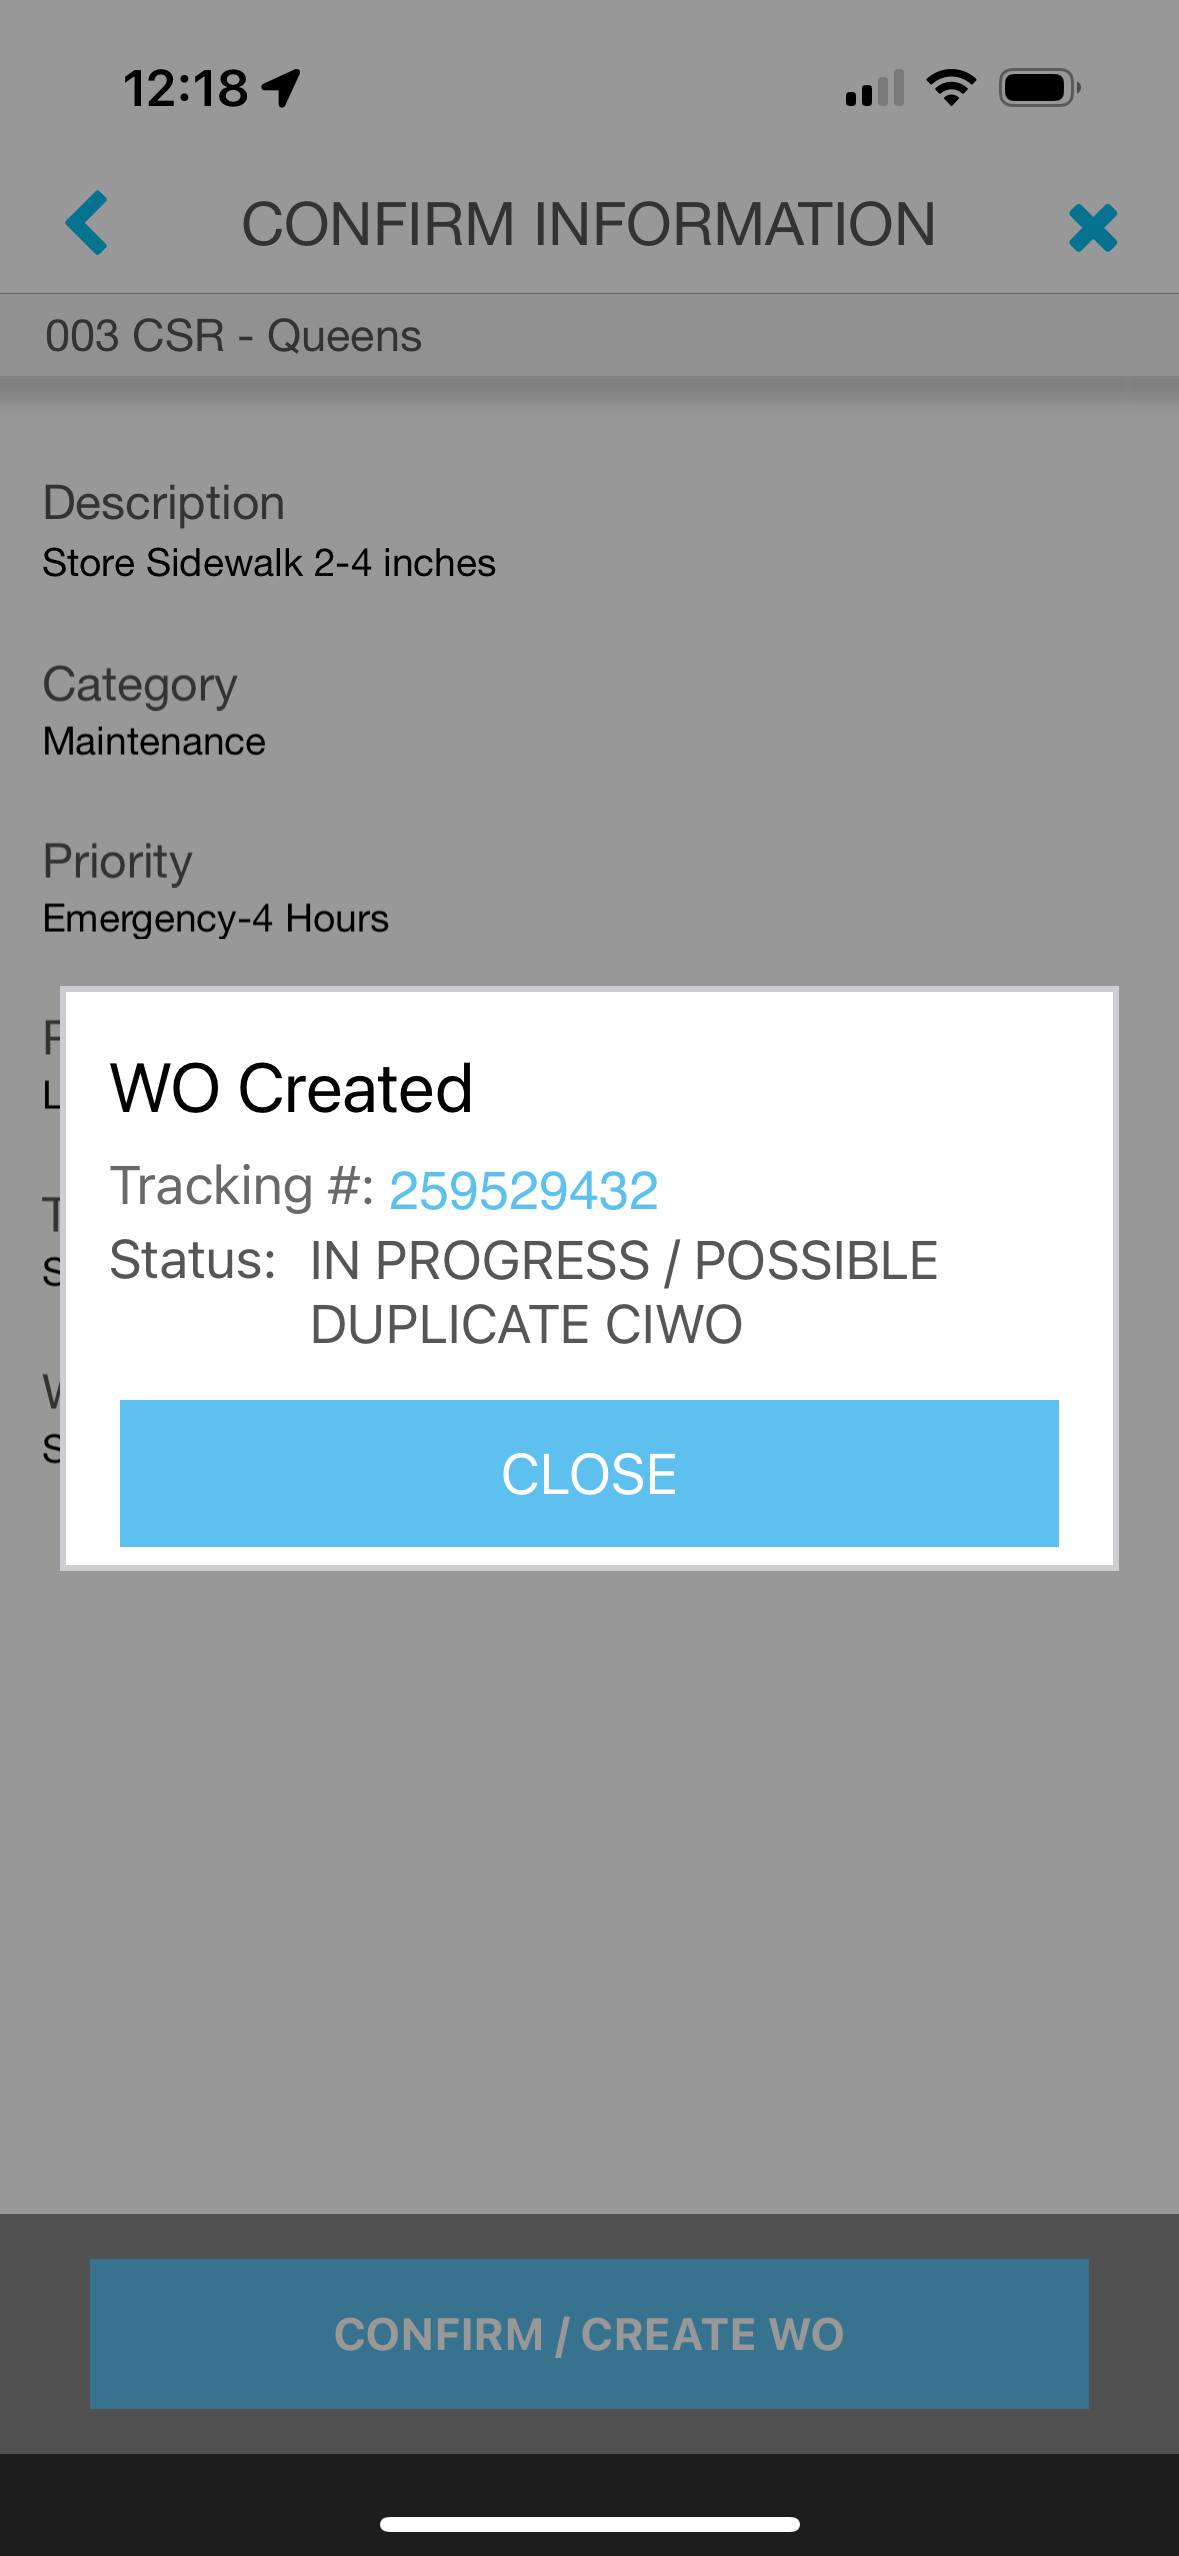
Tap Confirm / Create WO. The work order has been created in one of the CIWO statuses.
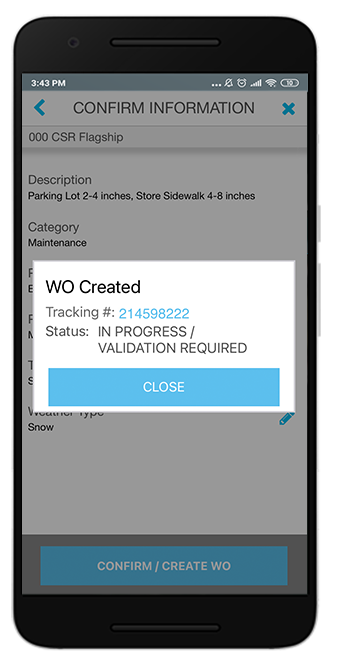
Tap the work order tracking number to view the details. From the details screen, you will also be able to attach an asset to the work order and add parts used if required.
- Tap Close. The work order is displayed on the Work Orders screen.
Duplicate Work Orders
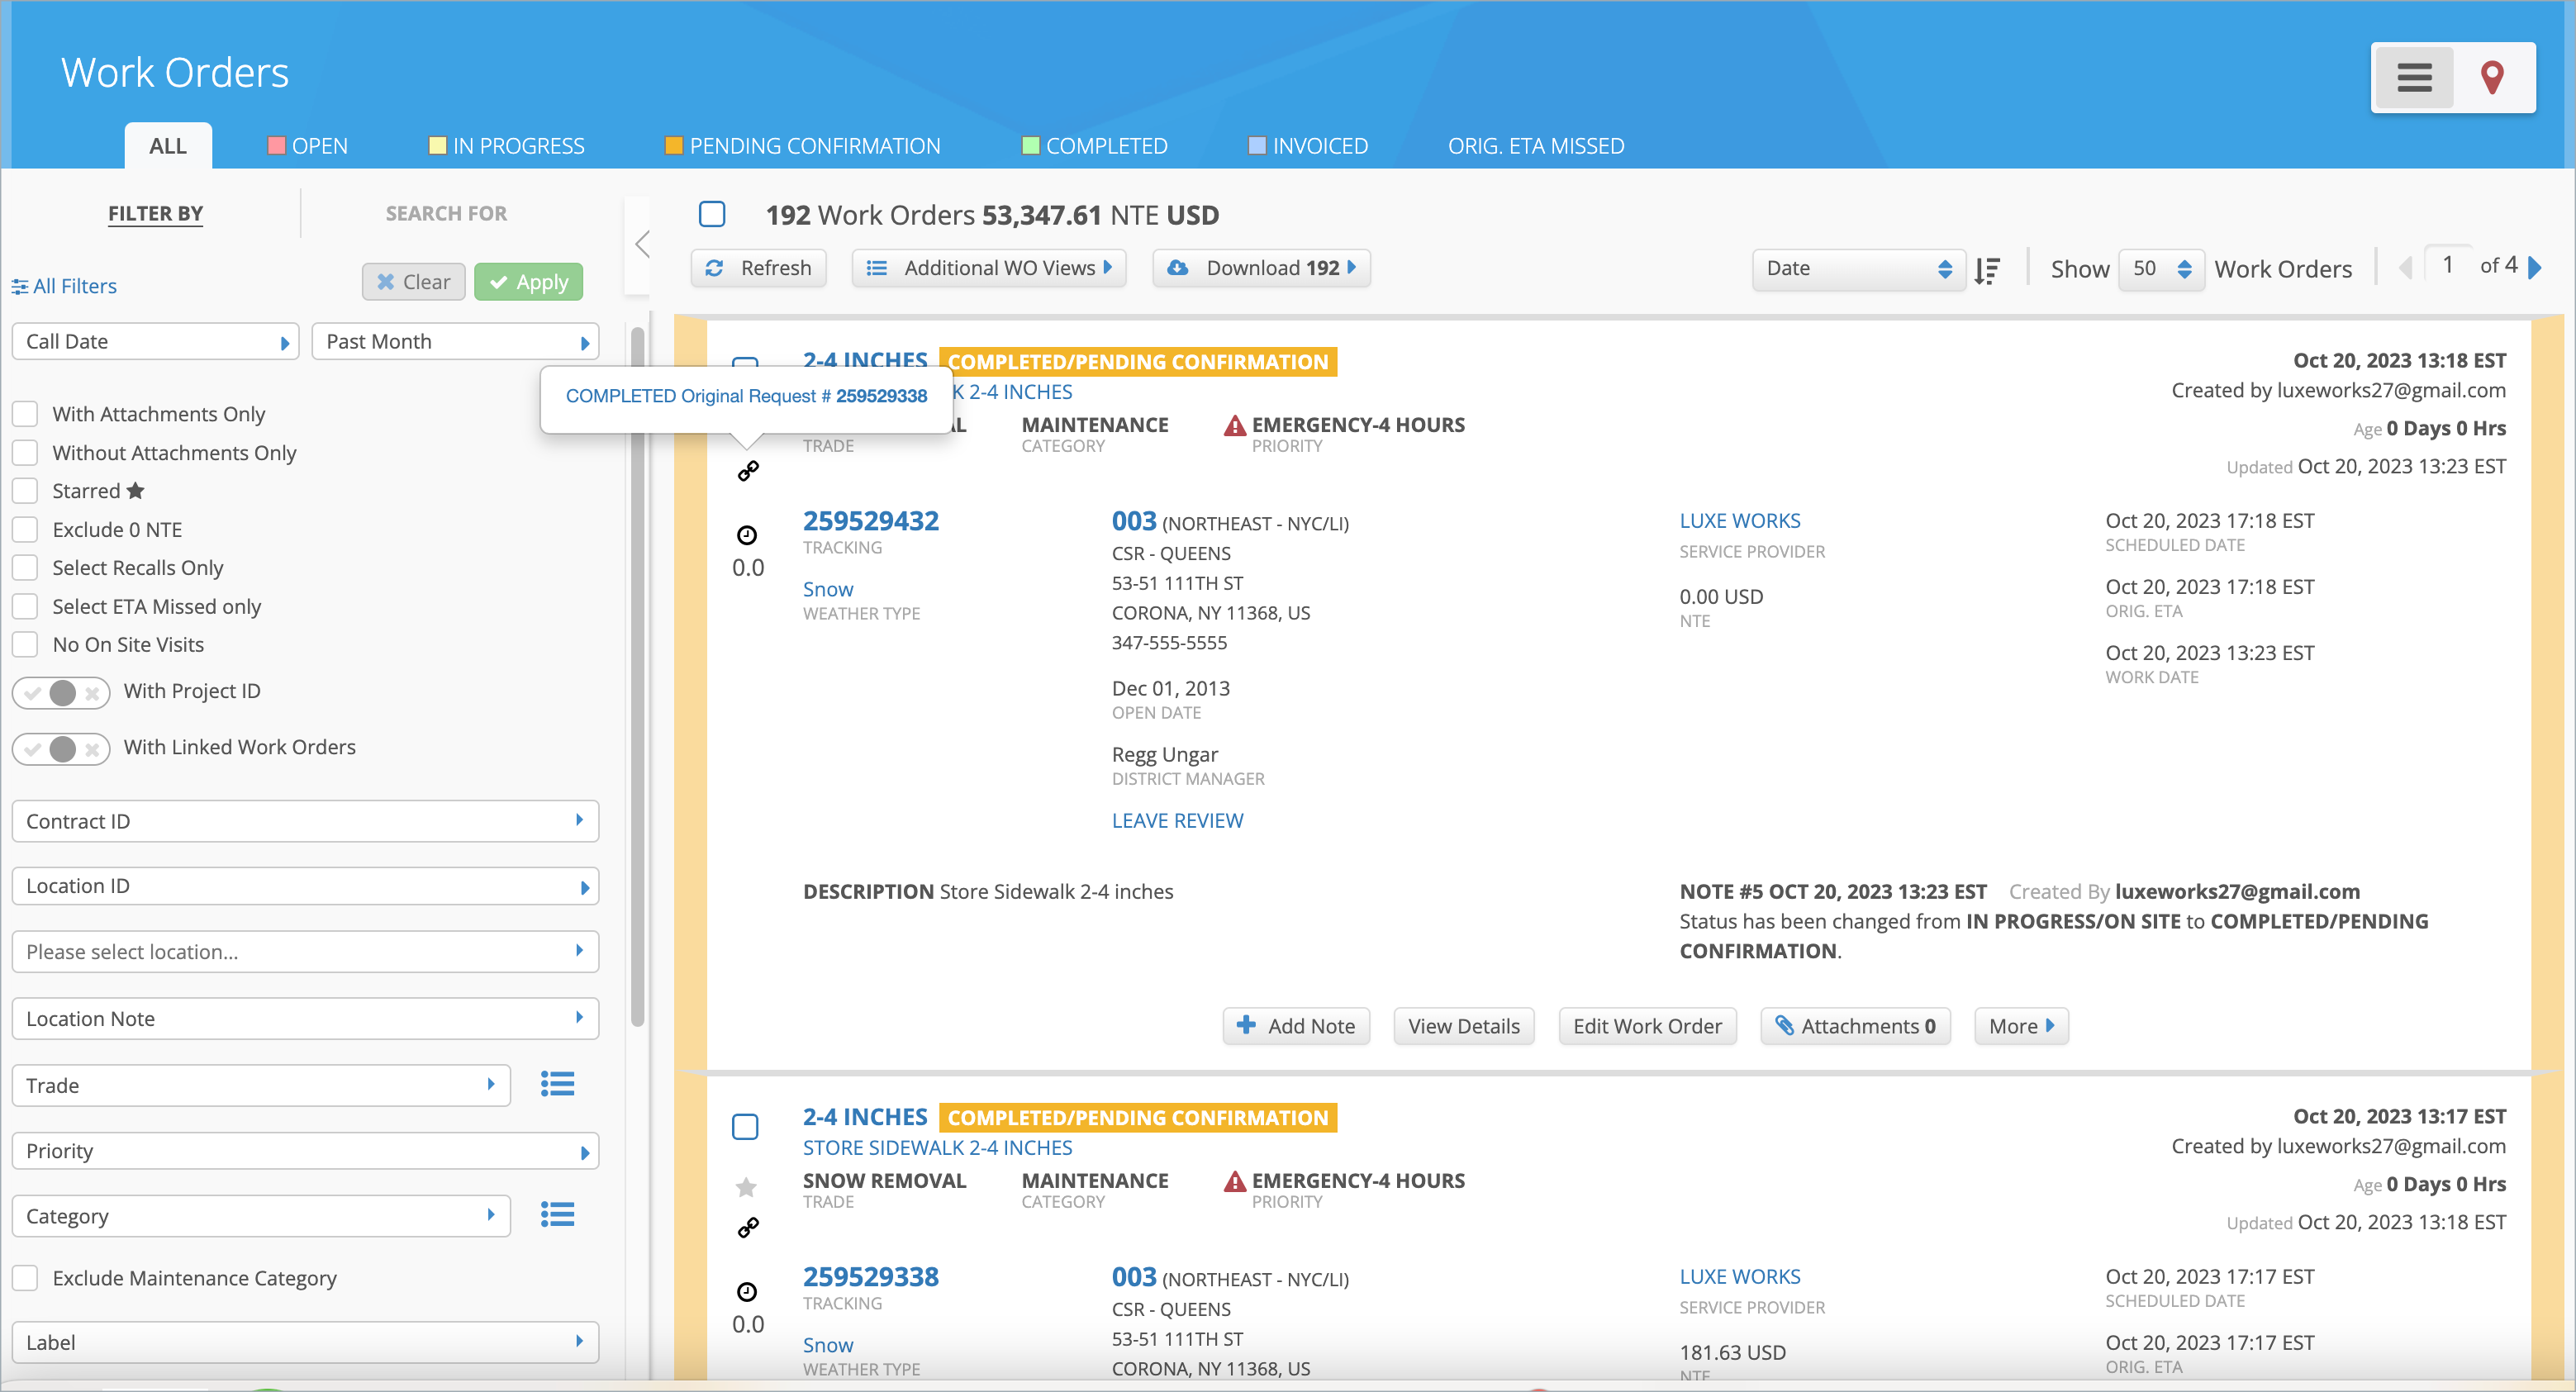
If you enter an additional work order within a close time frame from the original work order, that work order will automatically be linked to the first one and the status will change to In Progress - Possible Duplicate CIWO and the NTE will be changed to $0. You will be notified when you create the work order and it will display in Service Automation in the list view, work order details, and linked work orders.