Adding Trades and Regions
- Chellie Esters
- Anastasia Medovkina (Deactivated)
- Natalia Larina (Unlicensed)


In Provider Automation you can set up and manage the type of work your company performs and the geographical regions where you perform them. This information is displayed on your profile so potential clients are aware of your scope of work while they are deciding on contractors from the ServiceChannel Directory.
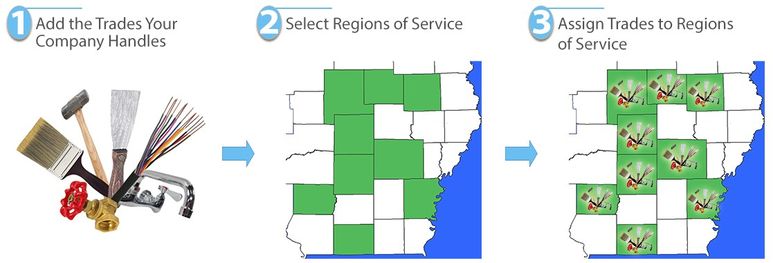
Setting up Trades is split into three easy parts:
- Adding Trades from the list of trades provided,
- Adding Regions where your company does work, and
- Assigning Trades to Regions to list which trades you perform in which regions.
You can also note whether your company performs the work (Self-Performing) or if you contract it out (Sub-Contracting).
Adding Trades and Regions
You can manage your Trades and Regions from the Profile Overview page in Provider Automation.

Important
(United States companies) For companies that collect and remit sales tax, it is important to add all trades and regions in this step. In the next step, Adding Your Financial Information, the trades and regions listed here are needed to list sales tax registration.
- In the top navigation bar, click Profile Overview. The Profile Overview page appears.
- Next to My Trades, click Manage Trades. The Trades page appears.
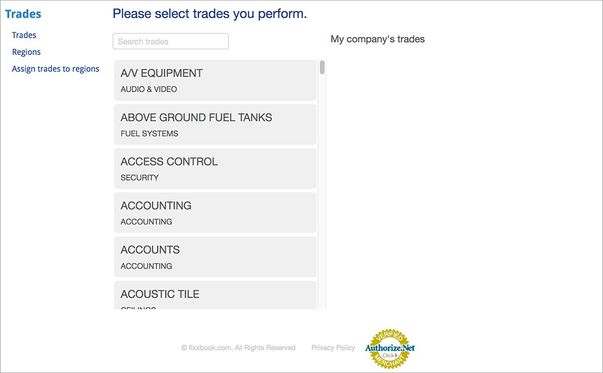
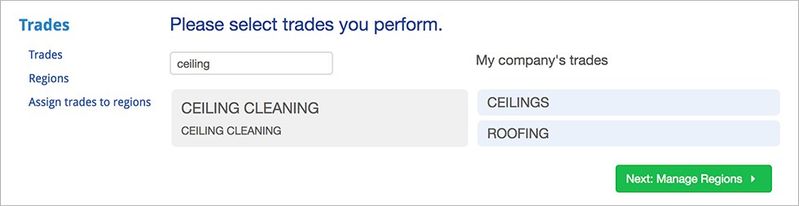
- Use the search bar to find your trades, and then click a trade to select. Your selection will appear under the My company's trades column.
- Repeat this step until you have selected all trades.
- Repeat this step until you have selected all trades.
- When you have selected all trades, click Next: Manage Regions.
- Under Add New Region:
Select your Country, and then whether you do Self-Performing or Sub-Contracting in this region.
- Should you do both Self-Performing and Sub-Contracting, create two separate regions, one for each work type.
- Once you select either Self-Performing or Sub-Contracting, you cannot change it.
- Click the Add Region button. The Create service region modal appears.
- Enter a Name for the region and select the appropriate areas.
- (For the United States, Canada, and the United Kingdom) Check the box(es) next to the state or territory, and then click the plus sign to expand the county/division list. Select the appropriate areas. The selected areas are highlighted in green.
- (For all other countries) The entire country is highlighted in green.
- Click Save. Your region appears on the top of the page underneath My company's service regions.
- Repeat steps 5a - 5d to create multiple regions.
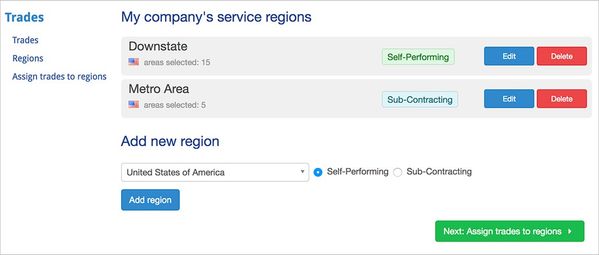
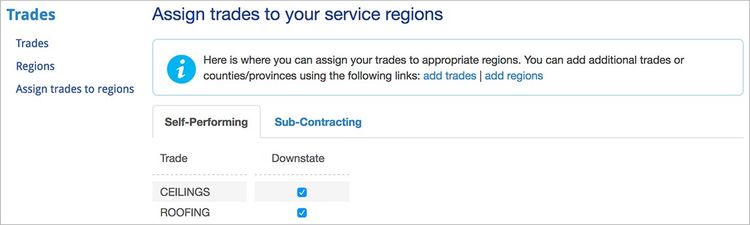
- Click Next: Assign trades to regions.
- Under the Self-Performing tab and/or the Sub-Contracting tab, check the trades to assign to each region.
Confirming Your Trades Setup and Next Step
Click Profile Overview in the top navigation bar. You will see My Trades checked, indicating this section is complete.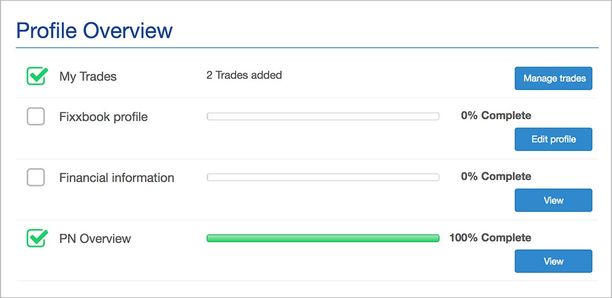
Next, complete your financial information so you can invoice your clients as you complete work orders.